


u
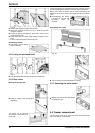
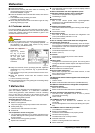
In the case of an appliance with
enclosed wall spacers, mount the
wall spacers on the back of the
appliance at the top left and right.
u
Dispose of packaging material (see 4.5) .
u
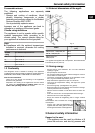
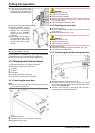
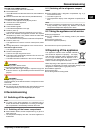
Align the appliance so that it
stands firmly and on a level by
applying the accompanying
spanner to the adjustable-
height feet (A) and using a
spirit level.
u
Then support the door: Extend
the adjustable foot at the turn
hinge (B) until it rests on the
floor and then make a further
90° turn.
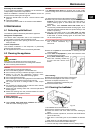
Note
u
Clean the appliance (see 6.2) .
If the appliance is installed in a very damp environment,
condensate may form on the outside of the appliance.
u
Always see to good ventilation at the installation site.
4.3 Changing over the door hinges
You can change over the door hinges if necessary.
Ensure that the following tools are to hand:
q
Torx® 25
q
Torx® 15
q
Screwdriver
q
Cordless screwdriver, if necessary
q
Second person for fitting work, if needed
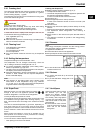
4.3.1 Detaching the upper door
Note
u
Remove any food from the door racks before removing the
door, so that no food falls out.
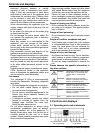
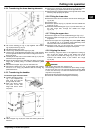
Fig. 4
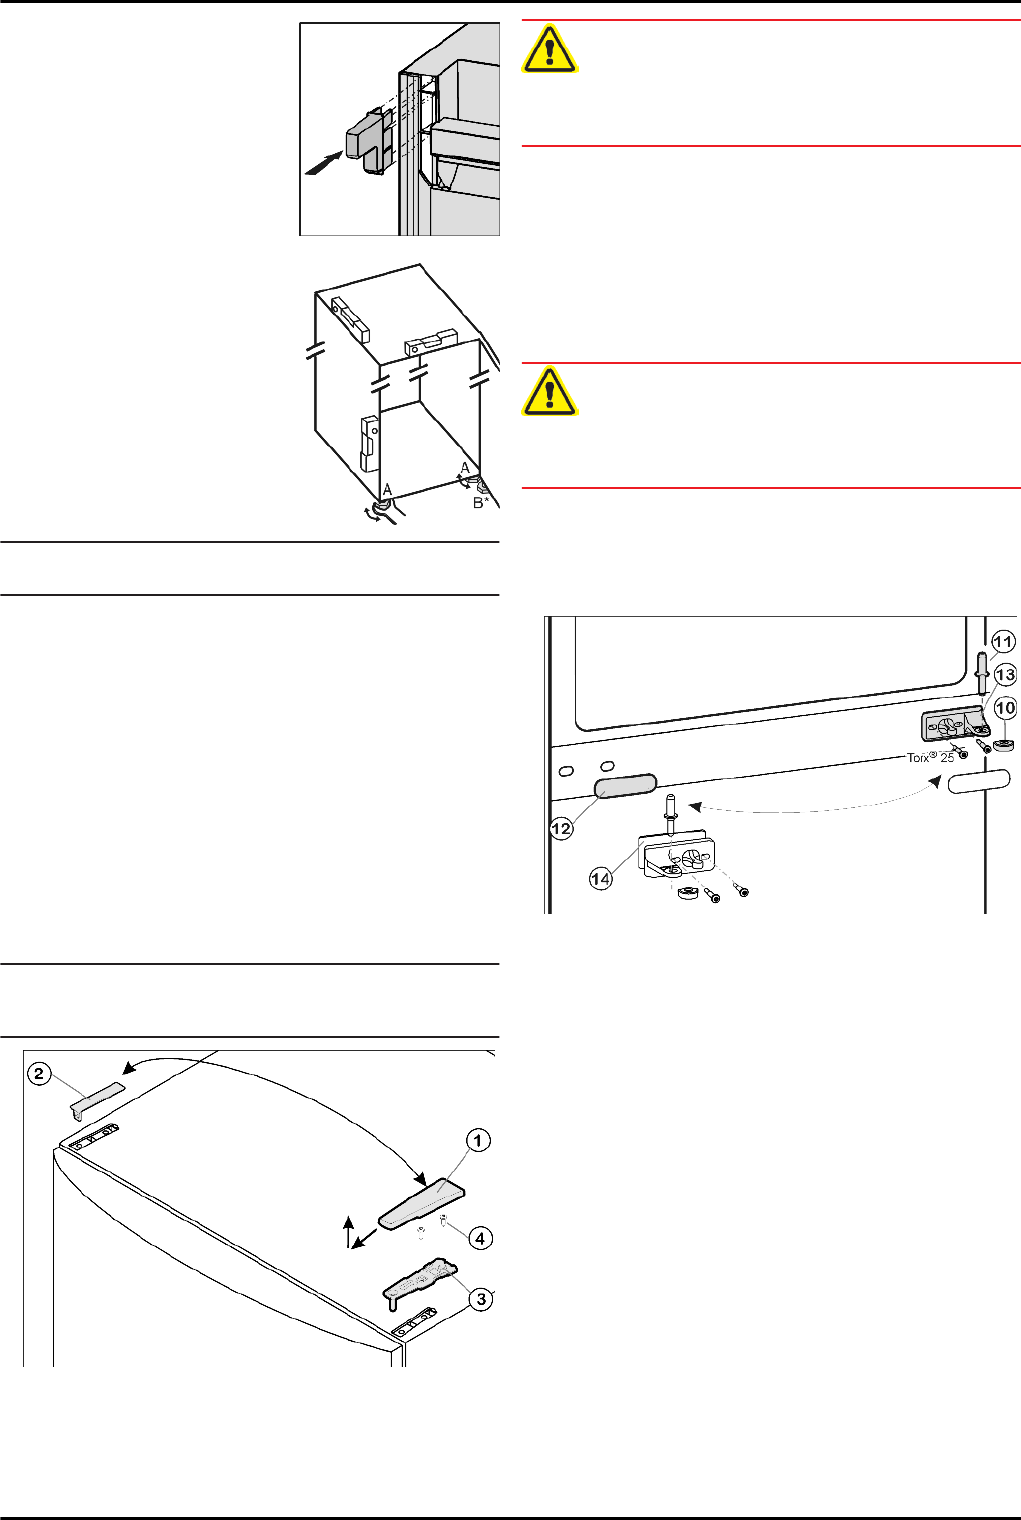
u
Close the upper door.
u
Pull off the cover
Fig. 4 (1)
forwards and upwards.
u
Lift off the cover
Fig. 4 (2)
.
CAUTION
Risk of injury if the door tips!
u
Take good hold of the door.
u
Set down the door carefully.
u
Unscrew the upper turn hinge
Fig. 4 (3)
(2x Torx® 25)
Fig. 4 (4)
and lift it off.
u
Lift up the upper door and set it aside.
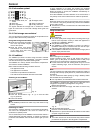
4.3.2 Detaching the lower door
u
Close the lower door.
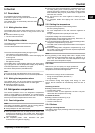
u
Draw the middle bearing pin
Fig. 5 (11)
out of the turn hinge
and lower door.
u
Remove the plastic cap
Fig. 5 (10)
.
CAUTION
Risk of injury if the door tips!
u
Take good hold of the door.
u
Set down the door carefully.
u
Open the lower door.
u
Unscrew the middle turn hinge (2x Torx® 25).
Fig. 5 (13)
u
Lift up the door and set it aside.
4.3.3 Transferring the middle bearing elements
Fig. 5
u
Carefully detach the cover panel
Fig. 5 (12)
.
u
Turn the middle turn hinge
Fig. 5 (13)
with the washer
Fig. 5 (14)
through 180° and screw it firmly into place on the
new hinge side (with 4 Nm).
u
Turn the cover panel
Fig. 5 (12)
through 180° and snap it
into place again on the new handle side.
Putting into operation
6 * Depending on model and options