


19
BN/SBN/es...6
GB
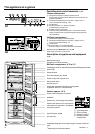
CleaningFreezer compartment
* Depending on model and options
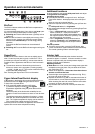
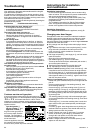
Freezer tray*
This is used for gently freezing
berries, herbs, vegetables and
other small items and prevents
them from sticking together. Items
being frozen will largely retain
their shape, and it will be easier to
remove exactly the right quantity later on.
W Spread the items out loosely on the tray.
W Suspend the freezer tray in one of the top drawers. Freeze
for 10 to 12 hours, then transfer to a freezer bag or contain-
er and put in a drawer.
W To defrost, spread the frozen items out loosely.
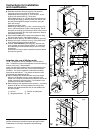
Cold-storage
accumulators*
These prevent the temperature in
the freezer from rising too quickly
in the event of a power failure, thus
preserving the quality of the food.
W To save space, you can freeze and store the cold-storage
accumulators in the freezer tray.
- To ensure maximum storage time in the event of a power
failure, place the frozen cold-storage accumulators in the
top freezer drawer on top of the food.
Making ice-cubes*
W Fill the ice-cube tray with water.
W Place the ice-cube tray in the appli-
ance and leave it to freeze.
W The ice-cubes can be removed from
the tray by twisting or by holding
upside down for a short time under
running water.
2
-
6
6
-
1
2
4
-
8
2
-
6
6
-
1
2
4
-
8
Cleaning
Notes on defrosting
The NoFrost system automatically defrosts the appliance.
In the BioFresh compartment
The water is evaporated by the heat from the compressor;
drops of water on the rear wall are perfectly normal.
W Simply ensure that the defrost water can flow freely through
the drain hole in the rear wall (arrow in fig. A).
In the freezer compartment
Any moisture arising collects on the evaporator and freezes,
and is periodically defrosted and evaporated.
The automatic defrosting system keeps the freezer frost-free
and eliminates the time and effort spent on defrosting manu-
ally.
Cleaning
W Before cleaning, always switch off the appli-
ance. Disconnect from the mains or unscrew or
remove the fuse.
W Clean the outer walls, inside and equipment by hand with
lukewarm water and a little detergent. Because of the risk
of injury and damage to the appliance, steam clean-ing
equipment should not be used.
W We recommend using a soft cloth and an all-purpose clean-
er with a neutral pH value. Only use food compatible
cleaning and care agents on the inside of the appliance.
W Use a commercially available stainless-steel cleaning
agent for stainless-steel appliances*.
- In order to achieve best possible protection, apply a stain-
less-steel care agent uniformly in grinding direction after
cleaning. Points which are darker at the start and a more in-
tensive coloration of the stainless-steel surface are normal.
- Do not use abrasive sponges or scourers, do not use con-
centrated cleaning agents and never use cleaning agents
containing sand, chloride or acid or chemical solvents, as
these would damage the surfaces and could cause corro-
sion.
W Do not allow cleaning water to run down the drain gulley
or to penetrate the ventilation grilles or electrical compo-
nents. Dry the appliance.
- Remove the protective film from the decorative trims*.
- Do not damage or remove the type plate on the inside of
the appliance. It is very important for servicing purposes.
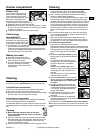
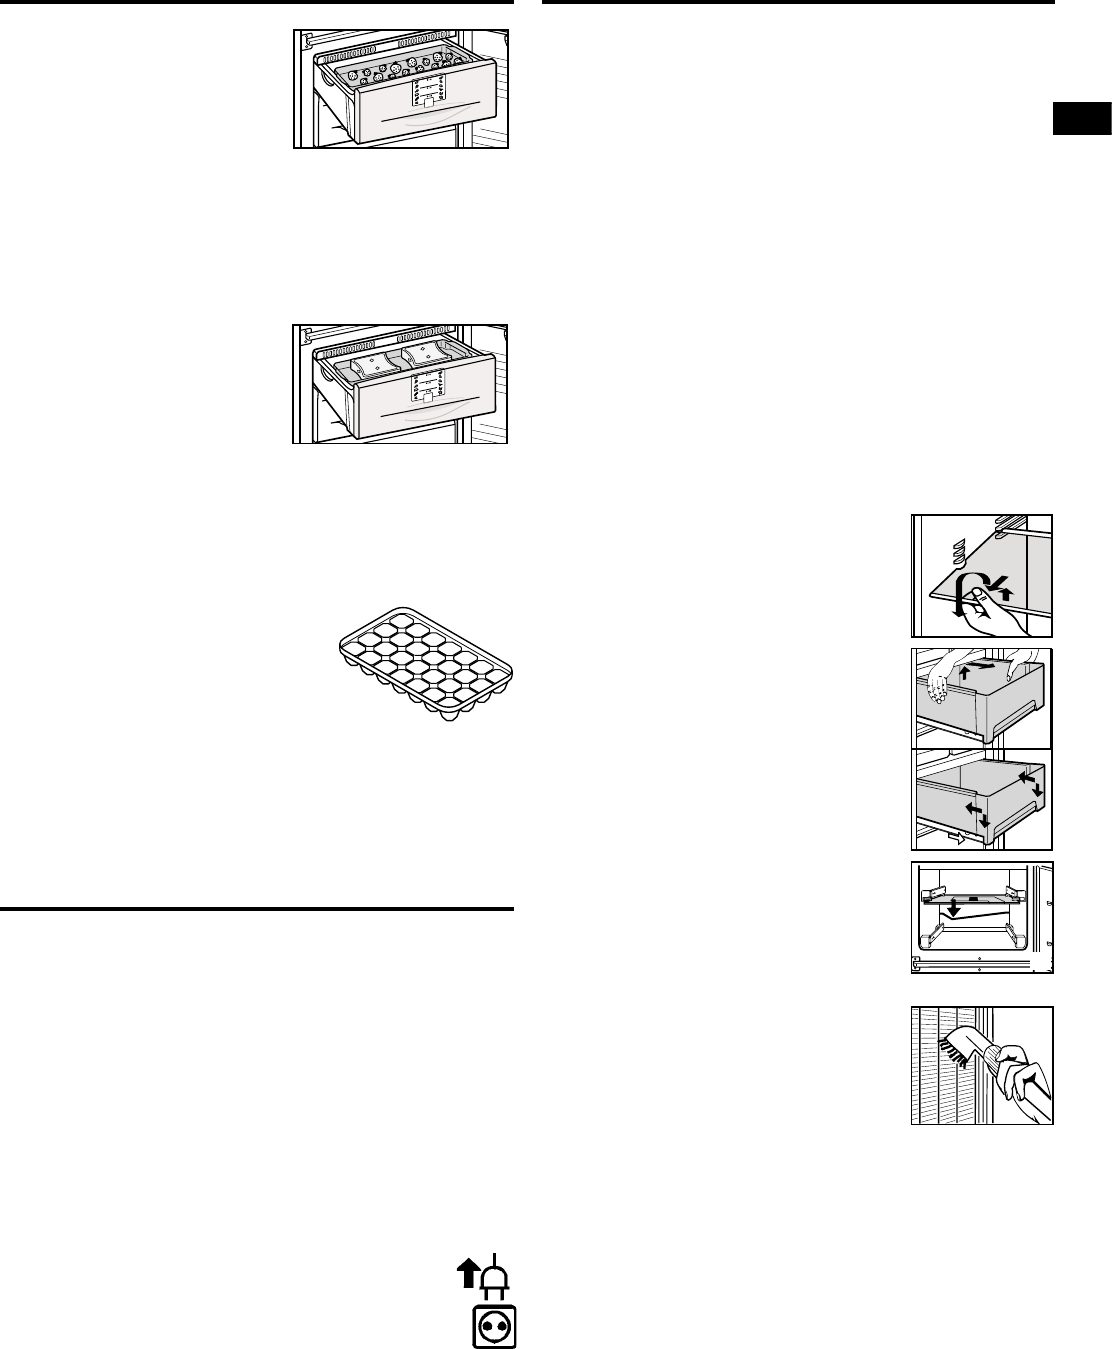
W To clean the storage shelves:
- lift the shelves, slide forwards and remove.
Always insert shelves with the guard bar at the back point-
ing upwards, otherwise food may freeze onto the rear wall.
- The glass shelves are fitted with stops to
prevent them being pulled out acciden-
tally.
W To clean the BioFresh drawers, pull the
drawers right out, grip at back and lift out
(fig. M1).
- To re-insert: place the drawers on the
extended rails - the rails must align with
the front of the drawer - and slide in
(fig. M2).
- Simply pull the drawer cover out to-
wards you. When re-inserting, make sure
the bearing pins snap into place in the
grooves.
The drawer and the cover must be flush
with one another vertically.
W Clean the drain hole in the rear wall fre-
quently, fig. N, arrow. If necessary, clean
with a thin object, e.g. a cotton swab
or similar.
W The dust should be removed from the
refrigeration unit and heat exchanger
- metal grid at the back of the appliance
- once a year. Dust deposits increase
energy consumption.
W Ensure that none of the wires or other
components are dislodged, bent or
damaged.
W Then connect/switch on the appliance
and start to insert the food to be frozen as
the temperature drops.
If the appliance is to be left switched off for any length of
time, empty the appliance, disconnect from the mains, clean
as described above and leave the door open so as to avoid
odours.
M1
M2
N
L
1
2
3