26
27
Connecting the microwave oven
The microwave oven must be connected to a 230-volt AC
current, 50 Hz. The guarantee is not valid if it is connected to
the wrong voltage. When the oven is on, a beep is heard and
the display (7) will show ”0:00”.
Setting the clock
1. Press the “CLOCK/PRE-SET” button (a) to select the 12
or 24-hour clock (12H or 24H is shown in the display).
2. Press the Up or Down button (d and e) to set the hour
number, which will start to flash.
3. Press the “CLOCK/PRE-SET” button; the minute number
will start to flash.
4. Press the Up and Down buttons to set the minute number.
5. Press the “CLOCK/PRE-SET” button to complete the
task.
6. The two dots between the figures will start to flash, which
means the clock is functioning.
NB! If while setting the clock you press the “STOP/CLEAR”
button (i), the task will be interrupted and you will have to start
again from the beginning.
NB! If the clock is not set, the microwave oven’s timer function
cannot be used.
Inserting the glass turntable
Before using the microwave oven, ensure the glass turntable
(4) is correctly seated on the turntable ring (5) and spindle (6).
The glass turntable must lie on top of the turntable ring in the
recess of the microwave oven base, so that the three studs on
the turntable shaft fit between those on the base of the glass
turntable.
Before using the microwave oven for the first time
The first time the microwave oven is used, a small amount of
smoke and smell may be emitted. This is due to oil residue
from manufacture and is neither abnormal nor dangerous.
Smells can be eliminated by starting the grill program and
letting it run for a few minutes. Smells and smoke should
disappear as a result. Repeat the procedure if this is not the
case.
OPERATING THE MICROWAVE OVEN
Basic operation
• Place the food to be cooked in the microwave oven and
close the door. Select cooking function as described
below and start the microwave oven. Once the
cooking time set has elapsed, the oven will switch off
automatically. The oven will beep 5 times and the display
will return to showing the clock.
• Cooking can be temporarily interrupted at any time by
pressing the "STOP/CLEAR" button once. If you press the
button twice, the cooking time and the program selected
will be cancelled.
• Cooking can also be temporarily interrupted by opening
the door (practical if the food needs turning).
• When cooking is temporarily interrupted, one or more
function indicators will show on the display, and the
clock will show the remaining cooking time. Cooking can
be resumed by closing the oven door and pressing the
"START/+30SEC./CONFIRM" button (h) again.
• During cooking using a program, 30 seconds can be
added to the cooking time at any point by pressing the
"START/+30SEC./CONFIRM" button. (However, this does
not apply to the defrost, multi-stage cooking, automatic
reheat and auto menu functions.)
• The maximum cooking time that can be set is 95 minutes.
• If you hold the Up or Down button down during setting,
the numbers in the display will change faster.
• During cooking you can always use the "MICROWAVE"
(g) or "CONVECTION/GRILL/COMBI" (f) buttons to check
the current microwave power or cooking program. You
can also use the “CLOCK/PRE-SET” button to check the
current time.
Express cooking
Express cooking takes place at full microwave power for the
number of minutes you set.
1. Press the “START/+30SEC./CONFIRM” button to start 30
seconds of cooking. The display will show the remaining
time and the microwave indicator will flash. Every time you
press the button, the actual cooking time will be extended
by 30 seconds.
Manual cooking – selecting power level
1. Press the “MICROWAVE” button to select power required;
the microwave indicator will light up. See the various
levels in the table below.
2. When the display shows the required power (see
”Indication in the display” in the table below), enter the
required cooking time using the Up and Down buttons.
3. Press the ”START/+30SEC./CONFIRM” button to start
cooking.
4. The microwave indicator will start to flash and the display
will show the remaining time.
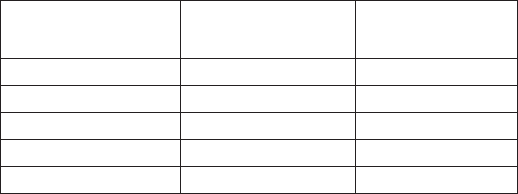
No. of times to
press
button
Indication in the
display
Microwave
power
1 P100 100 %
2 P 80 80 %
3 P 50 50 %
4 P 30 30 %
5 P 10 10 %
Cooking using the timer
You can set the microwave oven to start cooking at a given
time. The timer program can consist of up to three cooking
stages. Caution! The Defrost program cannot be set using
timer programming.
1. Check that the clock is set correctly.
2. Set one or more cooking programs. (See more detailed
instructions for setting individual cooking programs in the
relevant sections.)
3. Press the ”CLOCK/PRE-SET” button; the hour number
will start to flash.
4. Set the hour number using the Up or Down button.
5. Press the ”CLOCK/PRE-SET” button, so the minute
number starts to flash.
6. Set the minute number using the Up or Down button.
7. Close the oven door. The timer program will not start at
the programmed time if the door is left open.
8. Press the ”START/+30SEC./CONFIRM” button to
complete the task of setting the timer program’s start
time.
9. The microwave oven will beep twice when it reaches
the start time and cooking will begin automatically. The
relevant function indicator(s) will start to flash and the
display will show the remaining time.
• NB! When the microwave oven is set for cooking using the
timer, the two dots between the figures do not flash.


