SAFETY
- Always ensure bones and rinds etc. are removed from the
meat before mincing.
- When mincing nuts only feed a few down at a time and allow
the scroll to pick them up before adding anymore.
- Always unplug:
-before fitting or removing parts
-after use
-before cleaning.
- Always use the pusher supplied.
- Never put your fingers or utensils in the feed tube.
Warning - the cutting blade is sharp, handle with care both in
use and cleaning.
- Ensure the attachment is secured in position before
switching on.
-To avoid electric shocks, never let the power unit, cord or
plug get wet.
-Never use a damaged mincer. Get it checked or repaired:
see ‘service’.
- Never use an unauthorized attachment.
- This mincer is not intended for use by young children or
infirm persons without supervision.
-Young children should be supervised to ensure they do not
play with the appliance.
- Only use the machine for its intended domestic use.
BEFORE PLUGGING IN
Make sure your electricity supply is the same as the one shown
on the underside of your machine.
BEFORE USING FOR THE FIRST TIME
1. Remove all packaging.
2. Wash the parts see ‘care and cleaning’
Install knife and screens a little bit tight, operate mincer for 2
minutes with each screen, without any food; discharge knife and
screens, rinse and ready for use.
Caution: when install knife and screens for use, do not install
tight.
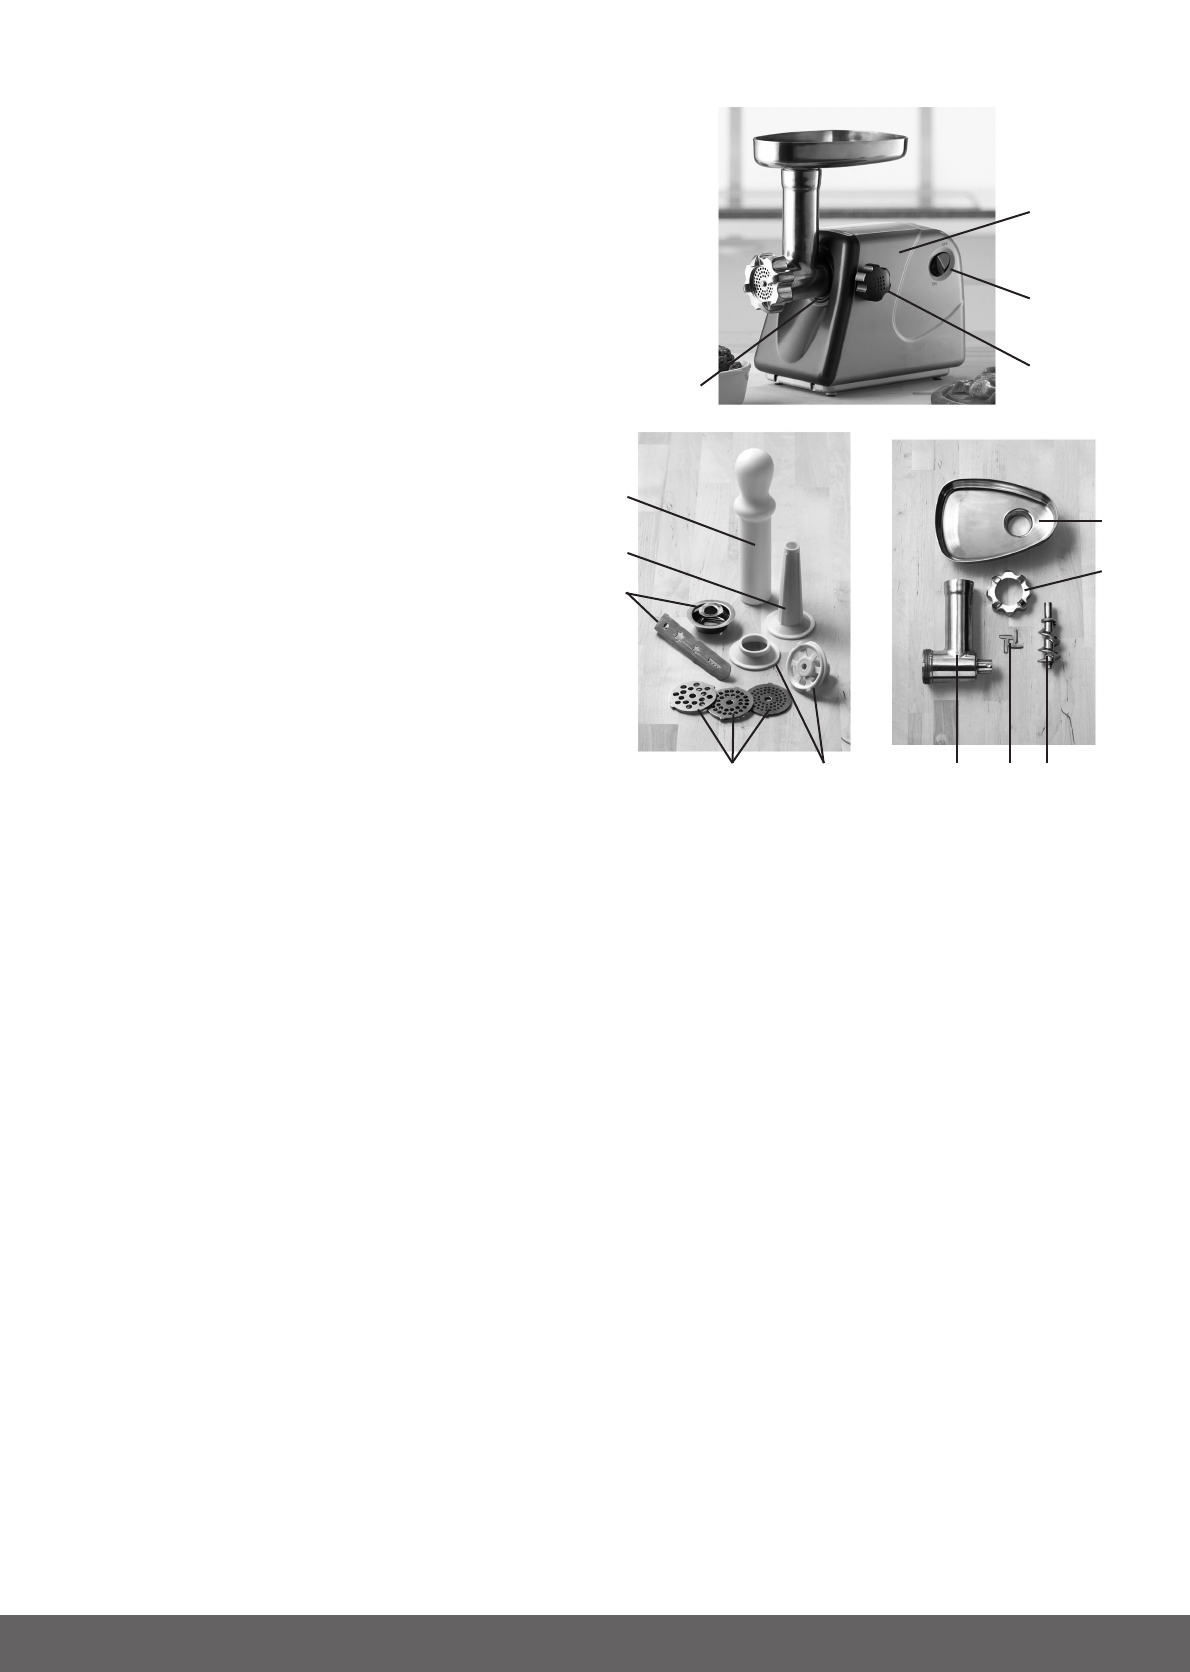
MINCER
1. Power unit
2. Attachment outlet
3. Locking screw
4. On/off button
5. Ring nut
6. Mincer screens: fine, medium, coarse
7. Cutter
8. Scroll
9. Mincer body
10. Tray
11. Pusher
12. Kebbe maker
13. Pastry nozzle
14. Sausage filler
TO ASSEMBLE
1. Fit the scroll inside the mincer body.
2. Fit the cutter – cutting side outermost.
Ensure it’s seated properly – otherwise you could damage
your mincer.
3. Fit a mincer screen.
Use the fine screen for raw meat; fish; small nuts; or cooked
meat for shepherd’s pie or meat loaves.
Use the medium and coarse screens for raw meat; fish; nuts;
vegetables; hard cheese; or peel or dried fruit for puddings
and marmalade.
4. Loosely fit the ring nut.
14
UK
1
4
3
2
11
14
13
6
12
9
7 8
10
5


