


20
20
sides and 7.87 in above the oven to ensure suffi cient ventilation.
Connecting the microwave oven
The microwave oven must be connected to a 230-volt AC
current, 50 Hz. The guarantee is not valid if it is connected to the
wrong voltage. When the power to the oven is switched on, the
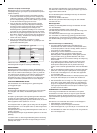
display shows (7) “1:01”, the dots between the numbers fl ash,
and the clock indicator appears in the top right corner.
Setting the clock
1. Press the “Clock” button (e). The clock indicator begins to
fl ash, and the hour number is shown.
2. Turn the ”Time/Menu/Start” button (h) to set the hour number.
3. Press the ”Clock” button; the minute number is shown at the
side of the hour number.
4. Turn the ”Time/Menu/Start” button to set the minute number.
5. Press the ”Clock” button to complete the setting.
6. The two dots between the numbers begin to fl ash, and the
clock indicator stops fl ashing, which means the clock is
running.
NB! This is a 24-hour clock.
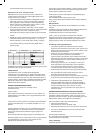
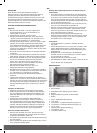
Inserting the glass turntable
Before using the microwave oven, ensure the glass turntable (2)
is seated correctly on the turning ring (3) and on its shaft (4). The
glass turntable must rest on the turning ring in the recess in the
bottom of the microwave oven, so that the three studs on the
spindle fi t between those on the base of the glass turntable.
OPERATING THE MICROWAVE OVEN
Basic operation
• Place the food to be cooked in the microwave oven and close
the door. Select cooking function as described below and
start the microwave oven. Once the cooking time set has
elapsed, the oven will switch off automatically. The display
will show "End" and 3 beeps will sound.
• When the display shows "End", you cannot reset the
microwave oven until the oven door has been opened or until
you press the "Stop/Cancel" button, so the display returns to
clock function.
• If you do not start the microwave oven within approximately
20 seconds of setting the cooking program and cooking time,
the oven will beep once and the display will return to clock
function.
• The maximum cooking time that can be set for manual
microwave cooking, grilling or combination cooking is 60
minutes.
• During cooking you can increase or reduce the set cooking
time at any point by turning the "Time/Menu/Start" button
(not when using any of the auto menu programs).
• Cooking can be temporarily interrupted at any time by
pressing the "Stop/Cancel" button once. If you press the
button twice, the cooking time and the program selected will
be cancelled.
• Cooking can also be temporarily interrupted by opening the
door (practical if the food needs turning).
• If cooking is temporarily interrupted, the clock shows the
remaining cooking time, and the pause indicator in the top
line of the display fl ashes. To restart cooking, close the oven
door (if it has been opened) and press the "Time/Menu/Start".
The pause indicator goes off when cooking resumes.
• You can check the time during cooking by pressing the
"Clock" button. After a few seconds the display switches
back to showing the remaining cooking time.
Express cooking
Express cooking takes place at full microwave power for the
number of minutes you set.
The maximum cooking time that can be set for express cooking
is 12 minutes.
Press the ”Time/Menu/Start” button repeatedly to set the cooking
time. Each time you press the time increases by 30 seconds. The
microwave oven begins cooking at full power immediately, and
the display shows the remaining cooking time.
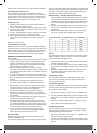
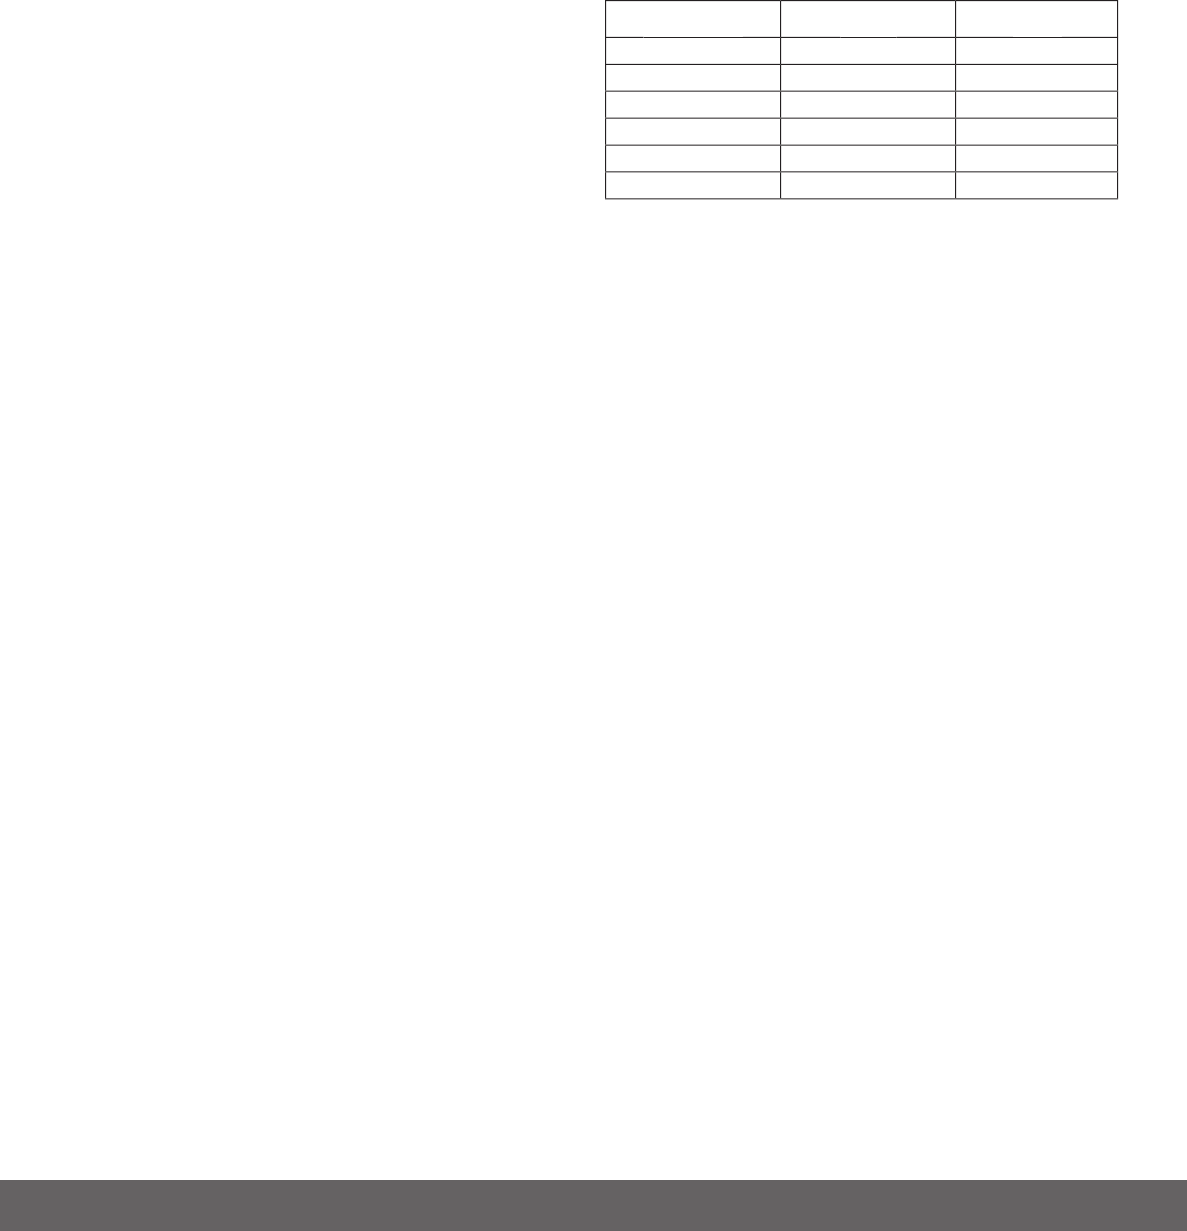
Manual cooking – selecting microwave power level
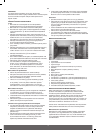
1. Press the “Micro” button (a) repeatedly to select the required
microwave power level (see the various power levels in the
table below). A percentage sign appears on the right side and
one or more indicators appear along the bottom line of the
display.
2. Turn the ”Time/Menu/Start” button until the required cooking
time is shown on the display. The pause indicator will now
start fl ashing.
3. Press the ”Time/Menu/Start” button to commence cooking.
The pause symbol goes off and the display shows the
remaining cooking time.
No. of times to
press button
press button
Indication in the
display
display
Microwave
power
power
1
100
100%
2
80
80%
3
60
60%
4
40
40%
5
20
20%
6
0
0%
Grilling
The grill program is ideal for thin pieces of meat, burgers, chops,
kebabs, sausages or pieces of chicken. It can also be used for
toasted sandwiches and gratin dishes.
1. Press the ”Grill” button (b). The grill symbol on the top line of
the display will begin to fl ash.
2. Turn the ”Time/Menu/Start” button until the required cooking
time is shown on the display. The pause symbol will now start
fl ashing.
3. Press the ”Time/Menu/Start” button to commence cooking.
The pause symbol goes off and the display shows the
remaining cooking time.
Combination cooking
The microwave oven has two combination programs, which
you can use if you want to cook food using a combination of
microwave power and grill.
Combination program 1
Using this combination program, food can be cooked using 30%
microwave power and 70% grill power. This program is ideal for
fi sh, potatoes or gratin dishes.
1. Press the ”Combination 1” button (c) once. ”COMB1” in the
display’s bottom line begins to fl ash.
2. Turn the “Time/Menu/Start” button until the required cooking
time is shown on the display. The pause symbol will now start
fl ashing.
3. Press the ”Time/Menu/Start” button to commence cooking.
The pause symbol goes off, ”COMB1” stops fl ashing, and the
display shows the remaining cooking time.
Combination program 2
Using combination program 2, food can be cooked using 55%
microwave power and 45% grill power. This program is ideal for
omelettes, baked potatoes and poultry.
1. Press the ”Combination 2” button (d) once. ”COMB2” in the
display’s bottom line begins to fl ash.
2. Turn the “Time/Menu/Start” button until the required cooking
time is shown on the display. The pause symbol will now start
fl ashing.