


7. Replace baskets, spring on tension brackets, front
baffle, receiving tray. Delivery chute and left and
right side panels.
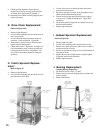
L Transmission Assembly Re-
placement:
(Figure #11)
1. Follow steps 1 thru 5 in Section K.
2. Remove drive chain, hubbed sprocket, bearing
retainers and bearings. (Refer to Sections I & J )
3. Slide assembly shaft to right side and lift left end of
shaft out of bearing hole and remove shaft. NOTE:
Free-wheeling (left) sprocket is mounted with hub
side inward.
4. Inspect shaft bearing for wear or binding. Replace
with new if necessary.
5. Replace new assembly in reverse order.
6. Check conveyor chain line-up. Refer to Section K
Step 6.
7. Check drive chain tension. Refer to section G Step
5.
M Tension Assembly Replace-
ment:
(Refer to Figure #11)
1. Remove receiving tray, delivery chute, left and right
side panels.
2. Remove all baskets and both conveyor chains.
Refer to Section K Steps 2 thru 5.
3. Unhook tension springs from brackets. (Figure
#12)
4. Remove bearing retainers and bearings.
5. Lift one end of assembly shaft and remove carrier
chain from sprocket. Move chain to one side;
repeat for opposite end of shaft.
6. Slide shaft to one side and lift opposite end out of
bearing hole. Lift assembly out and under to clear
carrier chains.
7. Reverse above procedure to install new assembly.
NOTE: Free-wheeling (left) sprocket is mounted
with hub side inward.
8. Inspect bearing for wear or binding. Replace with
new if necessary.
9. Install bearing, spring brackets and retainers.
Attach springs to bracket.
10. Check conveyor chain line up. (Figure #17).
11. Install baskets, left and right side panels.
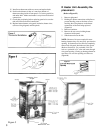
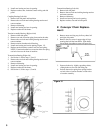
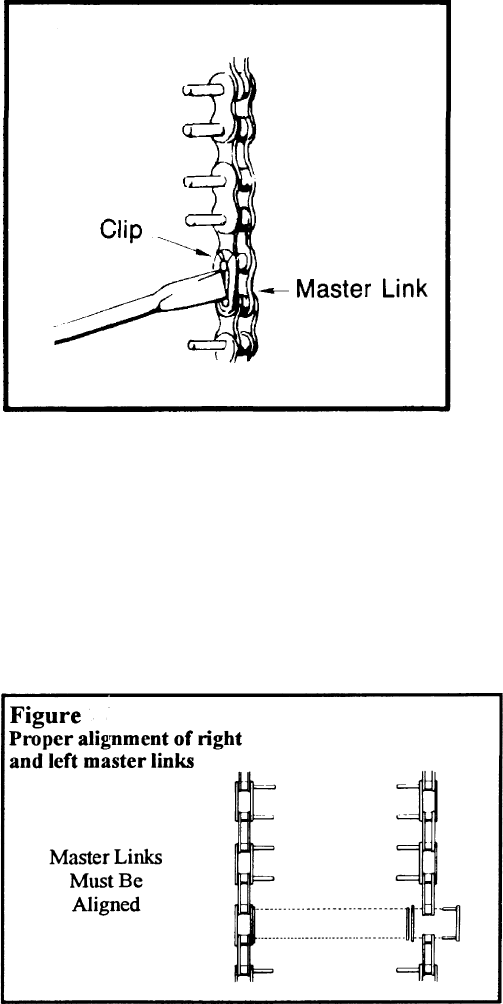
5. Locate master link (link without extended pins, (Figure
#15). Remove clips on master link (Figure #16) and
remove. Pull chain out from bottom.
Figure 16
Master Link
Clip
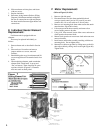
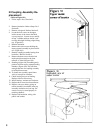
6. With extended pins facing inward, drape new chain over
the top of the coupling assembly. Make certain links of
chain are meshed over sprocket and from bottom opening,
lift it across transmission assembly and tension assembly
sprockets. Visually check for fit over sprocket teeth and
bring two ends of chain together. Install master link and
clips. Repeat procedure for other chain. IMPORTANT!
Align right and left side master links to insure proper
alignment of baskets. (Figure #17).
17
7