


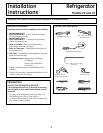
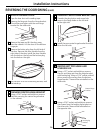
PLUG IN THE REFRIGERATOR
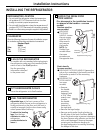
On models with an icemaker, before plugging in
the refrigerator, make sure the icemaker power
switch is set to the O (off) position.
See the grounding
information attached
to the power cord.
1
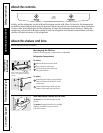
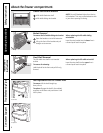
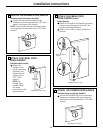
PUT THE REFRIGERATOR IN PLACE
Move the refrigerator to its final location.
2
LEVEL THE REFRIGERATOR
Adjustable legs at the front corners of the
refrigerator should be set so the refrigerator is
firmly positioned on the floor, and the front is
raised just enough that the door closes easily
when opened about halfway.
To adjust the leveling
legs, turn the legs
clockwise to raise the
refrigerator,
counterclockwise to
lower it.
3
Installation Instructions
INSTALLING THE REFRIGERATOR
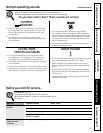
REFRIGERATOR LOCATION
• Do not install the refrigerator where the temperature
will go below 60°F (16°C) because it will not run often
enough to maintain proper temperatures.
• Do not install the refrigerator where the temperature will
go above 100°F (37°C) because it will not perform properly.
• Install it on a floor strong enough to support it fully loaded.
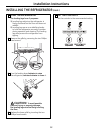
CLEARANCES
Allow the following clearances for ease of installation, proper
air circulation and plumbing and electrical connections.
Standard Depth
Models
Sides 1/8″ (3 mm)
Top 1″ (25 mm)
Back 1″ (25 mm)
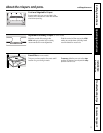
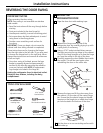
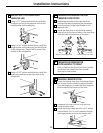
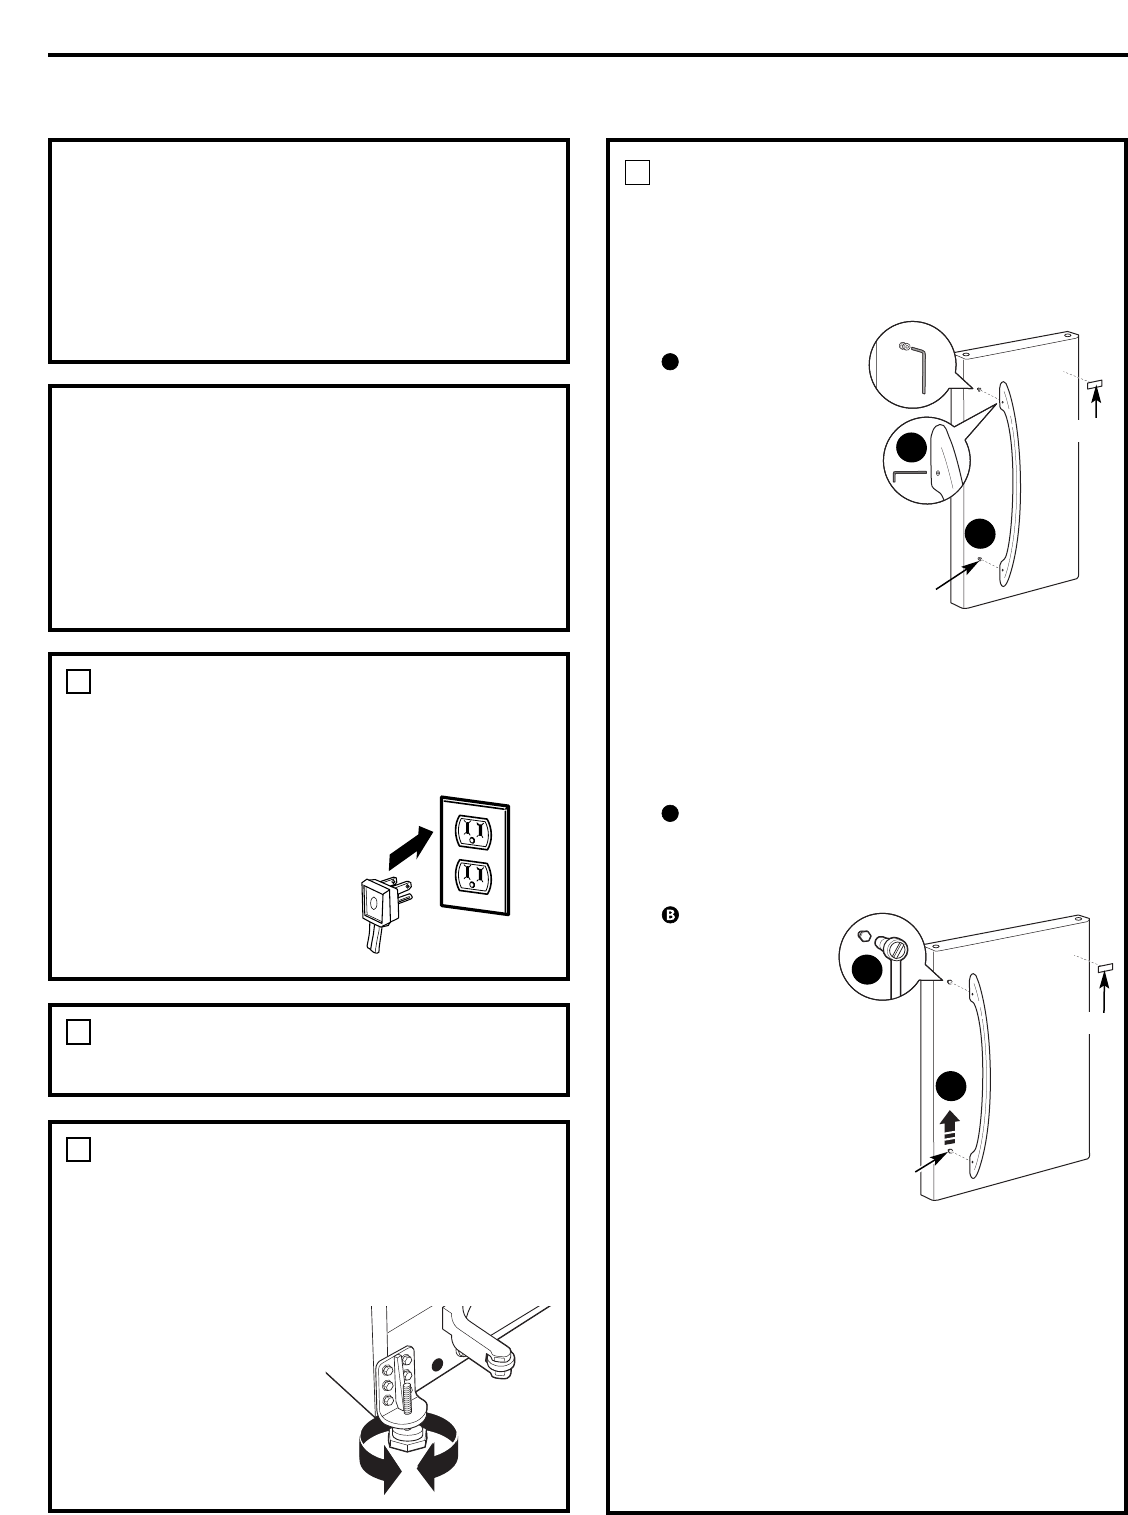
REMOVE THE FRESH FOOD
DOOR HANDLE
(For placement in the installation location
or reversal of the handles – on some
models)
Stainless steel (on
some models):
REMOVING
THE DOOR
HANDLE: Loosen
the set screws
with the 3/32″
Allen wrench
and remove
the handle.
NOTE: For
Double Door
models follow
the same
procedure on
the opposite door.
Plastic handle
(on some models):
REMOVING THE DOOR HANDLE: Depress the
tab on the underside of the handle and slide
the handle up and off of the mounting
fasteners.
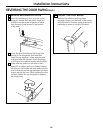
REVERSING THE
DOOR HANDLE
(on some
models):
• Remove
the handle
mounting
fasteners with
a 3/16″ Allen
wrench and
transfer
the handle
mounting
fasteners to
the right side.
• Remove the logo badge.
• Remove and transfer the plug button to
the left side of the fresh food door. NOTE:
Use a flat plastic edge to prevent damaging
the door. Remove any adhesive on the door
with a mild detergent. Remove the paper
covering on the adhesive backing on
the logo badge prior to carefully attaching
the badge to the door.
A
A
4
A
B
A
B
Mounting
Fasteners
Mounting
Fasteners
Badge
Badge
(appearance may vary)
(appearance may vary)
10