


4
Operating controlsOperating controls
Operating controlsOperating controls
Operating controls
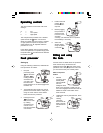
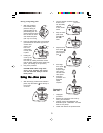
The food processor control knob has three
settings:
O = Off
I = Low speed
I I = High speed
The compact food processor has a variable
speed control dial
which can be set to
either low speed when less power is needed
or high speed if full power is required. The
speed selector can be adjusted whilst the
processor is in use.
Pulse allows greater control over the texture
of the food produced. To operate simply press
the pulse button until the food has reached
the desired texture.
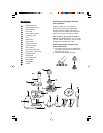
Food processorFood processor
Food processorFood processor
Food processor
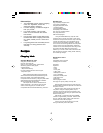
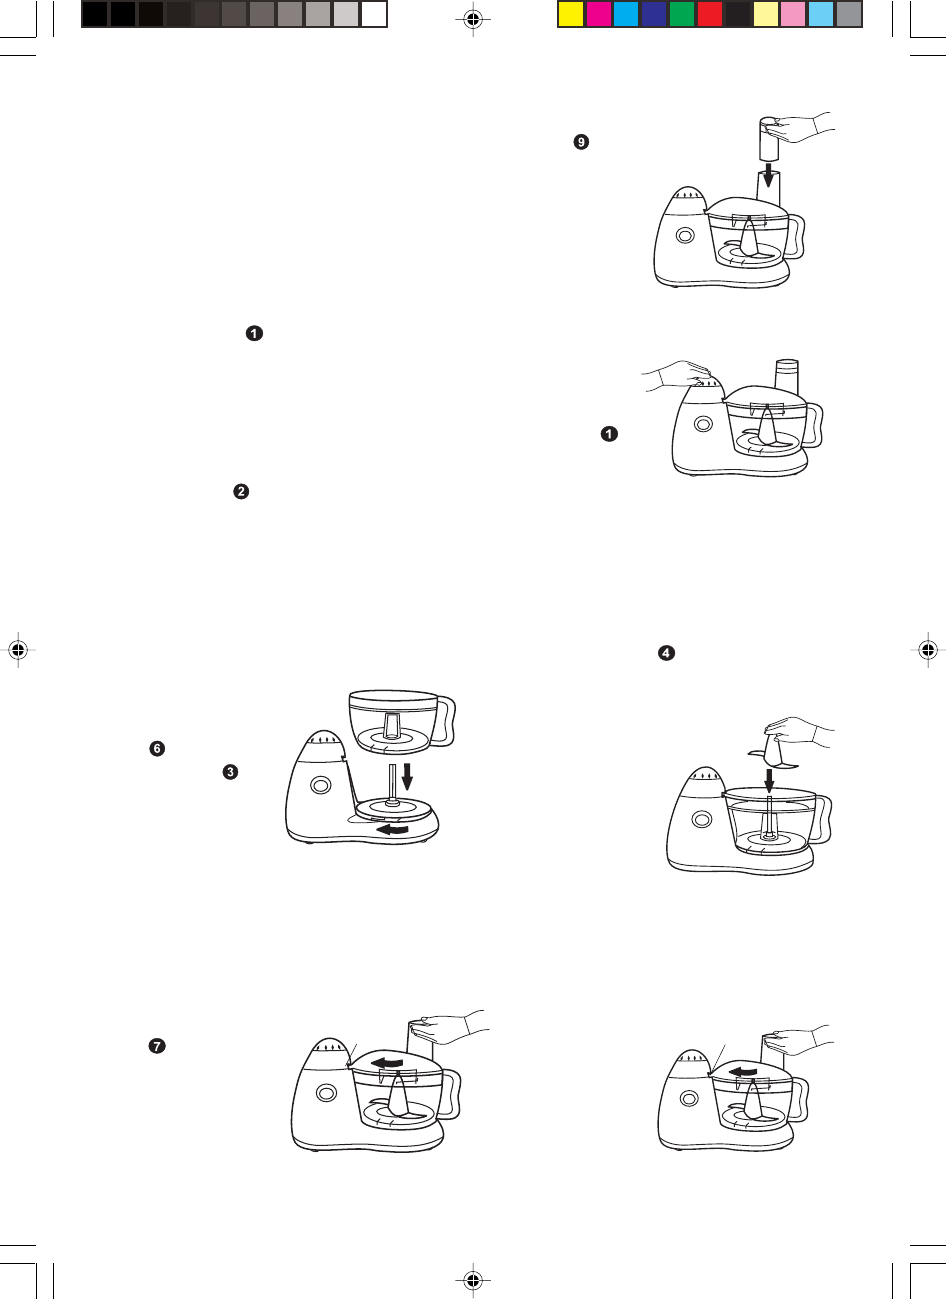
Setting up
Using the following instructions, assemble the
food processor as follows.
1 Drop the
processing bowl
onto the base
assembly by
rotating the bowl
clockwise until
you hear a click.
Ensure that all
three interlocks on the bowl engage with
the base unit.
2 The blades and disc holder can now be
placed into the bowl. Refer to ‘fitting and
using the tools’ section which follows.
Place food into the processor.
3 Holding the cover
by the feed
tube, fit the cover
by rotating
clockwise firmly
until the cover,
bowl and the base
unit interlock.
4 Position the food
pusher into
the feed tube if
required.
5 Before plugging
the processor in
ensure that the
bowl and cover
are fitted
correctly. (The machine will not operate if
the assembly is incorrect).
6 Select the
desired speed
using the speed
control dial .
Fitting and usingFitting and using
Fitting and usingFitting and using
Fitting and using
the toolsthe tools
the toolsthe tools
the tools
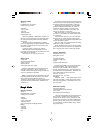
All tools which are fitted within the processor
bowl must be firmly connected to the
hexagonal drive shaft in the centre of the
processor bowl. Always adjust the tools until
you are sure that they are correctly fitted.
Metal and plastic
blades
1 With the
processor bowl
already fitted,
place the blade
over the
hexagonal drive
shaft of the processor. Lightly turn the
tool until it engages onto the drive and the
blades are close to the bottom of the
bowl and level.
2 Holding the cover by the feed tube, fit the
cover by
rotating
clockwise.
Ensure that the
safety interlock
has clicked into
place.
Safety
interlock
Safety
interlock