7
For details of other Morphy Richards products, please see our website:
hits the oil, the temperature is
sufficient to seal / brown. If it
does not sizzle, let the pan
heat up for another minute or
so and then test it again.
Add the meat to pan and stir
regularly until the outside of
the meat is sealed / browned.
When the timer reaches zero,
the Rapid Cook will beep five
times and the cooking
process will stop. If your
meat is sealed before the
timer reaches zero, press the
Keep Warm / Cancel button
once. The Rapid Cook will
beep once, and the cooking
process will stop. The screen
will return to the default
display B.
If your meat needs a few
extra minutes sealing after
the timer has reached zero,
simply press the Function
button fl once to start the
Sealing / Browning function
again. As explained above, to
cancel the sealing function
before the timer reaches zero,
press the Keep Warm /
Cancel button · once.
Please note:
Do not start the ‘Sealing /
Browning’ function without
the pan ¤ in the Base unit
› as this will make the
product overheat. You should
not start the ‘Sealing /
Browning’ function without
adding your oil to the pan.
Normal Cooking
Function
• Add the ingredients into the
cooking pot when it is in
place in the base unit. Be
careful not to spill any liquid
into the base unit. If it
happens switch off, remove
plug from the mains and
clean fullly.
Except when cooking rice,
never load the Rapid Cook
above maximum ingredient
level line marked “2/3 MAX
PC” on cooking pot. Foods
that expand while cooking
(i.e. legumes, peas etc)
should never go above the
3/5 mark.
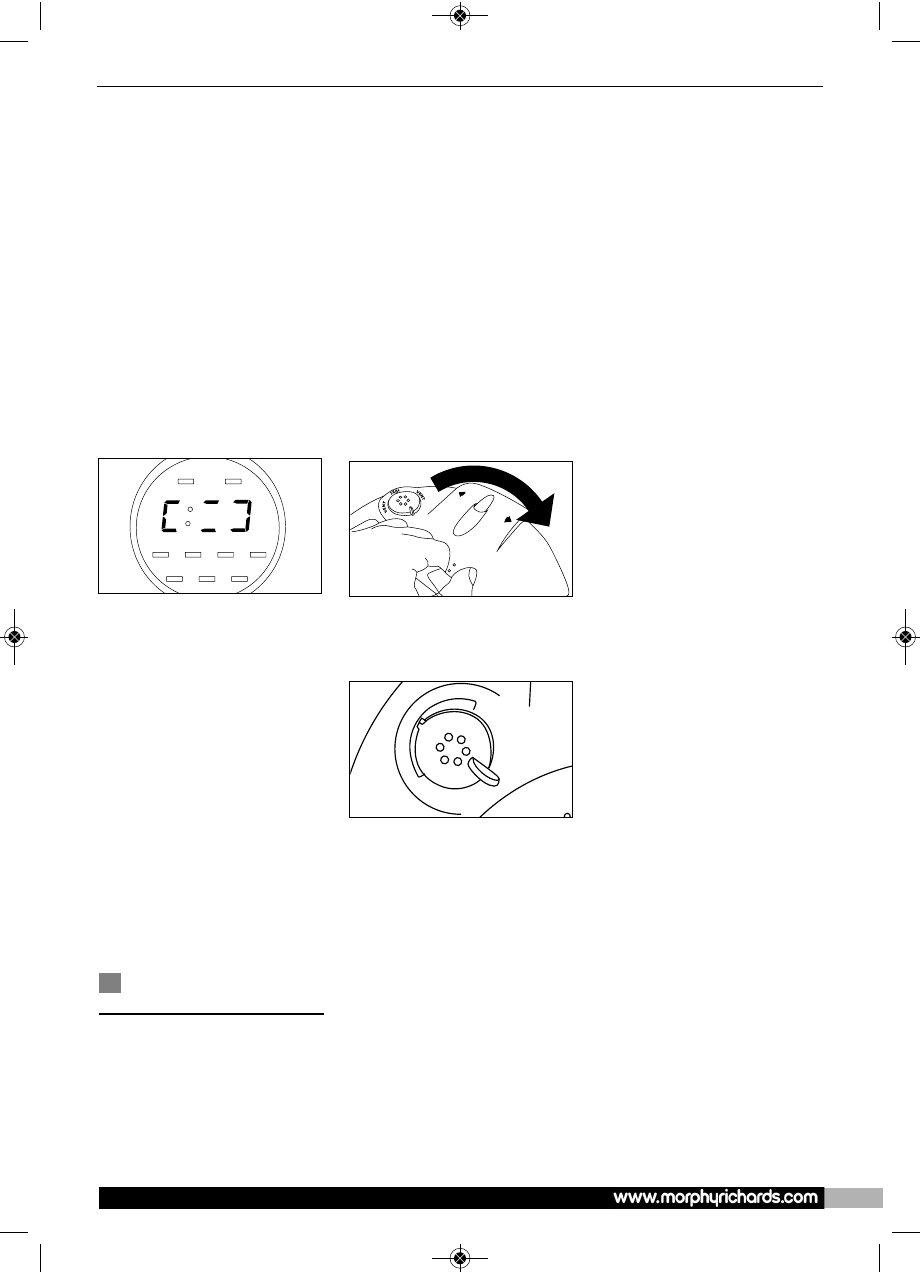
Then place the lid onto the
top of the Rapid Cook, so the
Morphy Richards logo is
pointing to the left of the
display panel on the front of
the cooker.
Then turn the lid using the
handle, gently clockwise C,
so the logo is aligned with
the front control panel.
Ensure that the pressure
release valve Ì on top on
the lid ⁄ is positioned to
‘SEAL’ D.
Whether you have used the
‘Seal / Brown’ function or just
turned the Rapid Cook on,
the display screen should
show the default setting B.
Press the Function button fl
the appropriate number of
times to select the desired
cooking time.
Press twice: 1-10 mins
Press 3 times: 11-20 mins
Press 4 times: 21-40 mins
Press 5 times: 41-90 mins
For each range, the Rapid
Cook will select the lowest
value (e.g. 11 minutes in the
11-20 mins range)
To select a longer value
within the selected range,
press the Time / Delay button
‡ to increase the cooking
time within the selected
range. For example, to select
a 27 minute cooking time
after selecting the 21-40 mins
range (as instructed above),
press the Time button ‡ six
times, until 0:27 displays on
the timer. The Rapid Cook will
then start to heat up and the
cooking process will begin.
Once pressure has been
achieved, pressure will
automatically be maintained.
Cooking time begins at this
point, and the time will begin
counting down in the display.
After selecting the desired
cooking function, you can
add cooking time by pressing
the Time button until total
cooking time is displayed.
You can set total cooking
time from 5 minutes up to
120 minutes for Rice, Meat,
Vegetables, Soup and Stew.
After selecting the desired
cooking function, you can
delay the start time for up to
2 hours by pressing the Time
/ Delay button ‡ until total
delay time is displayed.
Countdown will begin once
the colon ( : ) starts flashing.
When pressure cooking is
complete, the Rapid Cook
will automatically switch to
Keep Warm. The Warm
indicator light ‰ will
illuminate. To manually switch
to Keep Warm and / or
cancel any cooking process,
press the Keep Warm /
Cancel Button ·. After
pressure cooking is
complete, pressure can be
released manually or on its
own. If a recipe states “let
pressure drop on its own”,
press the Standby button ‚
and unplug the cooker. When
recipe states “reduce
pressure at once” or “reduce
pressure manually” put on
oven gloves and move the
Pressure Release Device Ì
to the ‘VENT’ position to
OP
EN
CLOSE
C
V
E
N
T
S
E
A
L
V
E
N
T
D
Heat
Warm
Browning 1-10 11-20 21-40
41-90 Delay Time Time
B
48815 rev3_x 21/06/2010 10:11 Page 7


