


4
5
MXL USB.007 User Manual
not requiring an external microphone preamp, as is the case with most condenser
microphones. We’ve already mentioned the importance of proper handling, but
should you find yourself recording an outdoor performance, you would be well
advised to use a windscreen as protection for your microphone.
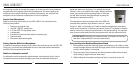
Unpack Your Microphone:
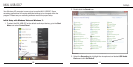
Begin by examining the contents of your MXL USB kit. You should have the
following components:
• Protective vinyl travel case
• One MXL USB.007 microphone
• A 10-foot USB 2.0 high speed cable
• A windscreen
• A desktop microphone stand plus the mounting ring
• Owners manual
• Microphone applications guide
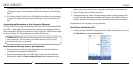
Getting Familiar With Your Microphone:
In addition to speaking or singing into the side of the microphone with the RED LED
facing you, you should also understand the use of the three-position attenuation
switch on the microphone’s back side.
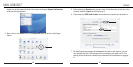
What’s an attenuation switch?
An attenuation switch reduces the signal strength in an electronic device. As the
microphone converts acoustical energy (your voice) into electrical energy (the
signal that feeds your computer), it is possible that a loud,
“boomy” voice, or a vocalist who is really “belting out those
notes” may exceed normal recording levels. In this case,
you will want to reduce the signal strength by using the
microphone’s attenuation switch.
The attenuation switch on the back side of the USB mic
provides three positions: High, Medium, and Low - identi-
fied as: Hi, Med, Lo. Normally, you’ll want to keep the microphone’s attenuation
switch in the Hi position. If, however, you need to “back off” the signal to compen-
sate for a loud voice, simply move the switch to the desired setting. You may also
need to move further away from the microphone which will also reduce the level.
PLEASE NOTE: Recording is a creative process, so there are no hard and
fast rules. Experimentation is the key to best results.
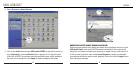
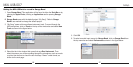
Using the Supplied Desktop Microphone Stand
1. After opening the stand’s tripod leg system and placing it on the table or desk,
loosen the angle adjuster and orient the large portion of the microphone holder
so that it faces upward, or horizontal.
2. Place the base of the microphone into the microphone holder with one hand
while holding it upright with your other hand.
3. While holding the microphone upright and firmly in one hand, secure the