


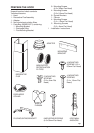
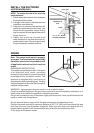
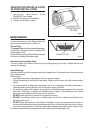
7
A
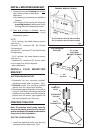
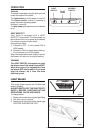
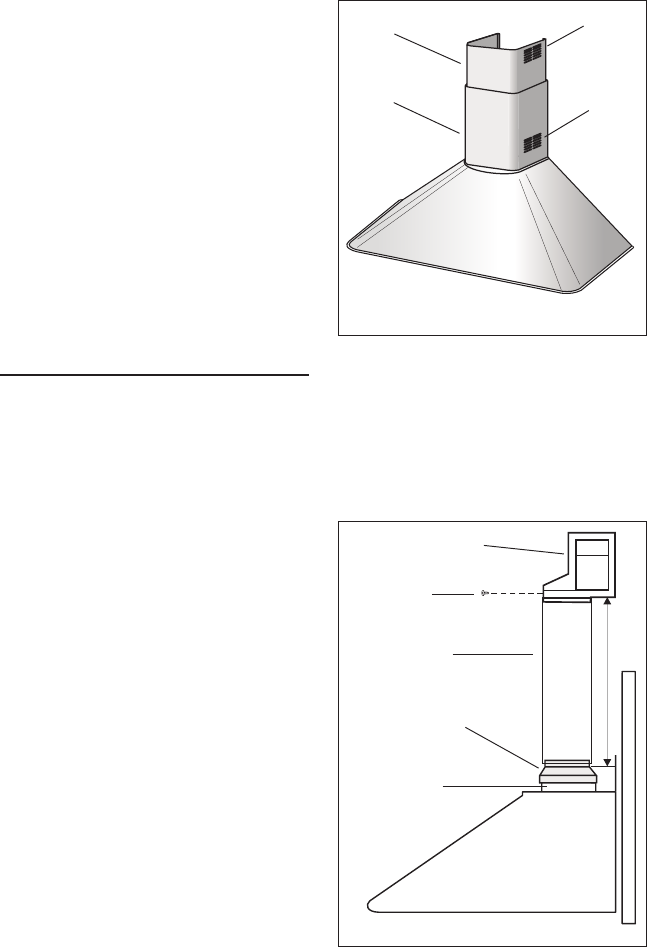
fig.7
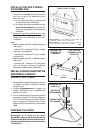
UPPER
FLUE
LOWER
FLUE
UPPER
FLUE
VENTS
EXPOSED
UPPER
FLUE
VENTS
CONCEALED
PLENUM
(3) SCREWS
5” ALUMINUM
FLEX DUCT
5” 6” ADAPTER
BLOWER
COLLAR
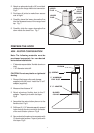
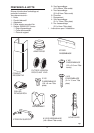
PREPARE THE HOOD
NON - DUCTED CONFIGURATION
Note: The following materials must be
purchased separately for non-ducted
recirculation installations.
• 5” diameter expandable / flexible aluminum
duct.
• 1/16” diameter twist drill.
CAUTION: Do not use plastic or rigid metal
ducting.
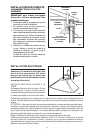
1. Discard discharge collar and damper
supplied with the hood. Install the 5” to 6”
adapter (supplied).
2. Measure the distance “A”
3. Attach aluminum flexible duct to the 5”
adapter. Tape all joints with duct tape.
Fig.8
4. Assemble the recirculation plenum to the
flexible duct. Fig.8
5. Drill three (3) 1/16” diameter equally spaced
holes through the duct and duct connector
of the recirculation plenum. Fig.8
6. Secure duct to the plenum’s connector with
(3) sheet metal screws. Tape all joints with
duct tape. Fig.8
fig.8
2. Attach an adequate length of 6” round steel
ducting to the range hood duct connector.
Fig.6
3. Duct tape all joints to make them secure
and air tight.
4. Carefully place the lower decorative flue
into the recessed area of the range hood
top. Fig. 7
5. Carefully slide the upper decorative flue
down inside the lower flue. Fig. 7