


8
PREPARE THE HOOD
NON - DUCTED CONFIGURATION, cont’d.
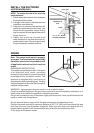
8. Carefully place the lower decorative flue
into the recessed area of the range hood
top. Fig.7
9. Carefully slide the upper decorative flue
down inside the lower flue.
Note: air vents must be up. Fig.7
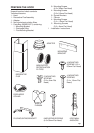
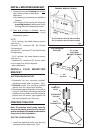
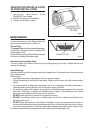
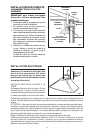
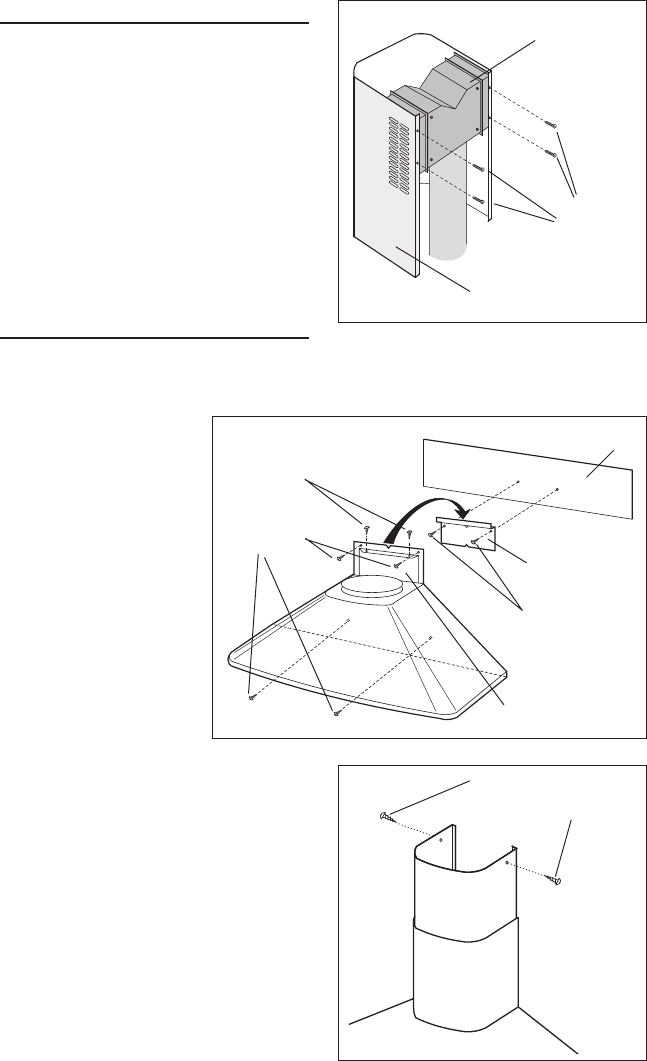
10.Secure the recirculation plenum to the
upper flue with (4) flat head screws. Fig.9
PLENUM
4 FLAT
HEAD
SCREWS
(3.4x15 mm)
UPPER
FLUE
fig.9
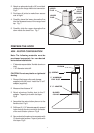
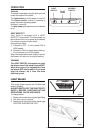
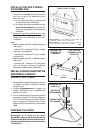
fig.10
RECTANGULAR
CUTOUT
HEIGHT
ADJUSTMENT
SCREWS
(3.9x9.5mm)
WALL FRAMING
MOUNTING
BRACKET
INSTALL THE HOOD
Note: at least two people will be required to
mount the hood.
1. Raise the hood into its
mounting position.
2. Plug the power cord into
the electric wall recep-
tacle. Tuck excess cord
behind the flue.
3. Align the rectangular
opening on the back of
the hood with the wall-
mounting bracket. Gently
lower the hood until it
securely engages the
bracket. Fig.10
4. Level the hood.
Height adjustment screws provide
vertical adjustment.
Secure the hood with mounting screws
(4.8x38mm). Use drywall anchors,
provided, if wall studs or framing are not
available.
Secure with (2) mounting screws
(4.8x38mm). Use drywall anchors provided
if wall studs or framing are not available.
Fig.10
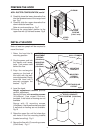
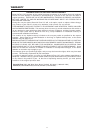
5. Raise the upper flue until its holes align
with holes in the flue mounting bracket
(located on ceiling). Fig.11
6. Secure the flue with (2) mounting screws
(3.9x9.5mm). Fig.11
fig.11
FASTEN FLUE TO
UPPER BRACKET
WITH SCREWS (3.9x9.5mm)
MOUNTING
SCREWS
(4.8x38mm)
MOUNTING
SCREWS
(4.8x38mm)