www.oster.com
4
www.oster.com
5
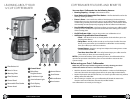
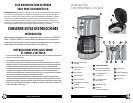
LEARNING ABOUT YOUR
12 CUP COFFEEMAKER
1
a
b
c
d
e
5
f
g
h
i
2
5
3
4
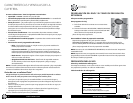
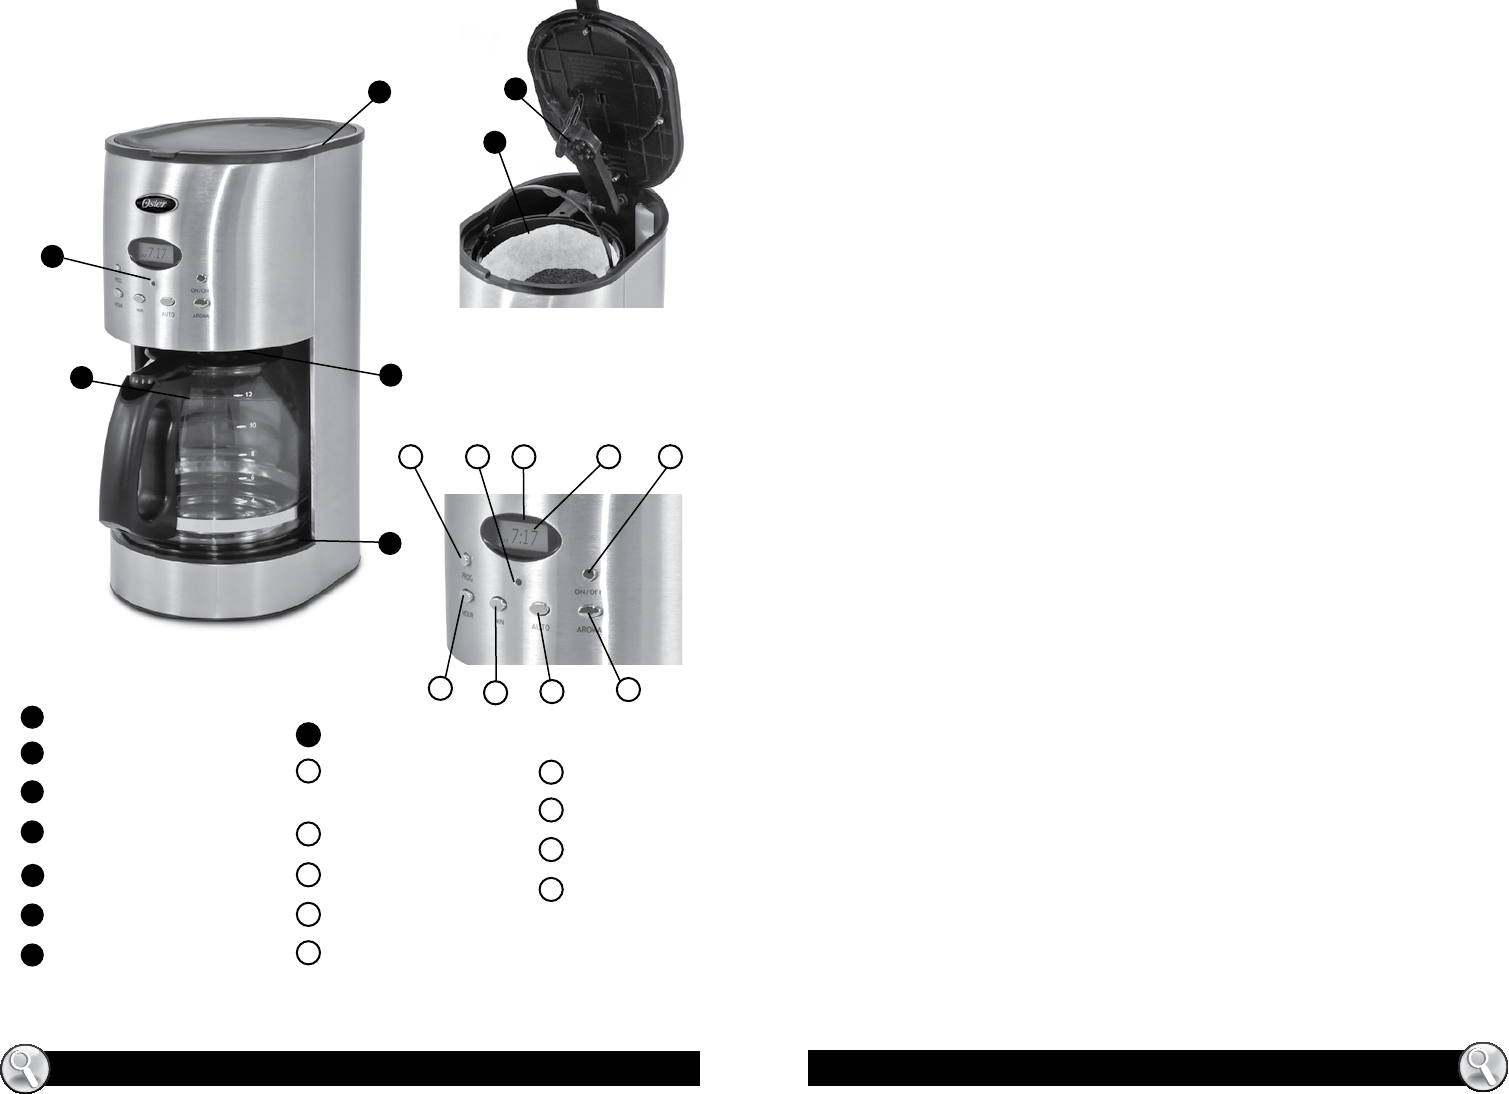
Filter Basket Lid
Pause ’n Serve
Warming Plate
Glass Decanter
Control Panel
Removable Filter Basket
Shower Head
6
COFFEEMAKER FEATURES AND BENEFITS
Your new Oster® Coeemaker has the following features:
• Brewing Capacity – 12 cups – Glass decanter series
• Brew Basket with Removable Filter Basket – The lter basket lifts out for fast
and easy cleaning and lling.
• Pause ‘n Serve – Can’t wait for the coee to nish brewing? The Pause ‘n Serve
feature allows you up to 30 seconds to pour a cup of coee while the coeemaker
is still brewing. Carefully remove the decanter and the Pause ’n Serve feature will be
automatically activated, temporarily stopping the ow of coee into the decanter.
• Non-Stick Warming Plate – This feature allows you to keep your coee hot after
brewing. The non-stick attribute prevents the decanter from sticking to the surface
of the warming plate.
• On/O Indicator Light – Lets you know when your coeemaker is “on”.
• Additional Programmable Control Features:
– Clock – The LED clock serves as a handy kitchen clock and allows you to set
the Delay Brew feature.
– Delay Brew – Would you like to wake up to a fresh pot of coee? The timer
allows you to preset when you would like the coeemaker to automatically
brew your coee, up to 24 hours in advance.
– Aroma Button – Regular or strong brew. Adjusts the brewing time to create
a more full avored coee.
– Two-Hour Auto Shut-O – This safety feature keeps your coee warm for
2 hours after you brew, then automatically turns o.
NOTE: If you have selected any of the operating functions, the coeemaker will act
upon the last operation selected if the power is restored within 10 seconds after
a power outage.
Before using your Oster® Coeemaker
Make sure your rst cup of coee is as good as can be by cleaning your Oster®
Coeemaker before its rst use. Just follow these simple steps:
• Wash the decanter, decanter lid and the lter basket in a mixture of mild detergent
and water. Rinse each thoroughly (please refer to the parts diagram listed above).
• Replace all the parts and close the lid. Then, run a brew cycle with water only, without
adding coee and coee lter.
• When brewing is complete, turn your coeemaker o, discard the water in the
decanter and rinse the decanter, decanter lid, and lter basket.
Your coeemaker is now ready to use. Enjoy it!
1
2
4
5
3
7
6
a
d
c
e
f
g
h
i
b
7
Delay Brew
Program Button
On Indicator Light
Auto Indicator Light
Clock Display
On/O Button
Control Panel
Aroma Button
Auto Button
Minute Button
Hour button


