


SAVE THESE INSTRUCTIONS
This product is for household use only.
• Themaximumratingmarkedontheproductisbasedontheattachmentthat
draws the greatest load. Other attachments may draw less power.
Power Cord Instructions:
Please follow the instructions below to ensure the safe use of the power cord.
• TheOster
®
Versa
®
Performance Blender comes equipped with a three-prong
(grounding) plug. If you do not have a three-prong outlet, you can use with an
adapter to be able to use with a standard 3-prong grounded plug. Do not cut
or remove the third prong from the plug on the power cord.
• Trytopositiontheblendernearthepowersourcetoreducethehazards
associated with power cords (such as becoming entangled or tripping over
a long power cord).
• Donotpull,twistorotherwiseabusethepowercord.
• Donotwrapthepowercordaroundthemainbodyoftheblenderduring
or after use.
• Donotuseanextensioncordwiththisproduct.
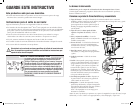
This symbol has been placed in specific areas of the User Guide portion of
this book. Its purpose is to help you easily identify instructions that require
your special attention.
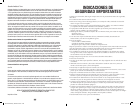
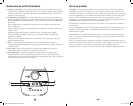
This appliance must be grounded while in use to protect the operator from
electric shock. This product is for use on 120 volts. The cord has a plug (A)
as shown. An adapter (C) (not included) is available for connecting three-
blade grounding-type plugs to two-slot receptacles (B). The green grounding
lug extending from the adapter must be connected to a permanent ground
such as a properly grounded outlet box. The adapter should not be used if a
three-slot grounded receptacle is available.
DO NOT ATTEMPT TO MODIFY THIS PLUG OR DEFEAT THIS SAFETY FEATURE
IN ANY WAY.
3-PRONG GROUNDED PLUG
D
Welcome
Congratulations on your purchase of your Oster
®
Versa
®
Performance Blender. If
you have any comments, questions or inquiries about this revolutionary product,
please call 1-800-334-0759.
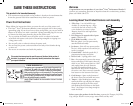
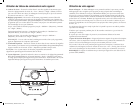
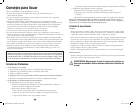
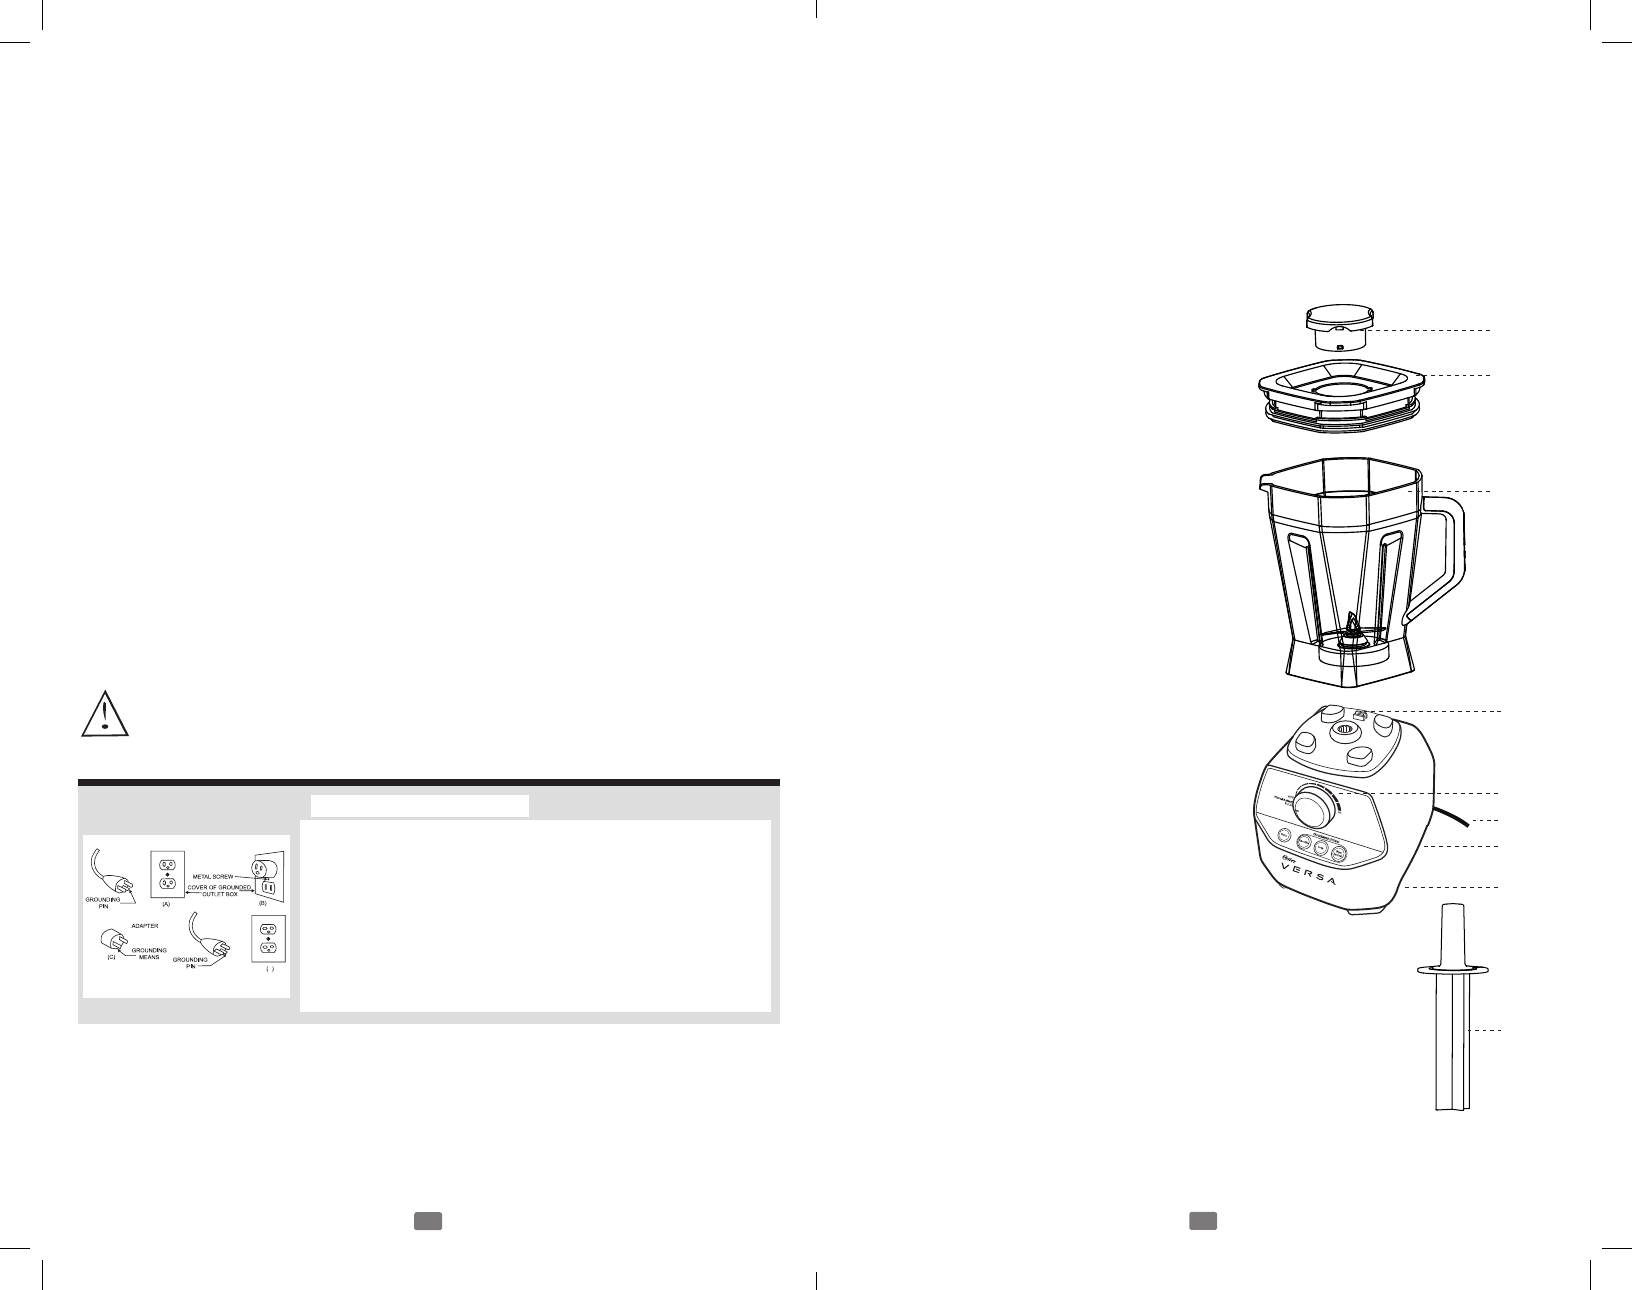
Learning About Your Product Features and Assembly
1. Filler Cap – 2oz/60mlllercap
doubles as a measuring cup. Align
notch with the hole to insert in lid;
turnclockwisetosecureinplace.
Remove from lid to add ingredients
while blending.
2. Lid (Flap goes on opposite side of pour
spout) – Seals the jar.
3. Jar & Blade Assembly – 64oz/2L
BPA-free plastic jar with permanently
attached blade assembly.
4. Jar Sensor - Unit will not operate unless
the jar is fully seated on base and the jar
sensor is engaged.
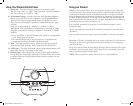
5. Control Panel – Includes speed dial, 3
programmed settings and pulse.
6. Power Cord – 3-prong power cord.
7. Fuse – Incorporated to protect the motor
from overheating. If the motor shuts off
whileinuse:Turncontrolknobto“Off”
and unplug from the wall. Remove
jar from base and free blade of any
obstructions. Wait 30-45 minutes for
the unit to cool. Press external resettable
fuse button on the bottom of the base.
8. Cord Storage – Space on the bottom of
the base to store the cord while not in use.
9. Tamper – After blending has started,
removethellercapandplacethetamper
through the opening in the lid to assist
with pushing the food down to the blade.
Note–thetamperisnotlongenoughto
reach the blade.
Before you use the product for the first time, separate the Tamper, Lid, Filler
Cap, and Jar. Wash in warm, soapy water. Rinse and dry well.
1
2
3
6
5
4
7
9
8
5
4
BLSTVB-RV0-000_13EFSM1 P.indd 5-6 5/17/13 9:51 AM