use
5
number of cups indicated for an automatic drip coffee maker using a
medium grind, unless otherwise indicated.
3. Press the START button.
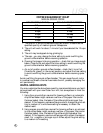
4. While the machine is ON, rotate the GRIND SETTING KNOB to
select your preferred coffee grind setting (see Grind Setting Chart). If
you turn the grind setting knob to the right, the grind will be progres-
sively coarser at each point. As you familiarize yourself with the mill,
you will discover which settings best suit your coffee-making prefer-
ences. For best results always select the grind setting while the unit is
running or when the whole bean hopper is empty.
5. The appliance’s timer will shut off the burr mill when you have ground
the desired amount of beans. If the ground coffee chamber is not cor-
rectly seated while the mill is operating, the auto-off switch will shut
off the appliance.
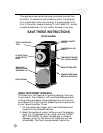
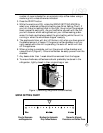
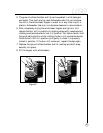
6. When grinding is complete, pull out the ground coffee chamber and
remove the lid (Figure 1). Ground coffee can be easily poured from the
chamber.
7. Any beans older than 1 week should be removed from the hopper.
8. To ensure freshness, coffee beans should preferably be stored in the
refrigerator, tightly closed in their original bag or can.
Figure 1 (removing the ground coffee chamber)
GRIND SETTING CHART
Fine for Espresso
and Cappuccino
Medium for Automatic
Drip Coffee Makers
Coarse for Manual,
Percolator and Coffee Press


