


www.oster.com
www.oster.com
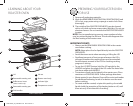
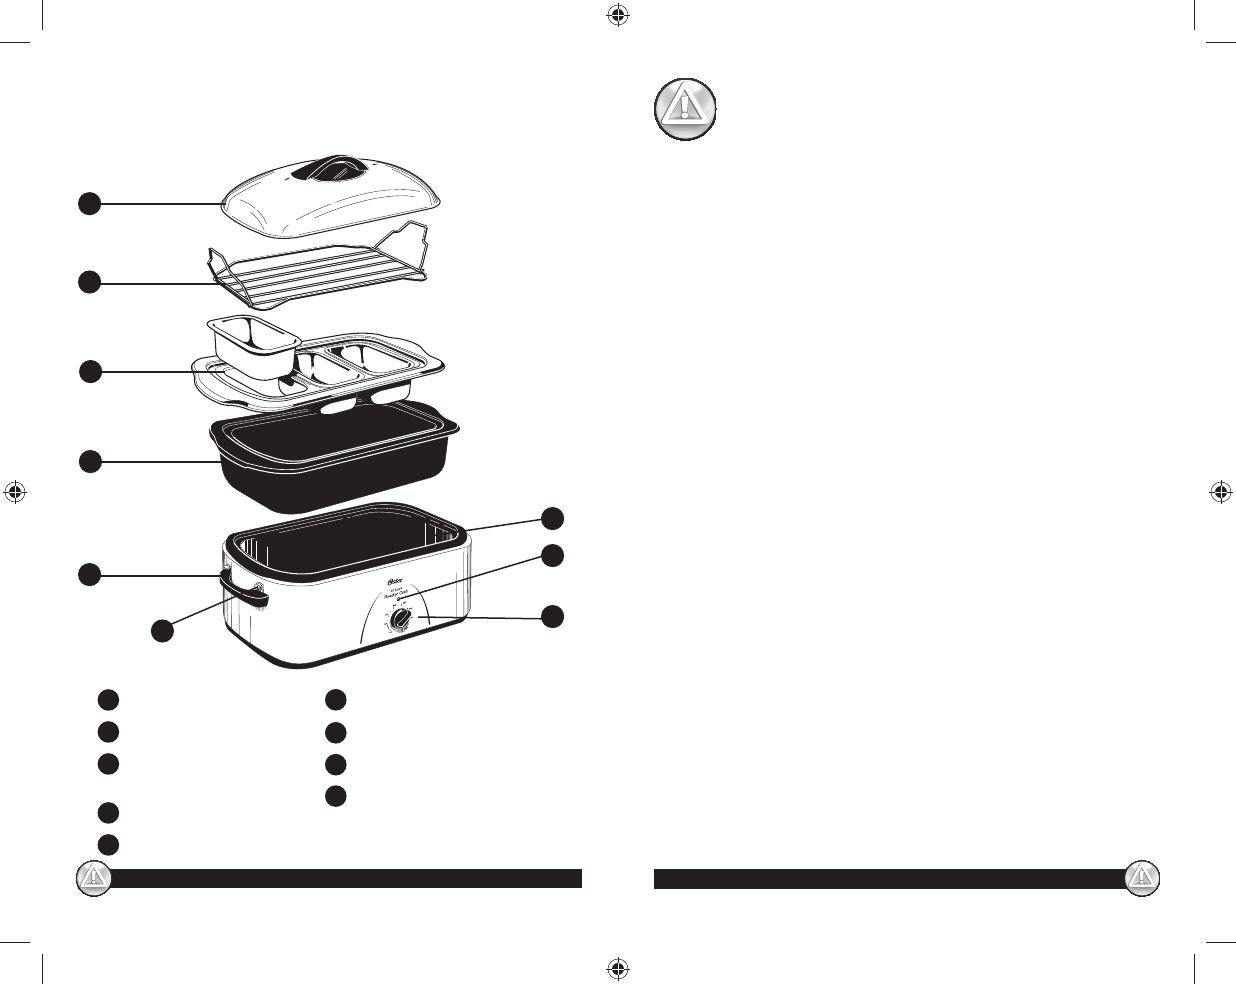
LEARNING ABOUT YOUR
ROASTER OVEN
4
5
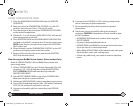
PREPARING YOUR ROASTER OVEN
FOR USE
1 Remove all packaging materials.
2 Wash the REMOVABLE ROASTING PAN, ROASTING RACK and
LID in hot, soapy water using a sponge or wash cloth. Rinse
thoroughly.
3 The outside of the ROASTER OVEN BODY may be cleaned
with a soft cloth and warm soapy water. Wipe dry. Do not use
abrasive cleaners. Do not immerse the ROASTER OVEN BODY
in water.
NOTE: Due to manufacturing process, some smoke and odor
may be noticed during the rst use. This should disappear after
the rst heating of the roaster oven.
IMPORTANT POINTS
• Always use the REMOVABLE ROASTING PAN in the roaster
oven when cooking.
NOTE: Never place food or liquid directly into the ROASTER
OVEN BODY.
• Avoid the steam vents when removing or lifting the LID.
• Signi cant amounts of heat escape whenever the LID is
removed; therefore the cooking time must be extended.
Avoid frequent removal of the LID for checking cooking
progress or stirring.
• To use the LID REST feature, hold the LID upright by the
HANDLE and place the edge of the LID under the metal tabs
just above either side HANDLE.
• Convenience foods can be baked in the roaster oven. Place
container on ROASTING RACK. Follow package directions.
• Meats roasted in your Roaster Oven will be moist and tender.
For additional browning, brush oil or butter over the meat
before cooking.
• To create a darker roasted, crispier skin poultry, do not add
liquids (with the exception of the basting butter or oil) until
there are only 30 minutes left of cooking.
a
b
g
d
h
i
e
c
f
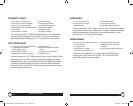
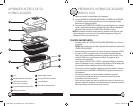
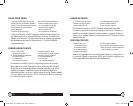
a
Lid
Removable roasting rack
Bu et server insert
(select models only)
Removable roasting pan
Side handles
Lid rest
Roaster oven body
Indicator light
Temperature control
b
c
d
f
g
h
i
e
CKSTRS18_23_10ESM1.indd Sec1:4-Sec1:5CKSTRS18_23_10ESM1.indd Sec1:4-Sec1:5 5/25/10 8:54:53 AM5/25/10 8:54:53 AM