


Preparing To Use Your Countertop Oven for the First Time
If you are using your countertop oven for the first time, please be sure to:
•Removeanystickersfromthesurfaceoftheoven.
•Openovendoorandremoveallprinteddocumentsandpaperfrominsidethe
countertop oven.
•Cleantherack,tray,andpanwithhotwater,asmallamountofdishwashingliquid
and a non-abrasive sponge or cleaning pad.
DONOTIMMERSETHEBODYOFTHEUNITINWATER.
•Drytheunitthoroughlybeforeusing.
•Selectalocationforthecountertopoven.Thelocationshouldbeinanopenareaon
a flat counter where the plug will reach an outlet.
•Plugthecountertopovenintoa120VoltACelectricaloutlet.
The heating elements are designed to work efficiently and maintain a precise
temperature. You may not see the elements glowing, however they are working properly.
PLEASE NOTE – During initial start up, you may detect a slight smell and/or
smoke. Don’t’ worry, this is normal. Turn the temperature to 450° and let oven
heat for approximately 15 minutes to allow the smell or smoke to dissipate.
English-3 | oster.com English-4 | oster.com
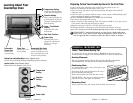
Baking Pan and Broiling Rack
(Select Models Only)
Use for all your baking, broiling and grilling needs. (not shown)
Interior Light
(Select Models Only)
Illuminates oven chamber when in use.
Learning About Your
Countertop Oven
!
GENERAL INFORMATION
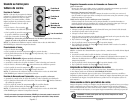
Timer / Toast Shade Setting Tip
To set the timer for less than 20 minutes, ALWAYS turn the timer past the
20-minute mark to engage timer switch and then turn it back to desired time.
Heating Elements
ThetopandbottomheatingelementswillcycleONandOFFtomaintainthe
desiredtemperature.Youmaynotseetheheatingelementsglowing.
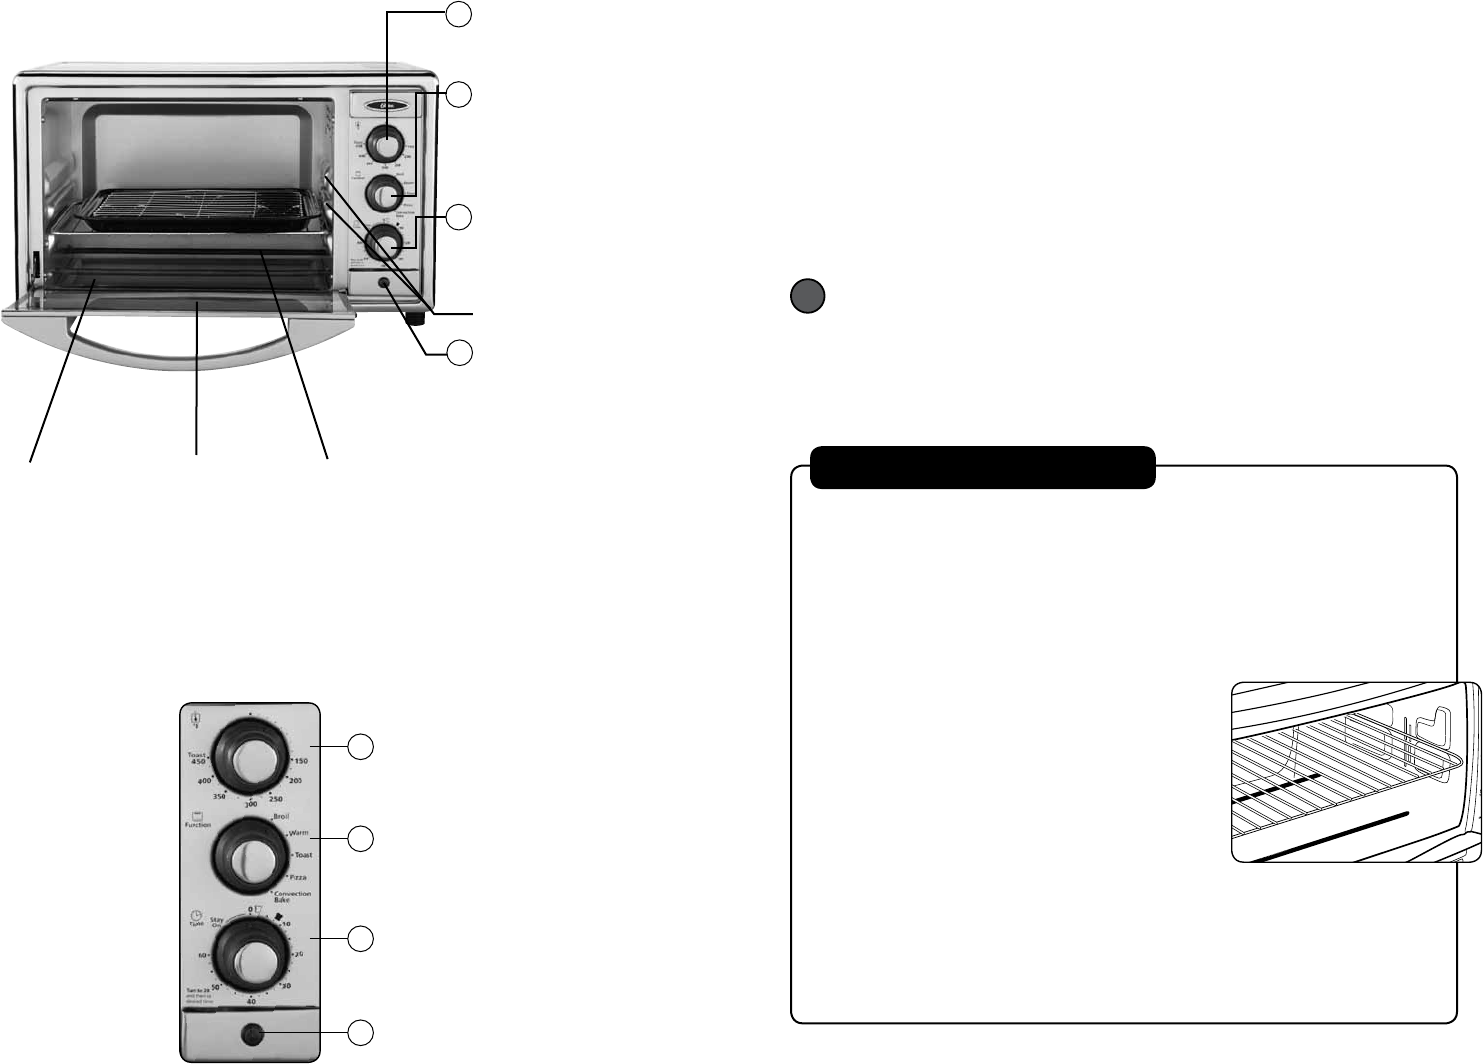
Positioning Rack
To accommodate a wide variety of foods the oven
has two rack positions.
Positioning of the rack will depend on the size of
the food and desired browning.
Before removing the rack allow the unit to cool.
PLEASENOTE–Forbesttoastandpizzaresults,
position the rack in the upper rack position.
Removing Food
Always open door fully and remove food carefully with oven mitt.
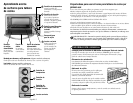
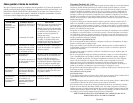
Removable Wire Rack
To accommodate a wide
variety of foods, the oven
has a removable wire rack
and two rack positions.
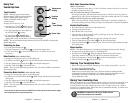
2 Temperature Setting
Adjust the dial thermostat
to the desired temperature
.
1 Function Setting
Select cooking function by
pressing button of desired
setting or turning Knob to
desired setting
Removable
Crumb Tray
Pulls out for
easy cleaning.
Glass Door
Allows you to see
food cooking.
Two Rack Positions
2
1
3
4
Temperature
Setting
Function
Setting
Timer
/ Toast Setting
Power Light
4 Power Light
Indicates that oven is
plugged in and that the
timer is set to begin
warming.
3 Timer / Toast Shade
Setting
Adjust the dial to the
desired time.