2
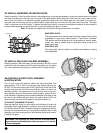
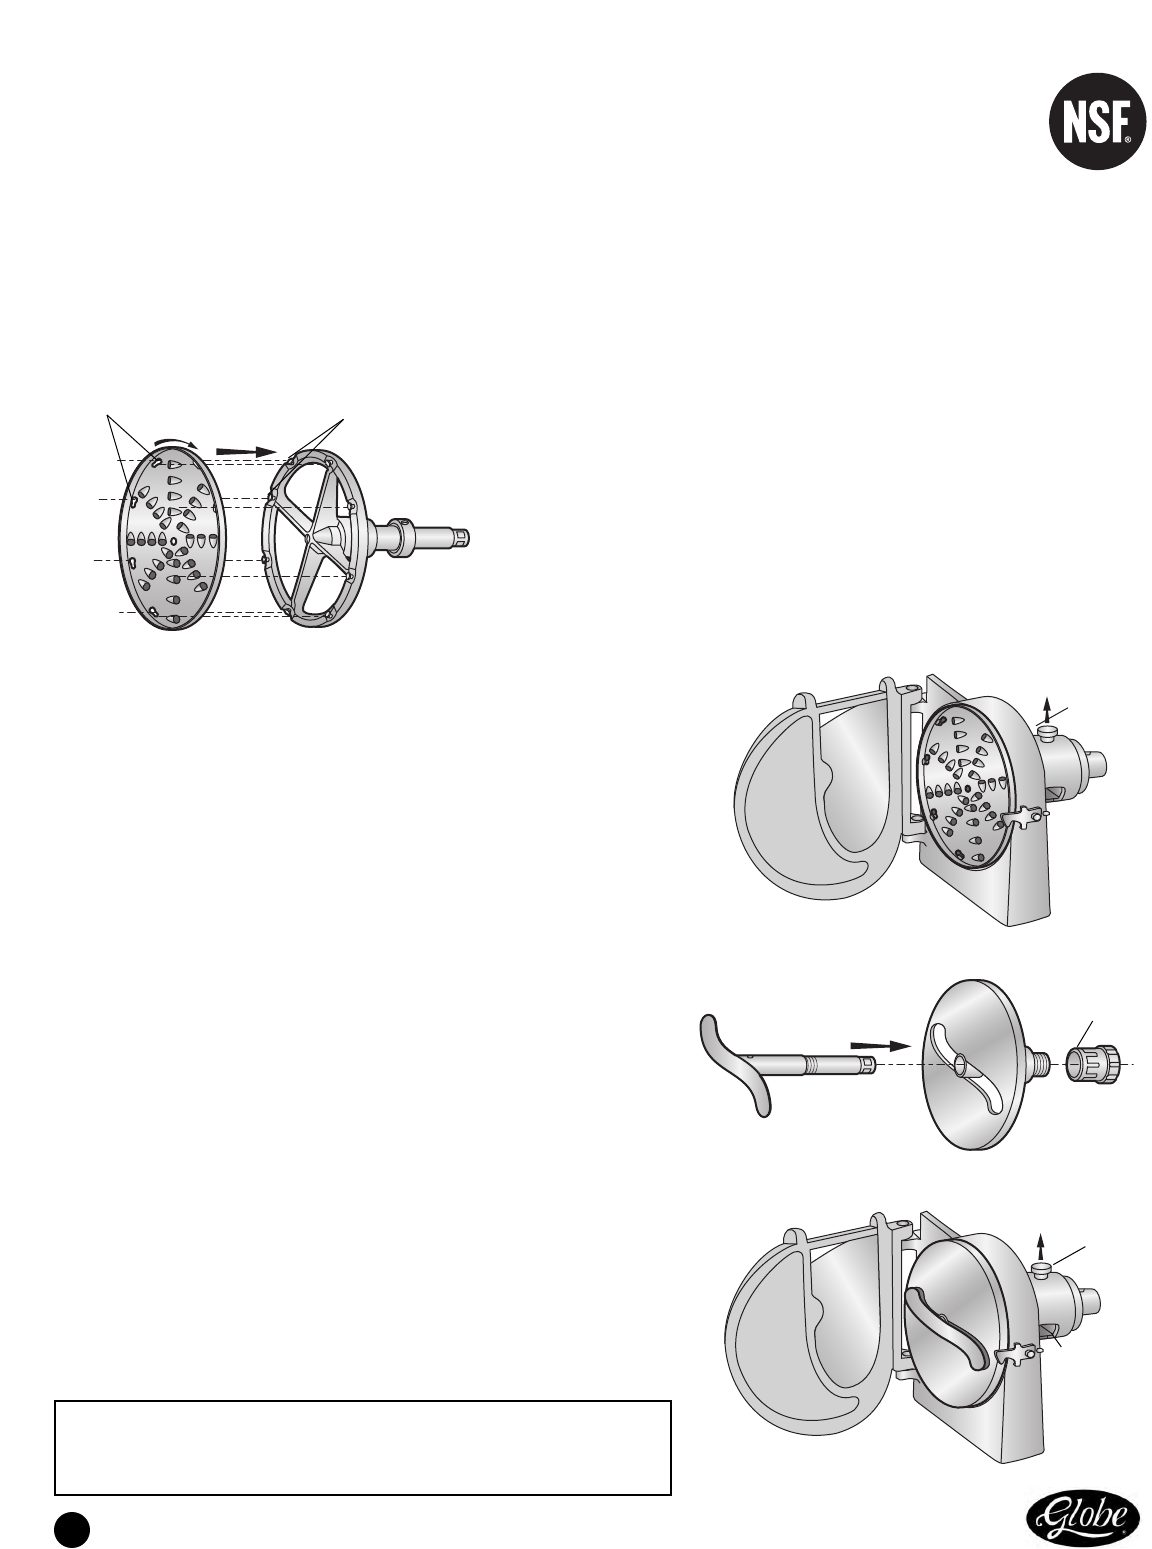
TO INSTALL SHREDDER OR GRATER DISCS
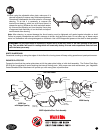
Stop the machine. Orient the plate with the cutting edge away from the shaft assembly. Locate the keyhole slots on the plate
and slide the wide part of the slots over the studs on the plate holder. When the plate is flush with the holder, rotate it clock-
wise to lock it in position. It is possible to loosely assemble the plate to the hub (sharp edge out), then place it on a work sur-
face (the teeth on the plate will mar a finished table). Press down and turn the hub until plate locks into place.
The sharp
"teeth" should face out on the holder. To detach the plate from the hub, reverse the installation procedure. A safe method is
to use protective gloves and press the palm of one hand against the plate to rotate it.
Note: The plates are slightly bent to provide holding pressure when in position.
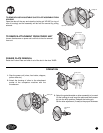
TO INSTALL XPH PLATE HOLDER ASSEMBLY
Stop the machine. With door open, pull the locking pin XP1007 up and
insert XPH until the square end of the shaft fits snugly into the power
unit. Then release the locking pin to hold the XPH in proper position.
Keyhole Slots
Studs
Open Door
Locking Pin
ADJUSTABLE SLICER PLATE ASSEMBLY
& INSTALLATION
Turn off and unplug the machine. Adjust the slicing thickness from
approximately 1/16" to 5/8" by turning the gray plastic adjusting nut
XP1022. Lift the silver locking pin XP1007 on the top of the rear of the
housing and open the front door and slide the slicer unit back into
operating position. The square end of the shaft may have to be man-
ually rotated to seat into the machine socket properly. Secure the unit
to the machine by tightening the pointed thumbscrew in the hole on the
top side of the attachment hub. Attach the pusher plate XVSP and
close and latch the door XVSD before turning the machine on.
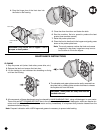
TO ADJUST THICKNESS OF SLICES
Stop the machine. While you can adjust the thickness of slices with
Adjustable Slicer Plate Assembly in position, by turning the gray plas-
tic
Adjusting Knob XP1022, accessed through the opening in the rear
housing, we recommend that you remove the Adjustable Slicer Plate
Assembly from the housing and turn the Adjusting Knob while careful-
ly holding the plate.
Adjustment
Nut
Open Door
Locking Pin
Adjustment
Nut Access
CAUTION: The adjusting nut turns with the shaft and adjust
-
ments should not be attempted unless the power unit is turned
off and unplugged.
SHREDDER PLATE
The coarse plates are normally used for making chopped slaw, cutting
vegetables for soup stock, salad blends or "hash brown" potatoes.
The medium and finer plates are for fine shredding of carrots, beets,
turnips, etc., and for salads. See our application chart at the end of
these instructions.
GRATER PLATE
The grater plate may be used for crumbling hard cheese or grating
hard vegetables.


