1 Press
2 Select the desired oven
temperature
3 Press
☛ The oven begins to preheat. Do not open the door during preheating.
4 Place the Food
After preheating 3 beeps will be heard and “P” will blink in the display.
5 *Set Cooking Time
(up to 9 hours and 59 minutes)
6 Press
19
Operation & Hints
To Cook on Convection
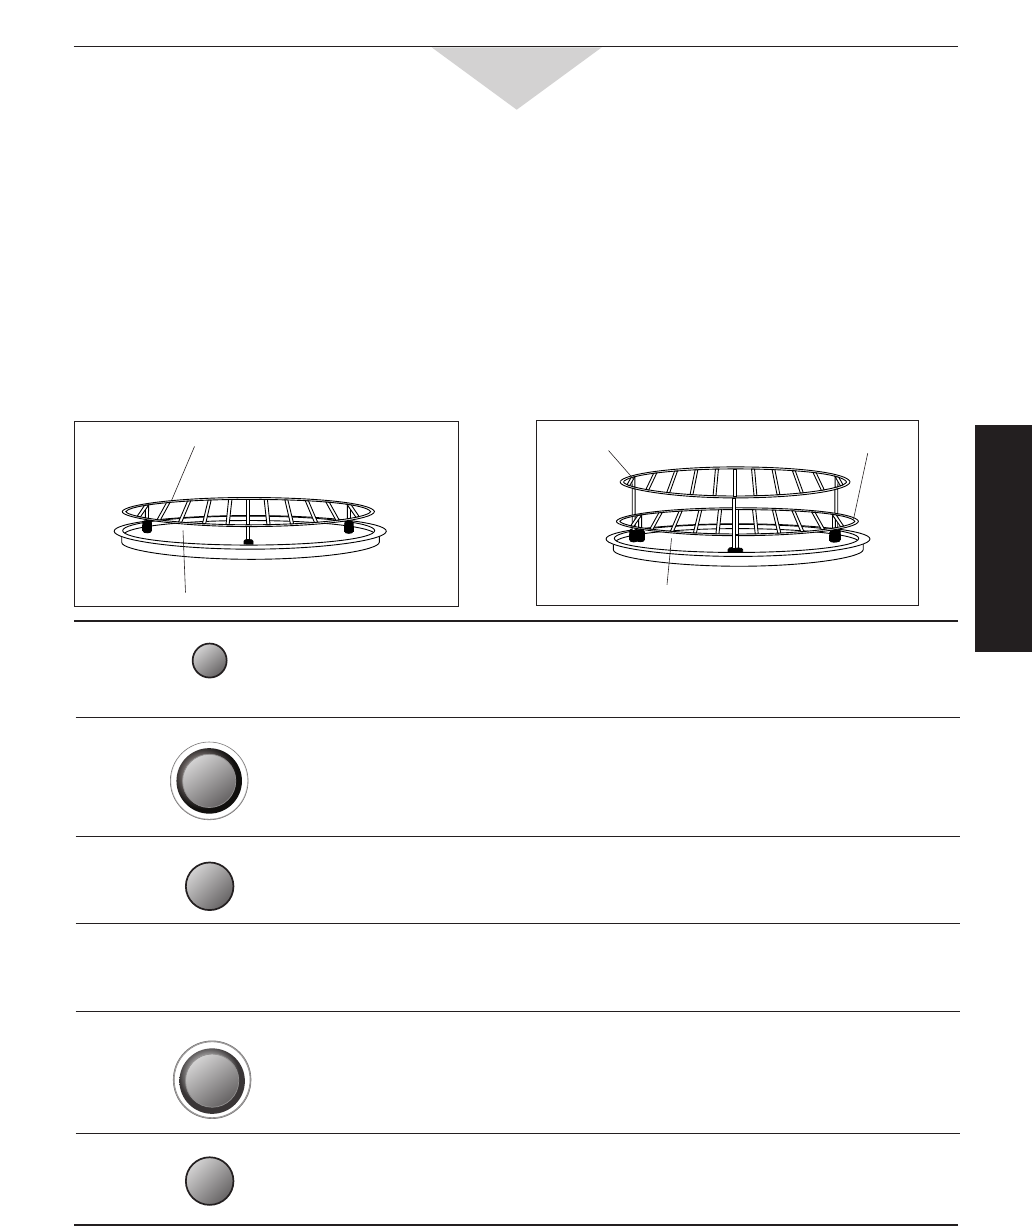
Use of Accessory:
NOTE:
1. Place Ceramic Tray correctly in the oven before preheating.
2. If the oven door is not opened after the completion of preheating, the oven will maintain the selected
temperature for 30 minutes. After 30 minutes, the oven will shut off automatically and revert to the time of
day.
3. If preheating is not required for the food you are cooking, eliminate step 2.
4. When selected cooking time is less than one hour, the time counts down by minutes and seconds.
5. When selected cooking time is more than one hour, the time counts down by hours and minutes until only
“1H 00 (1 hour)” remains. The display then counts down by minutes and seconds.
Ceramic Tray
Low Rack
1 Level Convection:
Just like a conventional oven, the convection oven
has a heating element to give the dry heating
needed to produce crisp, browned exteriors.
Convection cooking has the addition of a fan to
produce conventional results with a slightly reduced
cooking time. Convection cooking temperatures
range from 100˚C to 250˚C. Most conventional
recipes will be suitable for use. Follow the minimum
suggested cooking times and add additional time if
required. Convection recipes are also available
throughout the recipe section.
2 Level Convection:
2 Level Convection is available for when you wish to
cook a larger quantity of food. The entire oven cavity
may then be utilised. For example, cooking two
trays of biscuits Foods placed on Low Rack may
require a slightly longer cooking time than those on
High Rack.
Use of Accessory:
Ceramic Tray
Low Rack
High Rack
e.g.
Time can be entered 1 min intervals.
*
☛ Cooking will start.
Conv.Bake
Temperature/ Menu Select
Start
Time/Weight
Start


