


4
Perlick is committed to continuous improvement. Therefore, we reserve the right to change specifications without prior notice.
How to Operate – Beer Pump Panels
■ Adjust primary CO2 regulator by turning
adjusting screw counterclockwise until it turns
freely, then turn hand valve counterclockwise
on CO2 cylinder to the fully open position. Next,
turn regulator adjusting screw clockwise until
required system pressure plus an additional 15
psig is reached.
Note: If CO2 is only being used for keg-
applied pressure, adjust to approximately
40 psig.
Note: If using air to drive beer pumps,
adjust the air compressor output regulator
pressure to a minimum of 15 psig. greater
than the maximum required system
pressure required to operate the beer
pumps. Maximum setting 100 psig.
■ Adjust secondary CO2 regulator which
supplies the keg pressure located on the
beer pump panel to the proper pressure
setting. Setting depends on beer brand and
temperature. Desired goal is to maintain the
natural carbonation in the beer. Open the shut-
off valves.
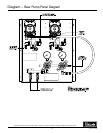
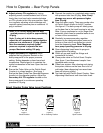
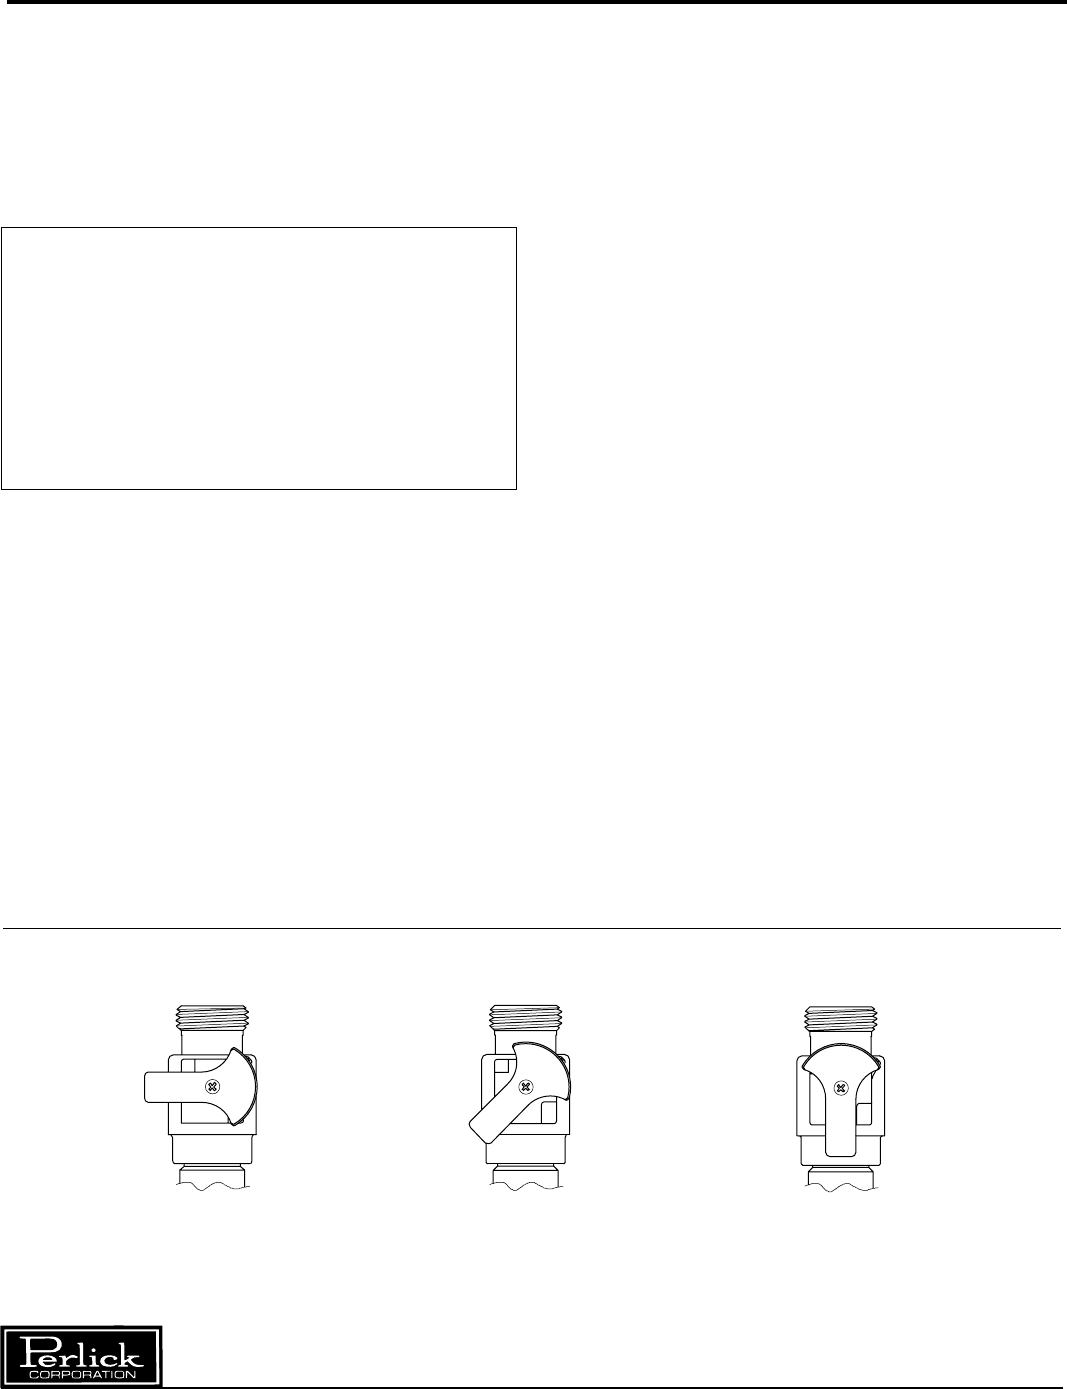
■ Ensure the Probe Valve on the Perlick Smart
Coupler is in closed position. See figure 1.
Ensure the Beer Pump Flow Reversal/Dispense
handle is in the dispense position. Adjust the
Secondary Air/ CO2 regulator located on the
beer pump panel to a minimum operating
pressure of 10 psig.
■ Connect the coupler to a regulated water supply
with pressure less than 30 psig. Note: Pump
damage may occur with pressure higher
than 30 psig.
■ Open the water supply. Then open probe valve
on Perlick Smart coupler to the 45° position.
See figure 2. The beer pump will slowly pump
up the beer line in the trunk housing to set psig.
Note: If pump continues to run for longer than
expected, check lines for possible leaks at one
or more of the connections.
■ Gradually increase secondary regulator
pressure to the designed system pressure to
achieve a flow rate of one gallon per minute
from the dispensing head. Note: Maximum
beer pump operating pressure is 90 psig.
■ Open dispensing head faucet to purge air
trapped within the tubing.
■ Check all gas and liquid line fittings and
connections for leaks.
■ Close probe valve on Perlick Smart Coupler.
(See figure 1) and disconnect coupler from
regulated water source.
■ Clean beer system. After cleaning and rinsing
the system, make sure the beer line is full of
cold water (beer dispensing from warm beer
lines will be poor quality).
■ Tap fresh keg with Perlick Smart Coupler. Open
dispensing head faucet until clear beer flows.
Figure 1
Closed Position
Figure 2
45° or Cleaning Position
Figure 3
Open Position
Smart Coupler Probe Valve Lever Positions
Form No. Z2149A
Rev. 10.11.06