


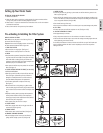
5
Proper Care and Cleaning
WARNING!
• Always unplug the unit before cleaning to avoid electric shock.
SECTION I-PERIODIC CLEANING
• Hand-wash all components: Reservoir, filter tray, fill tank, fill tank cap, drip tray basin,
drip tray grille and float valve with mild soapy water. Rinse each component with
water.
SECTION II-ANNUAL CLEANING
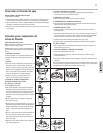
1. Turn off all-3 switches on the back of the unit and unplug electrical cord from wall.
2. Remove and drain fill tank.
3. Remove water from unit by placing a 3-gallon bucket under the drain plug. Unscrew
drain plug to release water into the bucket. Caution-water could be hot. Replace drain
plug.
4. Dispense remaining water by pressing cold temperature button (marked with blue
waves), room temperature button (gray waves) and hot temperature water (marked
with red waves) into a large glass.
5. Remove the filters from the unit and throw them away to ensure unit is completely
clean.
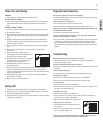
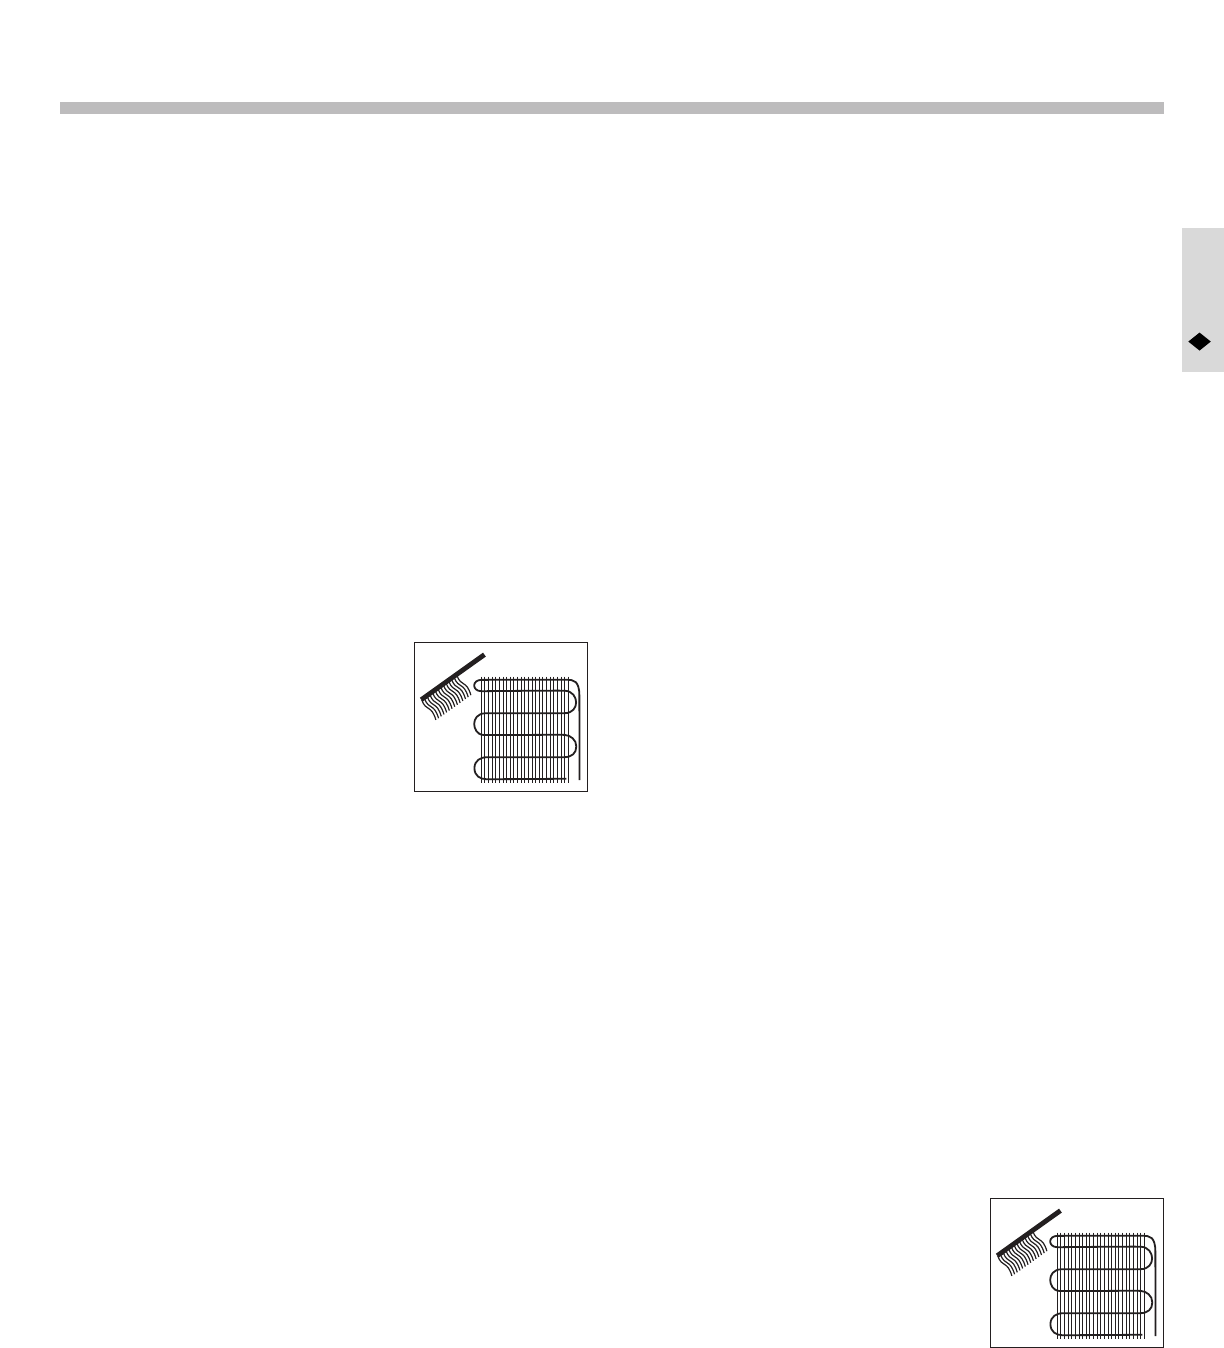
6. Vacuum or brush the condenser coils on the rear of the unit if dust is present.
(See figure 13)
7. Prepare a solution of 4 tsp (20ml) of common
household bleach (5.25% sodium hypochlorite) to 1
gal (4 liters) of room temperature water.
8. Pour the bleach solution into the fill tank. Put the fill
tank back onto the unit. Let bleach solution flow
through the unit and wait for 5 minutes.
9. Drain all the bleach solution from the cooler by
repeating steps 3 and 4.
10. Rinse the cooler by filling the reservoir with clean water and draining by repeating
steps 3 and 4 to remove water. Repeat rinsing step one more time to ensure the
system is thoroughly rinsed. Wipe away any residue on each part including the chilling
area with a clean damp cloth.
11. Install new filters and refill the unit with water. (See Pre-activating & Installing the
Filter System for more details.)
12. Plug-in unit and turn on all power switches.
Storing Unit
1. Follow steps 1-6 under the Proper Care and Cleaning Section II-Annual Cleaning.
2. When moving, the unit must be stored vertically. DO NOT store the unit on its side as
this may cause possible damage to compressor.
3. When removing the unit from storage, you may want to follow the direction suggested
under Proper Care and Cleaning.
13
Frequently Asked Questions
How long will it take for the water to filter through?
• The system will take less than 1 hour for the water to filter through and chill or heat the
water to be ready for dispensing.
Does the filter dry up if I don’t use it?
• Yes, the filters can dry up if left dry for any period of time.
• Repeat Pre-activating and Installing the Filter System directions, steps 1, 4 & 5.
Where will we be able to find
P
¯
U
R
Ultimate (CRF-950) Replacement Filters for
the
P
¯
U
R
Water Filtration System?
• The filters may be purchased at most retail outlets.
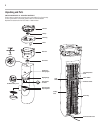
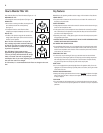
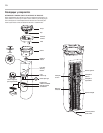
I found an extra white part the shape of a circle with a pole sticking out the
center on one side. What do I do with it?
• This is called a baffle - it helps separate the room temperature water from the cold water
in the chilling area. The chilling area is underneath the reservoir. Remove the fill tank,
filter tray and reservoir to access the chilling area. Refer to the illustration on page 2.
With the pole end in, insert the baffle inside the unit and resecure the pole into the hole
provided.
Troubleshooting
Unfiltered water leaks into the filtered water reservoir.
• Check that the filter that has been twisted firmly into place. (See Pre-activating &
Installing the Filter System, step 7)
The Filter Life Indicator doesn’t seem to be moving.
• Remove the filter cartridge from the fill tray and rinse under tap water for a few seconds
and replace.
Cannot remove the filter tray.
• To remove the filter tray, grasp the top of the filters firmly and lift up to remove.
The unit does not operate.
• Check if the unit is plugged in and the power switch is in the ON position.
• Check your house circuit breaker to make sure there is power at the outlet.
Hot water isn’t hot
• Check if the hot water switch is in the ON position.
• Too much hot water may have been used in too short a period of time. Wait for the indi-
cator light to turn off before dispensing.
The cold water isn’t cold.
• Check if the power switch is in the ON position.
• Too much cold water may have been used in too short a period of time. Wait for the
indicator light to go out before dispensing water.
• Adjust the cold water temperature knob closer to max.
Compressor runs too frequently.
• On hot and humid days, the compressor needs to run
more frequently.
• Vacuum or brush the condenser coils on the rear of the
unit if dust is present. (See figure 14)
If you have tried the recommended suggestions for troubleshooting and you are still
encountering problems with your unit, please call 1-800-447-0457.
14
ENGLISH
1
ENGLISH
1