


4
ArtNo.303-0001 Setting the clock 1
ArtNo.303-0002 Setting the clock 2
Fig.2-4
ArtNo.303-0003 Setting the minute timer
Fig.2-5
Fig.2-6
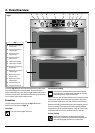
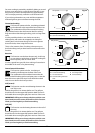
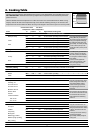
Fan and grill (full)
This function operates the fan while using the
heating elements in the roof of the oven. This
produces a more even, less fierce heat than a
conventional grill.
This is an ideal method of grilling thick pieces of meat and
fish, since the circulated air reduces the fierceness of the heat
from the grill.
For best results, place the food to be grilled on a grid over a
roasting tin, which should be smaller than a conventional grill
pan. This allows greater air circulation.
Preheat the oven for 5-10 minutes before use.
IMPORTANT: Grilling must always take place with the oven
door closed to ensure correct performance of this function.
Check your food regularly to avoid overcooking. You will
find that the food will need to be turned less than normal
grilling.
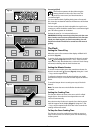
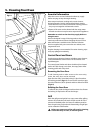
The Clock
Setting the Time of Day
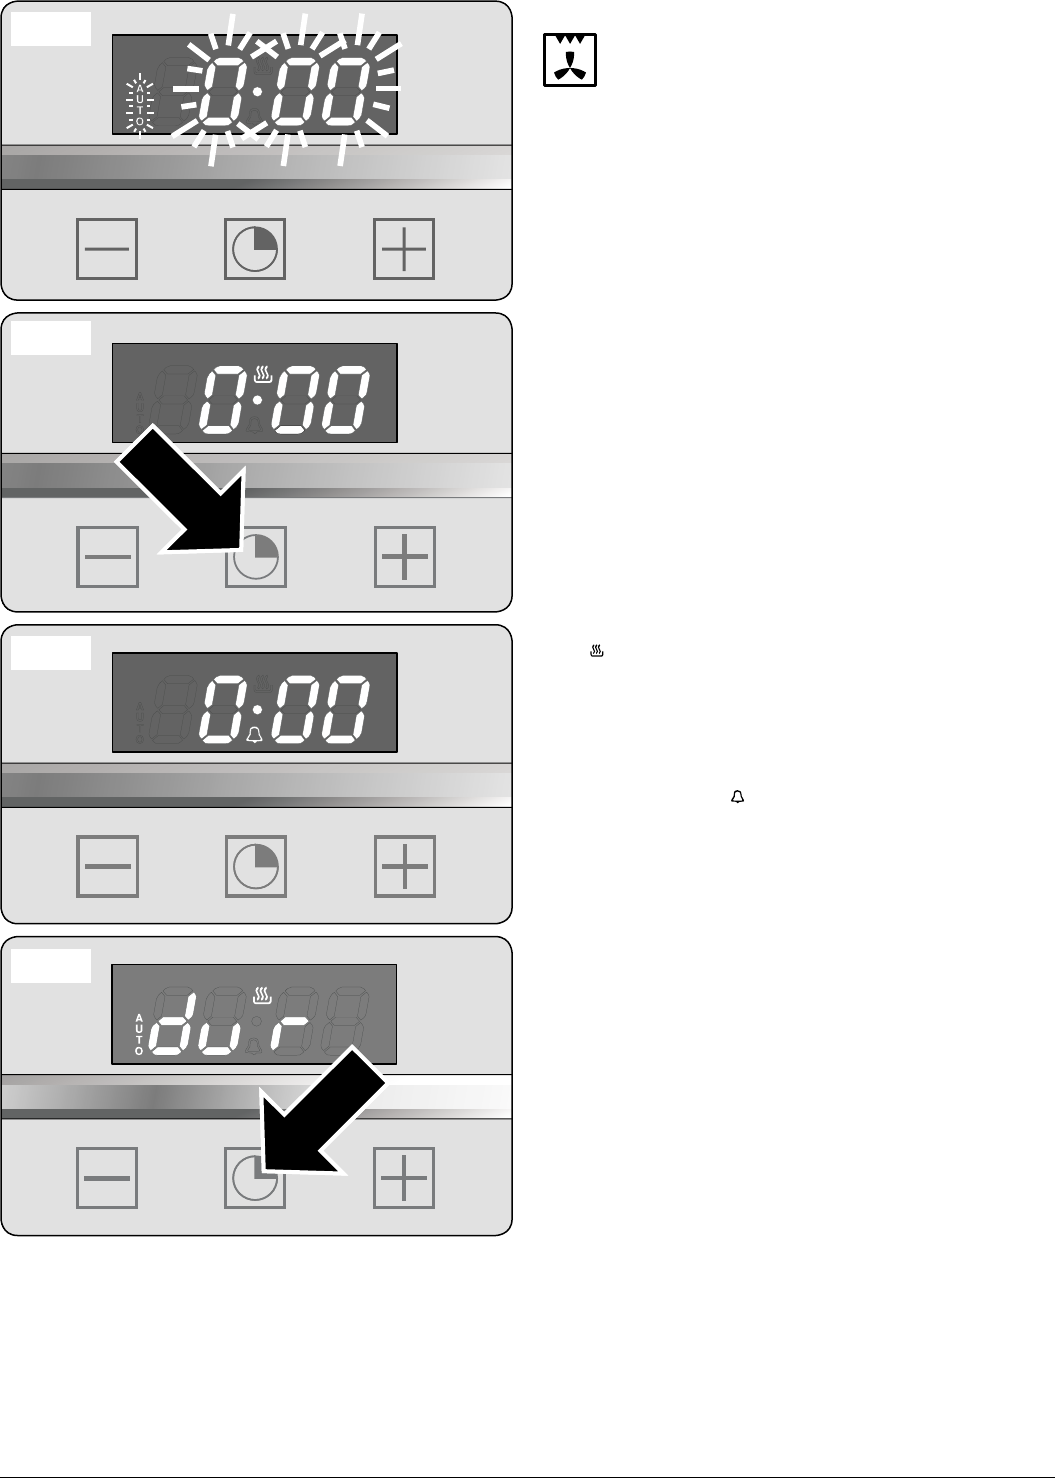
When the oven is first connected the display will flash ‘Auto’
and ‘0:00 ’ (Fig.2-4).
To set the clock, press the central button for about 3 seconds
until [
ArtNo.030-0010 TC
timer symbols
] appears (Fig.2-5). Use the ‘+’ and ‘–‘ keys to set the
correct time of day. Remember this is a 24-hour clock. A beep
will sound, indicating that the clock has been set.
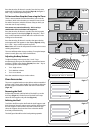
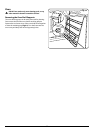
Setting the Minute Counter
To set the minute minder, press the central timer button for
about 3 seconds until [
ArtNo.030-0010 TC
timer symbols
] appears (Fig.2-6). Using the ‘+’ and
‘–‘ keys, set the required time.
To adjust the duration once the timer has been set, simply
press the timer key for 3 seconds and then adjust the time as
above.
To stop the beeper when it sounds, press any of the clock
buttons.
Note: The oven does not switch off after the alarm has
sounded.
Setting the Cooking Time
This function allows the oven to be set to cook for a fixed
length of time. Once the time has elapsed the oven will
switch off automatically.
Press the timer key for about 3 seconds. Press the key again
until ‘dur’ appears in the display (Fig.2-7). Using the ‘+’ and
‘–‘ keys, set the required ‘cook time’. After a few seconds the
settings will be memorised.
To Stop the Oven Cooking Time
This function is used to set the time at which an oven is to
stop. It can be set to turn off at any time over the following
24-hour period.
ArtNo.303-0004 Setting the cooking time
Fig.2-7
ArtNo.030-0006
9-function oven
symbols
ArtNo.030-0006
9-function oven
symbols
ArtNo.030-0006
9-function oven
symbols
ArtNo.030-0006
9-function oven
symbols
ArtNo.030-0006
9-function oven
symbols
ArtNo.030-0006
9-function oven
symbols
ArtNo.030-0006
9-function oven
symbols
ArtNo.030-0006
9-function oven
symbols
ArtNo.030-0006
9-function oven
symbols