5
The Clock
Setting the Time of Day
When the oven is first connected the display will flash ‘Auto’
and ‘0:00 ’ (Fig.2-4).
To set the clock, press the central button for about 3 seconds
until [
ArtNo.030-0010 TC
timer symbols
] appears (Fig.2-5). Use the ‘+’ and ‘–‘ keys to set the
correct time of day. Remember this is a 24-hour clock. A beep
will sound, indicating that the clock has been set.
Setting the Minute Counter
To set the minute minder, press the central timer button for
about 3 seconds until [
ArtNo.030-0010 TC
timer symbols
] appears (Fig.2-6). Using the ‘+’ and
‘–‘ keys, set the required time.
To adjust the duration once the timer has been set, simply
press the timer key for 3 seconds and then adjust the time as
above.
To stop the beeper when it sounds, press any of the clock
buttons.
Note: The oven does not switch off after the alarm has
sounded.
Setting the Cooking Time
This function allows the oven to be set to cook for a fixed
length of time. Once the time has elapsed the oven will
switch off automatically.
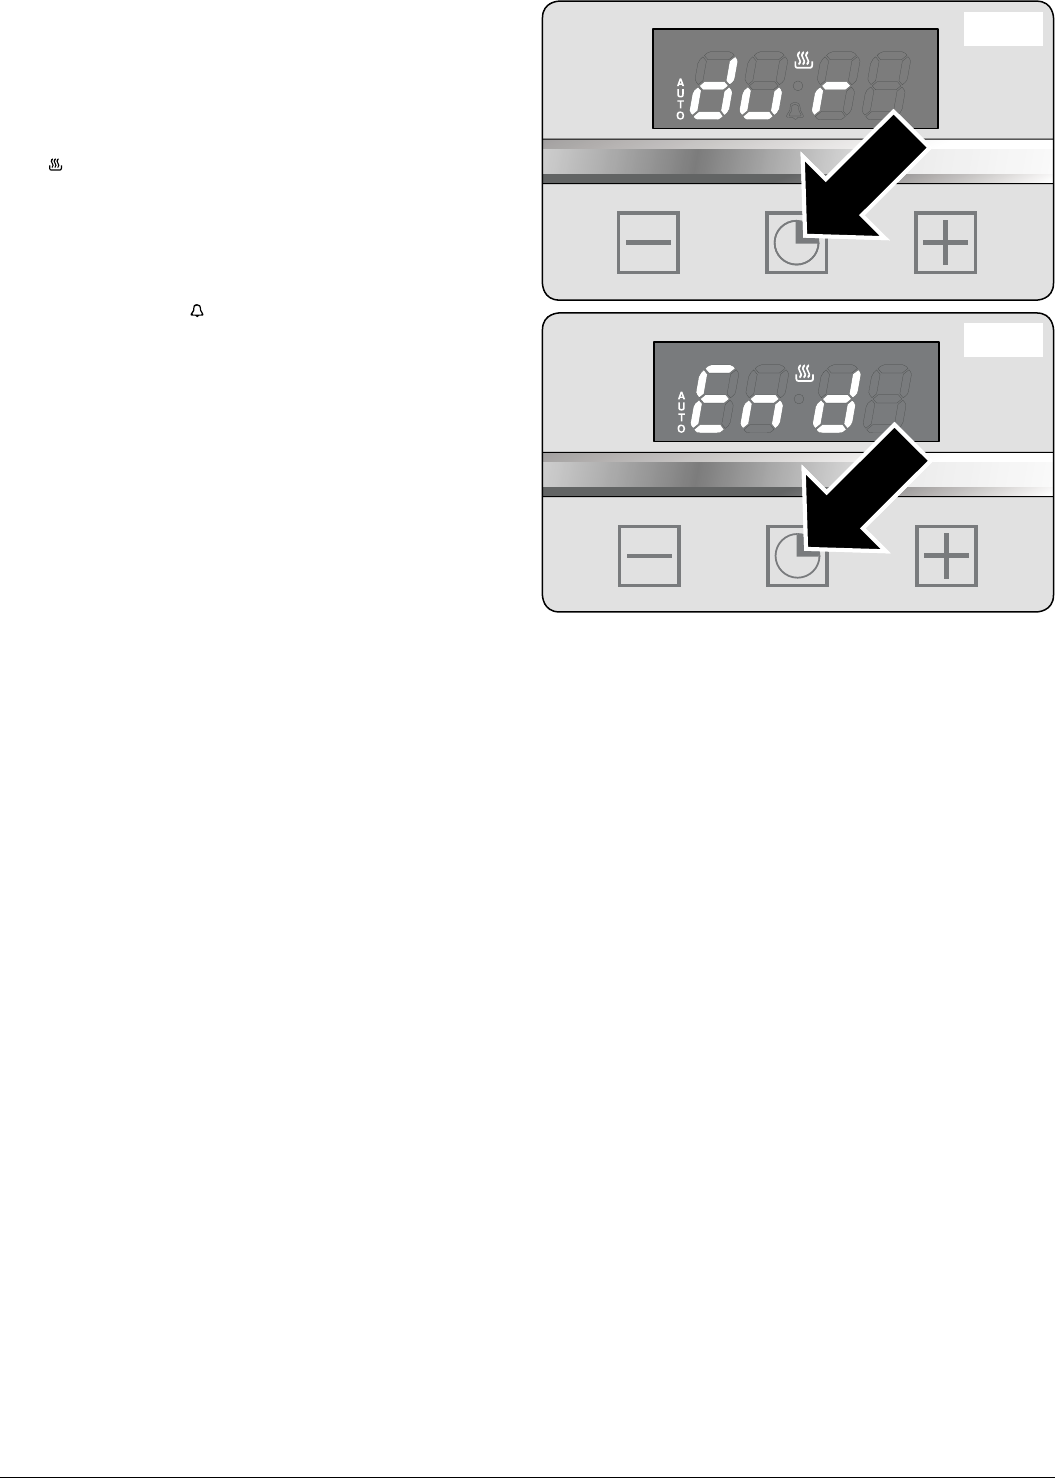
Press the timer key for about 3 seconds. Press the key again
until ‘dur’ appears in the display (Fig.2-7). Using the ‘+’ and
‘–‘ keys, set the required ‘cook time’. After a few seconds the
settings will be memorised.
To Stop the Oven Cooking Time
This function is used to set the time at which an oven is to
stop. It can be set to turn off at any time over the following
24-hour period.
Press the timer key for about 3 seconds. Press the key twice
again until ‘End’ appears in the display (Fig.2-8). Using the ‘+’
and ‘–‘ keys, set the required ‘stop time’.
To Start and then Stop the Oven using the Timer
This is a semi-automatic function that allows you to set the
‘cook time’, which is the duration you want the oven to cook
for and the ‘stop time’, which is the time of day at which you
want the oven to stop cooking.
You cannot set a start time directly – this is set by a
combination of the ‘cook time’ and ‘stop time’.
Press the timer key for about 3 seconds. Press the key again
until ‘dur’ appears in the display (Fig.2-7). Using the ‘+’ and ‘–‘
keys, set the required ‘cook time’. Wait a few seconds for the
settings to be memorised.
Press the timer key for about 3 seconds, then press the key
twice again until ‘End’ appears in the display (Fig.2-8). Using
the ‘+’ and ‘–‘ keys, set the required ‘stop time’.
Note: Make sure to set the temperature control to the correct
cooking temperature.
ArtNo.303-0004 Setting the cooking time
Fig.2-7
ArtNo.303-0005 Setting the end time
Fig.2-8


