


11
INSTALLATION
Check the appliance is electrically safe when you have finished.
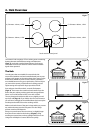
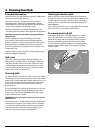
Positioning the Hob
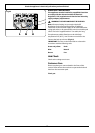
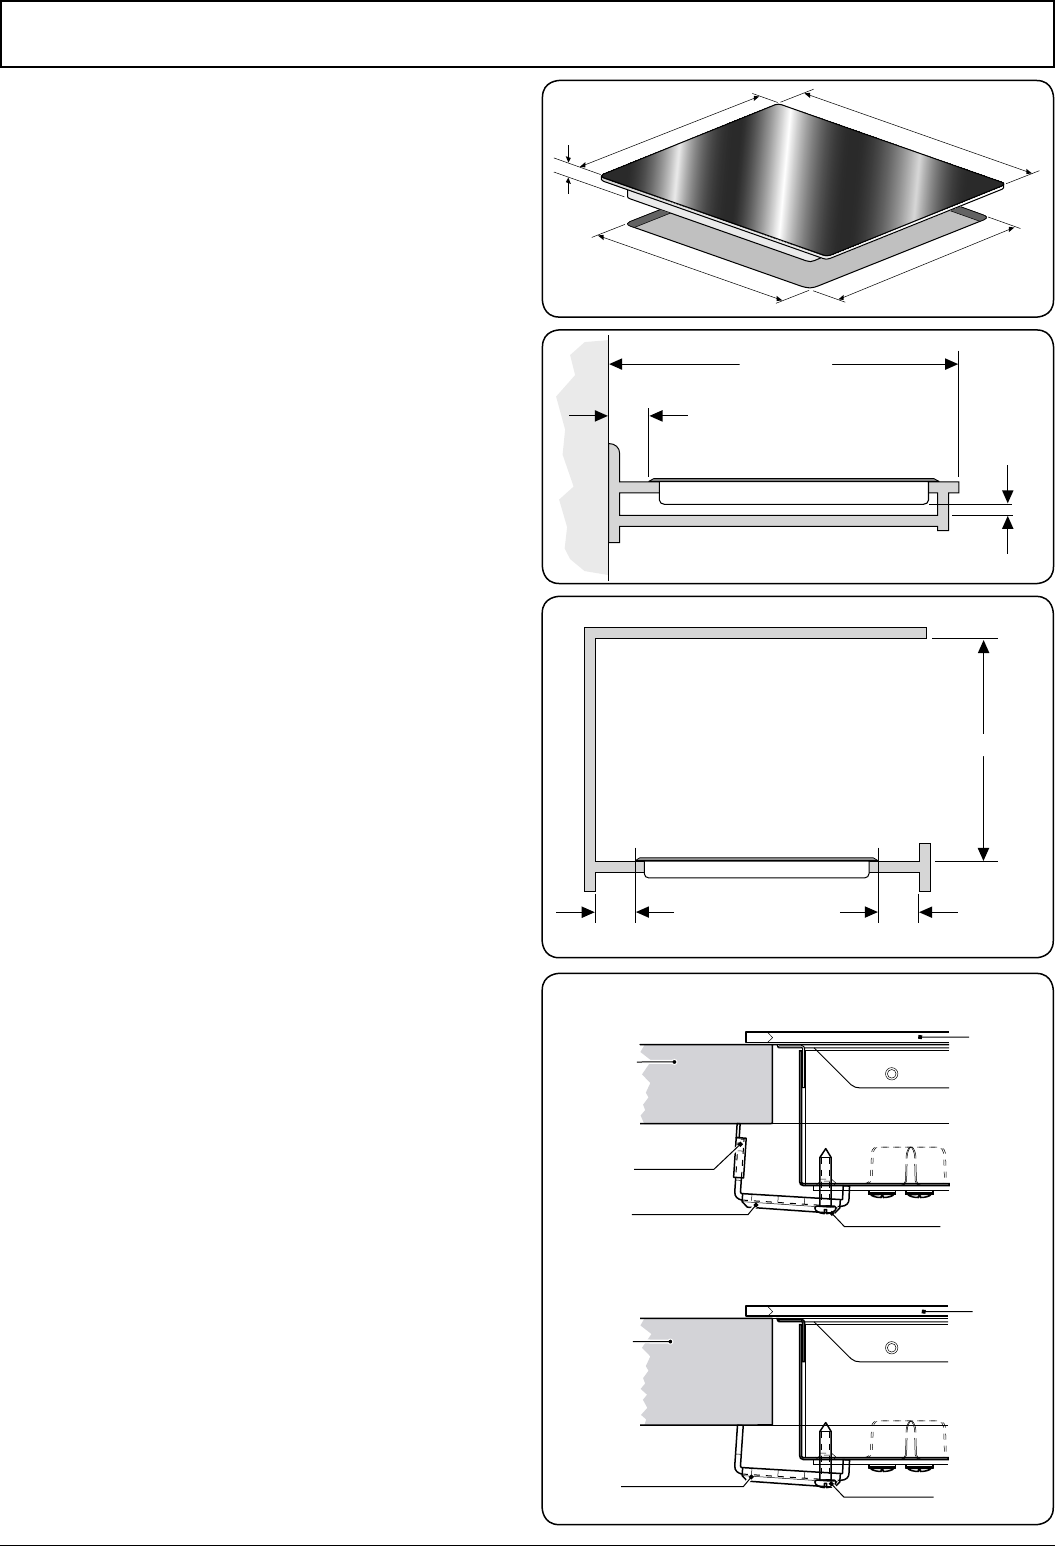
The hob should be fitted into a work surface, which is at least
600mm deep. In position, it has a maximum thickness of 5mm
from the top of the work surface. The cut-out dimensions are
shown in (Fig.5-1) and the minimum clearances in
(Fig.5-2). The minimum recommended distances from the
hob to nearby surfaces are shown in (Fig.5-3).
Any hob hood should be installed in accordance with the
hood manufacturer’s instructions.
Surfaces of furniture and walls at the sides and rear of the hob
should be heat, splash and steam resistant. Certain types of
vinyl or laminate kitchen furniture are particularly prone to
heat damage and discolouration.
We cannot accept responsibility for damage caused by
normal use of the hob to any material that de-laminates
or discolours at temperatures less than 65°C above room
temperature.
For safety reasons curtains must not be fitted immediately
behind the hob.
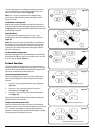
Fixing the Hob
The hob must be sealed to the work surface to prevent liquid
from entering into the cabinet. A tape seal is supplied with
the hob.
Carefully follow these instructions to correctly apply the
seal: Turn the hob over and place in on a secure, level
surface. Detach the seal from the backing, checking that the
transparent protection still adheres to the seal itself. Carefully
position the seal along the edge of the hob. Take special care
in the corners making sure there are no gaps. The ends of the
strips must fit together without overlapping.
If the surface that the hob is to be fitted to is tiled or is not
reasonably smooth, additional sealing with a waterproof
silicone sealant may be required.
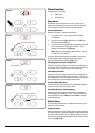
Turn the hob back the right way up and position it in the
worktop cut-out.
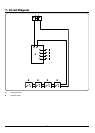
Secure the hob to the worktop using the brackets supplied.
The positioning of the bracket is dependent on the thickness
of the worktop as shown in (Fig.5-4).
Note: Slide the optional sleeve onto the bracket if fitting to
thin work surfaces.
Locate the bracket to the slot on the hob base and then
tighten the retaining screw until it is locked to the worktop.
ArtNo 314-0006 60cm induction dimensions
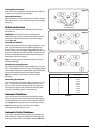
ArtNo 317-0011 60cm hob clearances
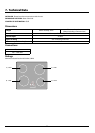
ArtNo.317-0012 - Hob fittings 1
Fig.5-1
Fig.5-2
Fig.5-3
Fig.5-4