-5-
HOW TO ASSEMBLE:
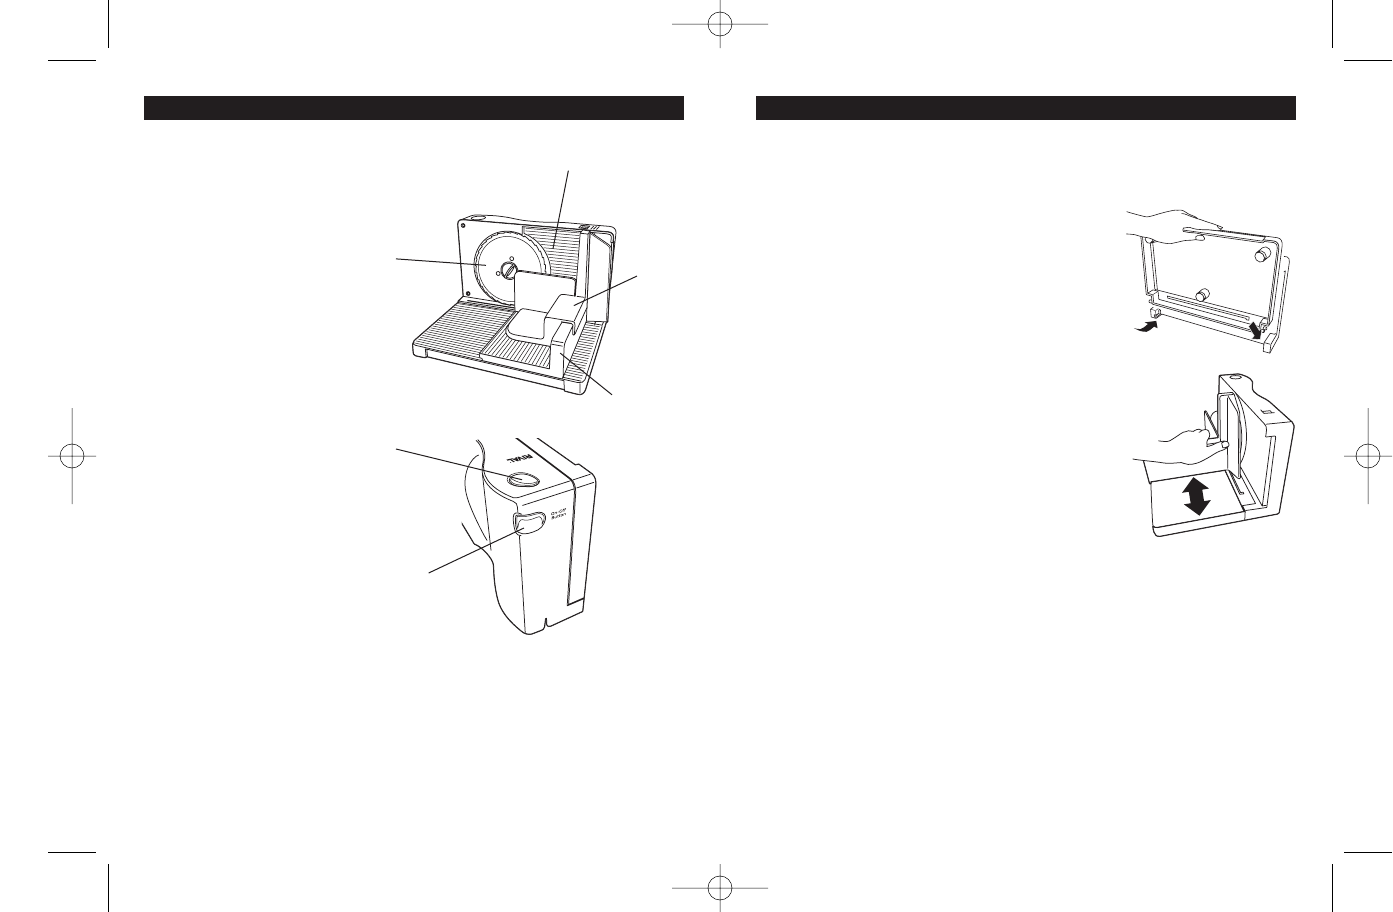
1. Position slicer on a clean, dry, smooth surface. Unfold platform.
2. Hold platform parallel with base. Insert right
tab into base followed by the left tab. Pull
platform down to lock into place (Fig 1).
3. Attach feeder to front edge of platform (Fig
2). Slide tray furthest from blade. Allow tab
(under tray) to lock into slot.
4. Slide food pusher onto the top of feeder.
5. Set thickness control knob for desired thick-
ness. Turn knob clockwise for thicker slices
and counterclockwise for thinner slices.
6. Slip a plate into recessed area to catch food.
TO SLICE:
CAUTION: Always use feeder and food pusher.
Before using for the first time, disassemble and
wash slicer. See Care and Cleaning.
1. Plug into 120 volt AC outlet.
2. Pull food away toward you. Place food on
tray.
3. Press safety button and keep depressed. Then push ON/OFF button.
Motor will only operate when both buttons are pushed.
4. Hold food pusher with left hand, keeping thumb protected behind
thumb guard as shown. Slide food pusher forward toward blade.
Move tray back and forth steadily. Keep food gently pressed against
guide for even slices.
5. When finished slicing, unplug unit. For safety and blade protection
when storing, turn knob to align thickness guide with blade.
USING YOUR SLICERKNOW YOUR SLICER
1. Adjustment Plate
2. Thickness Adjustment Knob(on back of unit)
3. Food Pusher
4. Feeder
5. Blade
6. Safety Switch
7. On/Off Switch
-4-
Fig. 2
Fig. 1
1
3
4
6
7
5
1042-WN05EM1.qxd 5/18/05 1:47 PM Page 5


