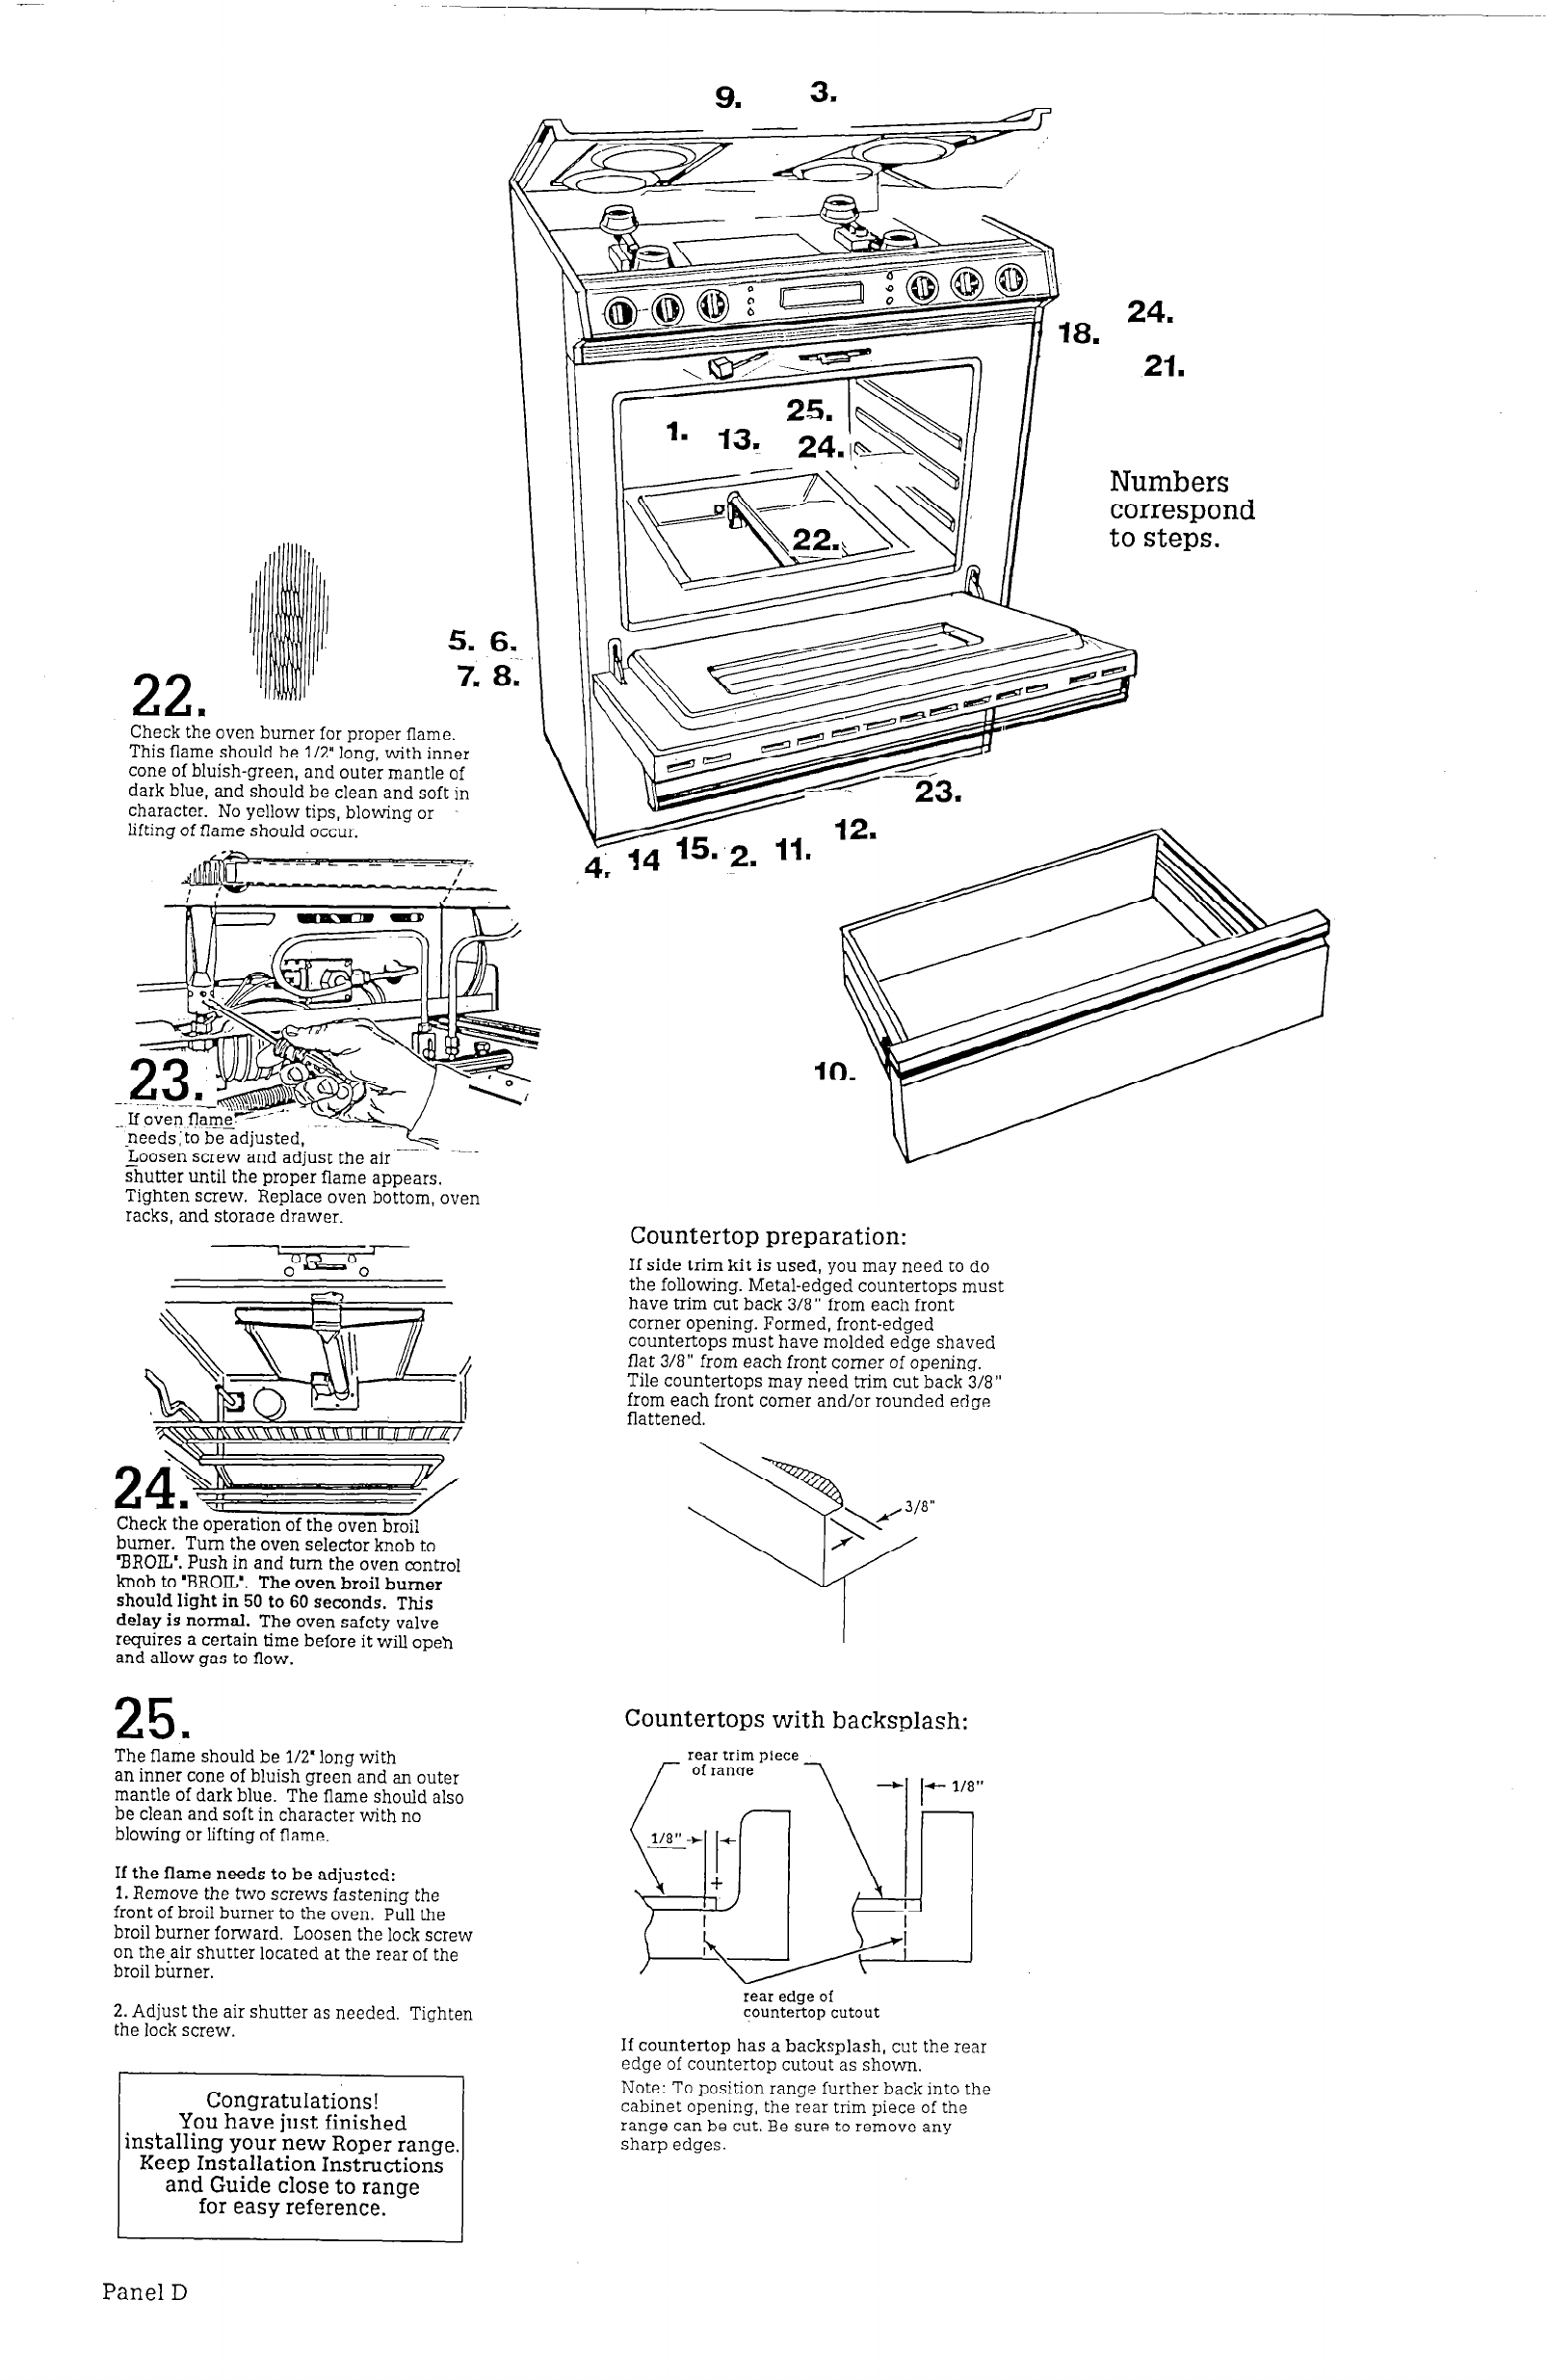
Check the oven burner for proper flame.
This flame should be l/2” long, with inner
cone of bluish-green, and outer mantle of
dark blue, and should be clean and soft in
character. No yellow tips, blowing or
lifting of flame should occur.
shutter until the proper flame appears.
Tighten screw. Replace oven bottom, oven
racks, and storaae drawer.
Countertop preparation:
If side trim kit is used, you may need to do
the following. Metal-edged countertops must
have trim cut back 3/8” from each front
corner opening. Formed, front-edged
countertops must have molded edge shaved
flat 3/8” from each front comer of opening.
Tile countertops may need trim cut back 3/8”
from each front comer and/or rounded edge
flattened.
2
Check the operation of the oven broil
burner. Turn the oven selector knob to
‘BROIL’. Push in and turn the oven control
knob to ‘BROIL’. The oven broil burner
should light in 50 to 60 seconds. This
delay is normal. The oven safety valve
requires a certain time before it will open
and allow gas to flow.
25
m
The flame should be l/2’ long with
an inner cone of bluish green and an outer
mantle of dark blue. The flame should also
be clean and soft in character with no
blowing or lifting of flame.
Countertops with backsplash:
rear trim piece
If the flame needs to be adjusted:
1. Remove the two screws fastening the
front of broil burner to the oven. Pull the
broil burner forward. Loosen the lock screw
on the.air shutter located at the rear of the
broil burner.
2. Adjust the air shutter as needed. Tiqhten
the lock screw.
rear edge of
countertop cutout
If countertop has a backsplash, cut the rear
edge of countertop cutout as shown.
Note: To position range further back into the
cabinet opening, the rear trim piece of the
range can be cut. Be sure to remove any
sharp edges.
Congratulations!
You have just finished
installing your new Roper range
Keep Installation Instructions
and Guide close to range
for easy reference.
Panel D


