6
Do not press the control lever. Simply leave to warm for 30-60
seconds.
Cancel the toasting or warming cycle at any time by pressing the
“STOP/EJECT” button.
MAINTENANCE, CLEANING AND STORAGE
Always unplug the toaster and let it cool before cleaning or
handling.
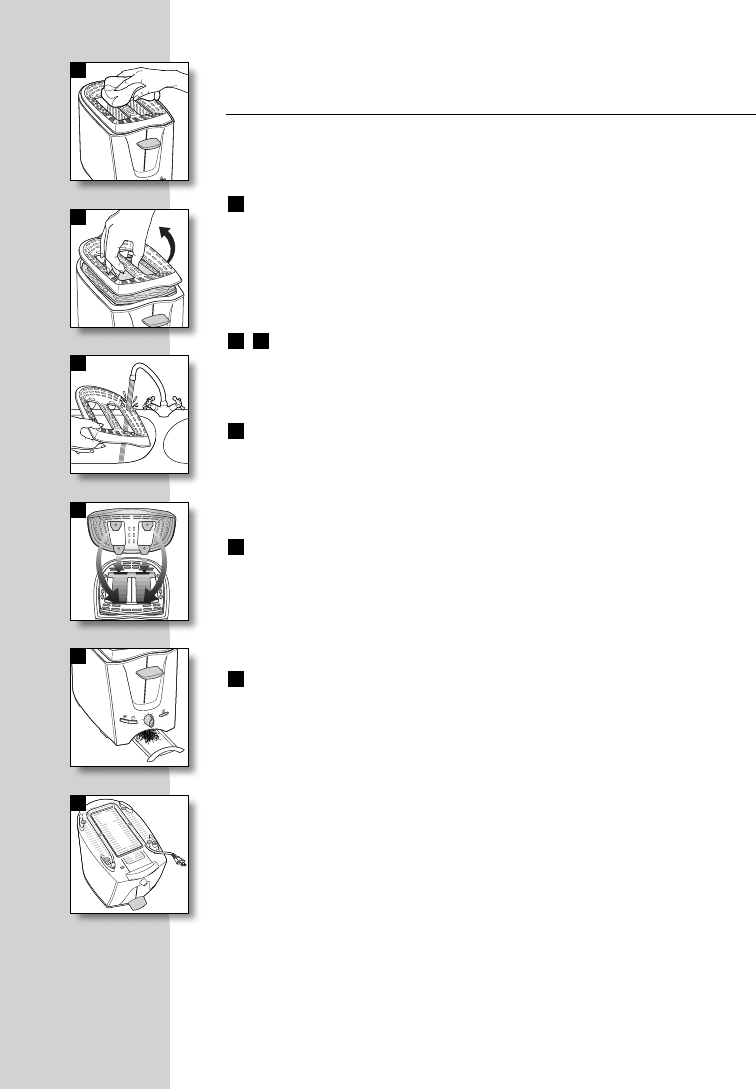
Wipe the outside of the toaster, the cord and the warming plate
with a damp sponge and a mild dish detergent.
Dry thoroughly.
For appliance with a metallic finish : Do not use any cleaning
products designed for metals. Use a soft cloth with a window or
glass cleaner.
For removal of the integrated warming plate : Grip the
metal warming plate by the middle and gently pull until it
becomes detached. Clean with a mild dish detergent, then
dry thoroughly.
Attaching the warming plate : Insert the 4 tabs on the warming
plate in the corresponding slots on the toaster and check that it is
correctly in place before each use.
NEVER USE TOASTER WITHOUT THE WARMING PLATE
IN PLACE.
To clean the crumb tray : Pull out the tray completely. Remove
the crumbs. Wipe it clean. Do this regularly, after each use. If
crumbs or crusts remain inside the heating elements, remove the
warming plate* and turn the toaster upside down so that these
remaining crumbs fall out. Replace the crumb tray and the metal
warming plate carefully.
Cord Storage : Wind the cord loosely in the storage area on the
underside of the toaster.
* Depending on model.
16
15
14
1312
11
11
12
13
14
p
l
u
s
15
16


