30
INSTALLING OF THE WATER DISPENSER LINE
WARRANTY INFORMATION
This water line installation is not covered by the refriger-ator
or ice maker manufacturer's warranty.
Follow these instructions carefully to minimise the risk of
expensive water damage.
Note:
If the coupler does not fit on the current tap, go
the nearest authorised service dealer and purchase
the right couplers fittings.
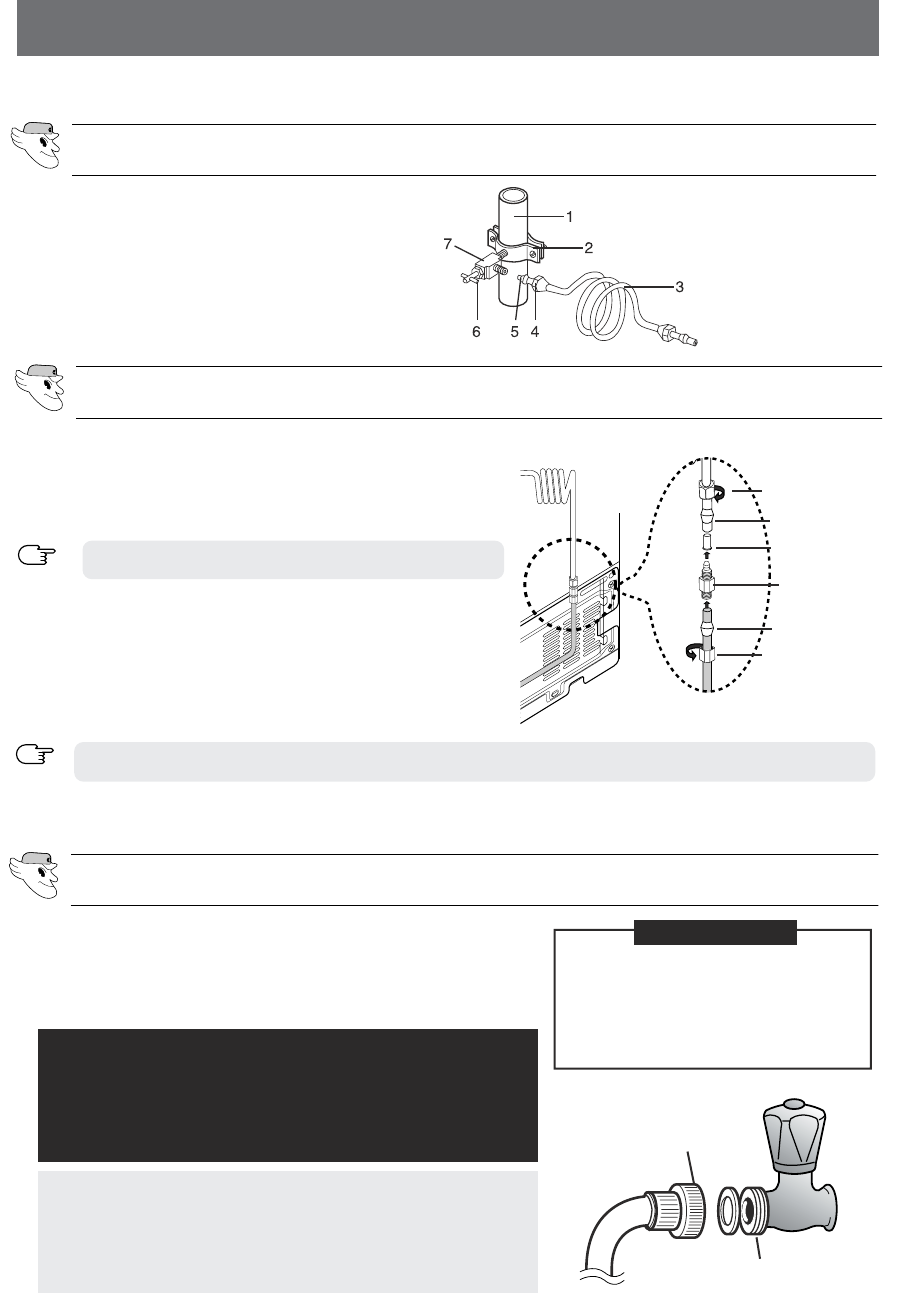
Connecting to water supply line
- Shut off the main water supply line and turn the Ice
maker to the off position.
- Locate the nearest cold drinking water line.
- Follow the instructions in the ice maker installation kit.
- Slip the compression nut and plastic ferrule
through the plastic tube.
- After inserting the sleeve, tighten the compres-sion
nut onto 1/4” compression fitting(union).
Connect the water line to the refrigerator
Check the water supply line
Waterline must be connected to drinkable water only
NOTE
Do not overtighten the compression nut.
NOTE
- Slip the compression ferrule and nut on copper(or plastic) tubing as
shown.
Tighten the comperssion nut onto the com-pression fitting(union).
- Turn water on and check for any leakege.
Connect the water pipe with coupler and tap.
- Close the main water tap.
- Connect coupler “A” to the tap.
- Every join should be protected with sealing tape.
Compression
Nut
Sleeve
Compression
fitting
Ferrule
Ferrule
Compressi
on Nut
For Interior Model
(Case 1)
(Case 2)
COUPLER “A”
TAP
CAUTION
The water line must be connect-ed
to the cold water pipe.
If it is connected to the hot water
pipe, it may cause the
purifier to malfunction.
1. Cold Water line
2. Pipe Clamp.
3.Copper (or Plastic) line
4.Compression Nut
5.Compression Sleeve
6.Shut Off Valve
7.Packing Nut.
DA99-00494B (EN)-0.7 7/22/04 12:37 PM Page 30


