2
2 - 20
9. Pumping Out Refrigerant from Outdoor Unit
W-2WAY ECO-i SYSTEM
Outdoor Unit Repair Procedures
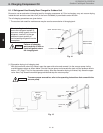
Required equipment and tools:
This work is performed in order to collect the refrigerant from an outdoor unit where repairs (other than compressor
replacement) will be performed into other outdoor units and indoor units, and the refrigerant tubing.
9-1. If Remote Controller (RCS-TM80BG) is Used for Maintenance of Outdoor Unit
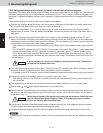
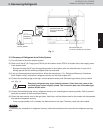
(1) Refer to “4. Backup Operation” and perform backup operation.
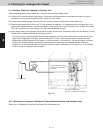
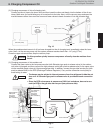
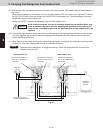
(2) Connect the manifold gauge valves at the Lo side to the low-pressure outlet port of the outdoor unit to be
repaired. Also connect the refrigerant recovery cylinder to any one of the normal outdoor units at the liquid line
service port (Schrader-type push-to-release valve). Perform the connection work quickly so that no air is
allowed to enter. (Fig. 20)
* Connecting the refrigerant recovery cylinder is done to prevent pressure from rising excessively during backup
operation by recovering the refrigerant from the outdoor unit to be repaired.
(Measure the weight of the refrigerant and cylinder itself beforehand and provide sufficient safety measures,
such as installing a high-pressure cutout in the circuit.)
The hoses may be subject to internal pressure from the refrigerant inside the out-
door unit. Check that the manifold gauge valves are fully closed beforehand.
A Schrader-type push-to-release valve is provided at each connection port.
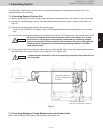
(3) Connect the outdoor unit maintenance remote controller to the RC connector (CN006) (3P) (BLU) on the out-
door unit control PCB of the outdoor unit to be repaired. Then start a test run of all units. (Press and hold the
(CHECK) button for 4 seconds or longer.)
(4) Use the outdoor unit maintenance remote controller to check the operating status of the indoor units. Check
that all units are operating in Heating mode. For details concerning operation of the outdoor unit maintenance
remote controller, refer to the “Outdoor unit maintenance remote controller” item. It is also possible to check the
operating conditions either in cooling or heating mode by touching the gas tube.
(5) Close the suction tube and balance tube on the outdoor unit to be repaired. Then slowly close the liquid tube
service valve.
(6) When the low pressure at the outdoor unit to be repaired reaches 72.5 psi or below, press the ON/OFF button
on the outdoor unit maintenance remote controller to stop all the units. Then immediately fully close the gas
tube valve on that outdoor unit.
While closing the valves, the rise in discharge temperature or another factor may
cause a protective device to activate, stopping the operation of the outdoor unit.
If this occurs, immediately fully close the gas tube valve on the outdoor unit to be
repaired.
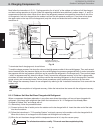
(7) Connect the high-pressure gauge side of the manifold gauge to the high-pressure outlet port on the outdoor unit
to be repaired, and connect the manifold gauge to the refrigerant recovery device. Be sure that no air enters the
tubing at this time.
CAUTION
CAUTION
CAUTION
Jumper wire with clips, adjustable wrench, set of manifold gauge valves for the
refrigerant R410A, refrigerant recovery unit, pre-purged refrigerant cylinder for
recovery, flat-head screwdriver, and outdoor unit maintenance remote controller.
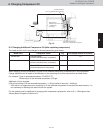
Cooling mode : low temperature (68 F or lower)
Heating mode : high temperature (140 F or higher)
The gas tubing becomes hot (140 F or higher) in heating. Be careful so as not to be
burnt when touching the tubing.


