


BJ5-615 Chapter 5: Maintenance 34 of 85
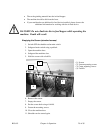
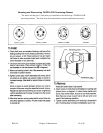
10. Place the screen back into its working position and fasten with the mounting
screws.
11. Close the machine and hopper doors.
12. Machine can be started again.
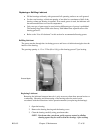
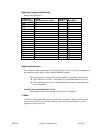
Replacing the Gear Box
The gearbox is made so a replacement is only necessary in exceptional cases.
Dismounting and mounting the gear box requires specialist knowledge and a careful
working method. Please observe the instructions given in the installation manual of the
gear box manufacturer or ask the service department for help.
Replacing the Rotor
The rotor’s design is heavy duty, so a replacement is only necessary after a crash, (i.e. a
hammer fall inside). Dismounting and mounting of the rotor requires specialist
knowledge and a careful working method. Call the Service Department for assistance.
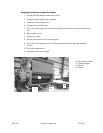
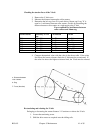
Dismounting the Rotor
1. Dismount the V-belt cover.
2. Dismount the V-belts.
3. Dismount the gearbox.
4. Remove the screen.
5. Remove the rotor mounting slot cover plates from the housing.
6. Screw in hooks on both shaft ends.
7. Remove the bearing housing mounting screw.
8. Carefully lift out the complete rotor using suitable lifting and stopping equipment.
9. Lay the rotor down in a safe location using appropriately sized timber beams.
Mounting the Rotor
1. Before starting, clean the bearing seat surfaces and check the key.
2. Lift the rotor using suitable lifting and stopping equipment and place carefully into
the bearing seats.
3. Attach the bearing housing (Pos.) to the bearing seats using screws.
4. Put the gear onto the rotor axis.
5. Put back the rotor mounting slot cover plates.
6. Put in the screen.
7. Pull on V-belts and adjust the V-belt tension force.
8. Attach the V-belt.