


4
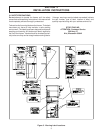
2.2 SHIPMENT AND TRANSIT
The freezer has been assembled, operated and inspected
at the factory. Upon arrival at the final destination, the
complete freezer must be checked for any damage which
may have occurred during transit.
With the method of packaging used, the freezer should
arrive in excellent condition. THE CARRIER IS RESPON-
SIBLE FOR ALL DAMAGE IN TRANSIT, WHETHER
VISIBLE OR CONCEALED. Do not pay the freight bill until
the freezer has been checked for damage. Have the carrier
note any visible damage on the freight bill. If concealed
damage and/or shortage is found later, advise the carrier
within 10 days and request inspection. The customer must
place claim for damages and/or shortages in shipment
with the carrier. Stoelting, Inc. cannot make any claims
against the carrier.
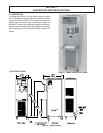
2.3 FREEZER INSTALLATION
Installation of the freezer involves moving the freezer close
to its permanent location, removing all crating, setting in
place, assembling parts, and cleaning.
A. Uncrate the freezer.
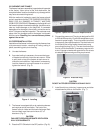
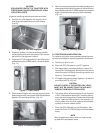
B. Accurate leveling is necessary for correct drainage
of freezer barrel and to insure correct overrun. Place
a spirit level on top of the freezer at each corner to
check for level condition. If adjustment is necessary,
level the freezer by turning the caster in or out and
tighten the locknut. (Fig. 4).
Figure 7. Installing Tray and Cover
Figure 4. Leveling
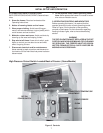
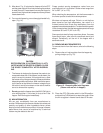
C. The freezer is equipped with an air cooled condenser
and requires correct ventilation. The front of the
freezer is the air intake and the back discharge. Both
front and back must have a minimum of 3" of
clearance. (Fig. 5).
CAUTION
FAILURE TO PROVIDE ADEQUATE VENTILATION
WILL VOID WARRANTY!
D. Place the OFF-ON switch in the OFF position. (Fig.10).
Figure 5. Space and Ventilation Requirements
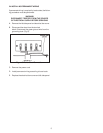
E. Connect the power cord. The plug is designed for 208
or 230 volt/20 amp duty. Check the nameplate on your
freezer for proper supply. The unit must be connected
to a properly grounded receptacle. The electrical cord
furnished as part of the freezer has a three prong
grounding type plug (Fig. 6). The use of an extension
cord is not recommended, if necessary use one with
a size 12 gauge or heavier with ground wire. Do not use
an adapter to get around grounding requirement.
CAUTION
DO NOT ALTER OR DEFORM PLUG IN ANY WAY!
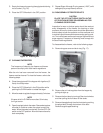
F. Install the drip tray, drain tray, hopper cover and other
miscellaneous parts on the freezer. (Fig. 7).
Figure 6. Electrical Plug