


12
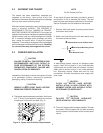
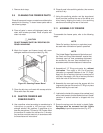
B. Place the CLEAN-OFF-SERVE rocker switch in the
CLEAN position. Allow the mix to agitate in freezer
barrel until the mix has become a liquid.
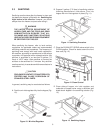
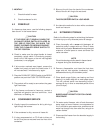
C. Drain the liquid mix by opening the spigot. A bucket
or container should be placed under the spigot to
catch the liquid mix (Fig. 19).
Figure 19. Draining Mix
D. Place the CLEAN-OFF-SERVE switch in the OFF
position.
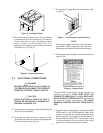
3.7 CLEANING THE FREEZER
NOTE
The frequency of cleaning the freezer and freezer
parts must comply with local health regulations.
After the mix has been removed from the freezer, the
freezer must be cleaned. To clean the freezer, refer to
the following steps:
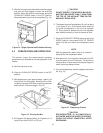
A. Close the spigot and fill the hoppers with 2 gallons
(7.5 liters) of cold tap water.
B. Place the CLEAN-OFF-SERVE switches in the
CLEAN position.
C. Allow the water to agitate for approximately five
minutes.
D. Open the spigots to drain the water. Remember to
place a bucket or container under the spigots to catch
the water. When the water has drained, turn the
CLEAN-OFF-SERVE switches to the OFF position.
Allow the freezer barrel to drain completely.
E. Repeat steps A through D using a mild detergent
solution.
3.8 DISASSEMBLY OF FREEZER
PARTS
CAUTION
PLACE THE CLEAN-OFF-SERVE ROCKER
SWITCHES IN THE OFF POSITION BEFORE
DISASSEMBLING FOR CLEANING OR
SERVICING.
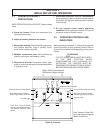
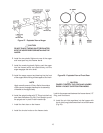
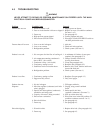
Inspection for worn or broken parts should be made at
every disassembly of the freezer for cleaning or other
purposes. All worn or broken parts should be replaced
to ensure safety to both the operator and the customer
and to maintain good freezer performance and a quality
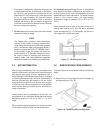
product. Two normal wear areas are the auger flights
and front auger support bearing (Fig. 20). Frequency of
cleaning must comply with the local health regulation.
Figure 20. Auger Flight Wear and Front
Auger Support Wear
To disassemble the freezer, refer to the following steps:
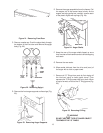
A. Remove the mix inlet regulators from the hoppers
by pulling straight up.
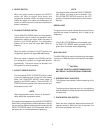
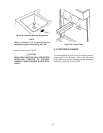
B. Remove the front door by turning off the circular
knobs and then pulling the front door off the studs
(Fig. 21).