


15
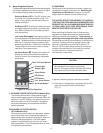
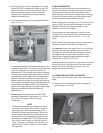
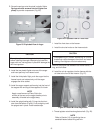
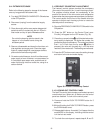
D. Screw the springs onto the studs in plastic flights.
Springs must be screwed into the flights com
pletely to provide compression (Fig. 25).
CAUTION
Do not place the mix inlet regulator into the hopper
before installing the auger. Attempting to install the
auger with mix inlet regulator in place will damage the
mix inlet regulator.
E. Install the two plastic flights onto rear of the auger
and insert part way into freezer barrel.
F. Install the third plastic flight, push the auger into the
freezer barrel and rotate slowly until the auger
engages the drive socket.
G. Install the auger support and bearing into the front of
the augers with one leg of the support at 9 o’clock.
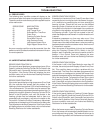
NOTE
Apply a small amount of Petro-Gel to the
surface of the cam on the spigot handle prior to
assembly of handle to the spigot body.
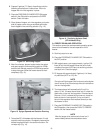
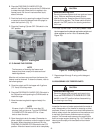
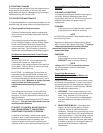
H. Install the spigot bodies with O-rings into the front
door from the bottom (Fig.26). Push straight up until
the spigots are in place. Install rosette caps.
I. Install the front door on the freezer.
J. Install the circular knobs on the freezer studs.
CAUTION
Overtightening or uneven tensioning of circular
knobs may cause damage to front door and cause
leaking. Hand tighten circular knobs evenly.
Look for the proper seal between the freezer barrel, O-
ring, and front door.
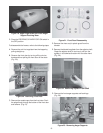
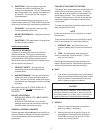
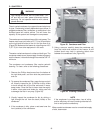
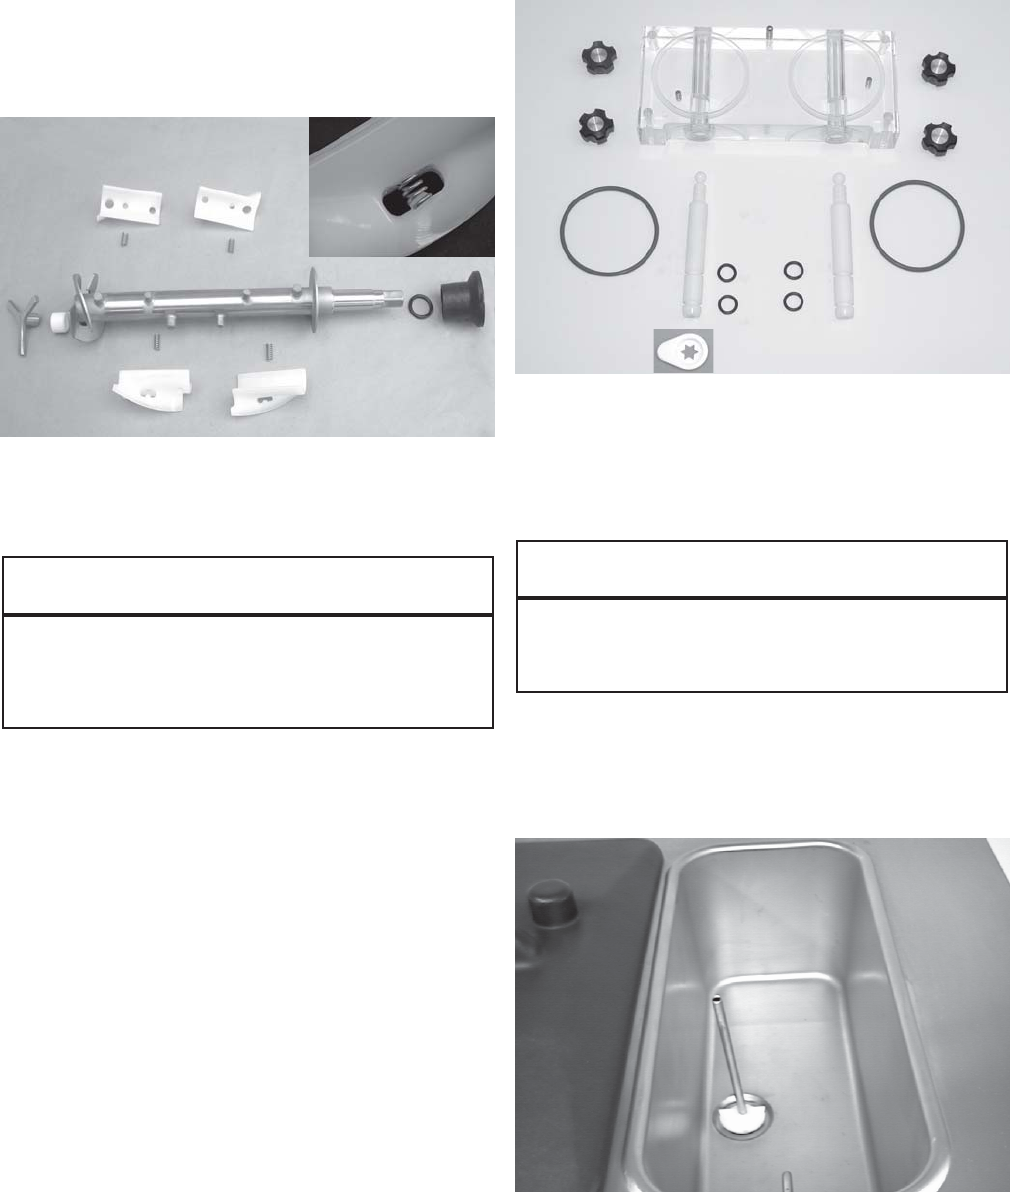
K. Install the mix air regulator into the freezer with the
air tube to the front of the freezer. (Fig. 27).
L. Thread agitator onto blender agitator shaft. (Fig. 22).
NOTE
Refer to Section 3.3, for sanitizing the as-
sembled freezer before filling with mix.
Figure 25. Exploded View of Auger
Figure 26. Exploded View of Front Door
Figure 27. Install Mix Inlet Regulators