


4
|
English
OVEN OPERATION
Oven Operation
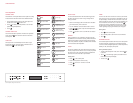
CONTROL PANEL
The electronic control panel features touch pads for cooking
modes and other functions. Refer to the illustration below.
1 Touch desired cooking mode on the control panel. For
double ovens, touch
to select oven.
2 Touch to select preset temperature or use number
pads to change temperature.
3 Touch .
CONTROL PANEL LOCK
The control lock feature prevents unwanted oven operation.
Touch and hold
for 3 seconds to lock and unlock the
control panel.
OVEN LIGHT
Oven light turns on automatically when the door is open
and off when closed. To turn the light on while the door is
closed, touch
on the control panel.
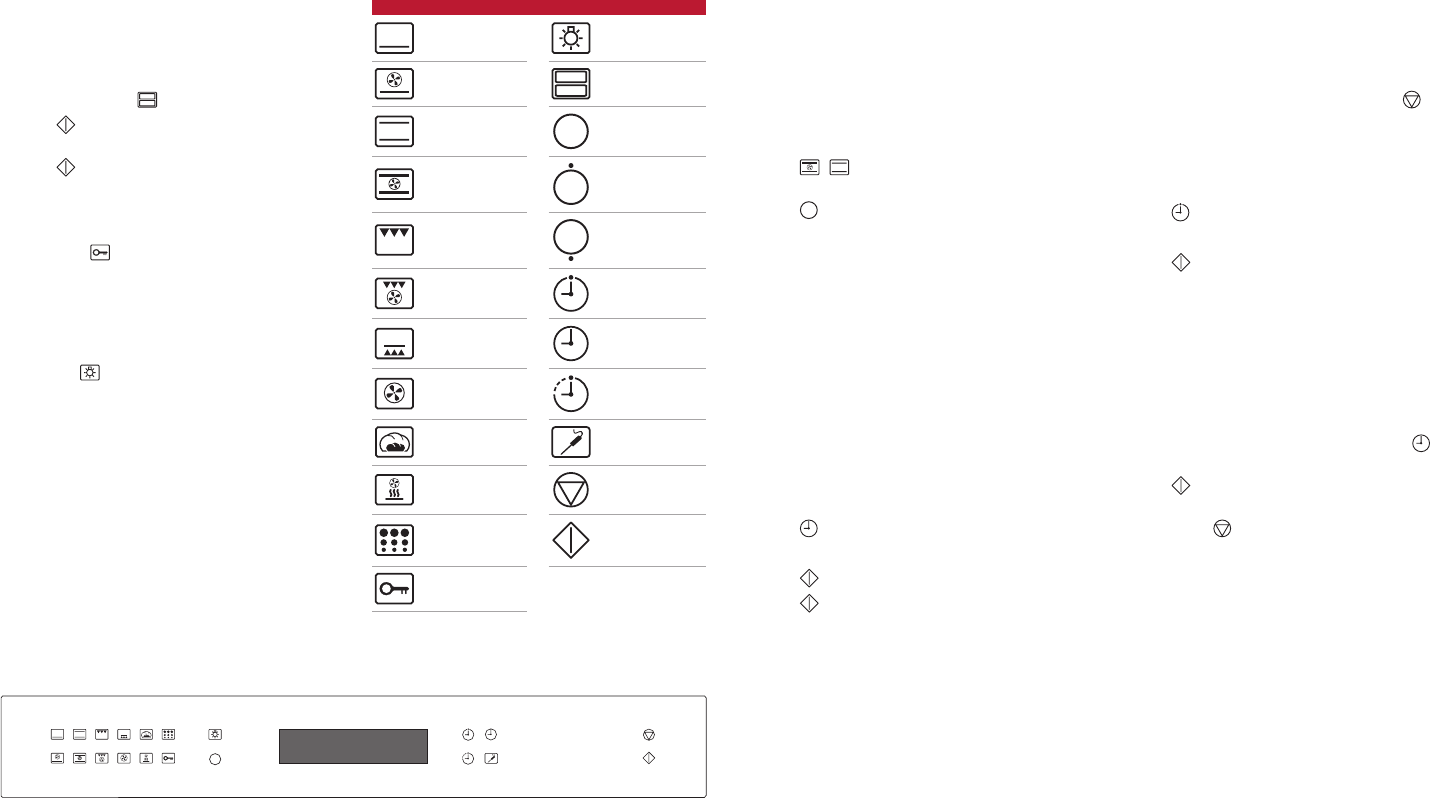
CONTROL PANEL TOUCH PADS
Bake Oven Light
Convection Bake
Upper/Lower
(double ovens only)
Roast
Oven Off
(single ovens only)
Convection Roast
Upper Oven Off
(double ovens only)
Broil
Lower Oven Off
(double ovens only)
Convection Broil Set Timer
Bake Stone Set Clock
Convection Timed Cook
Proof Temperature Probe
Dehydration Clear
Self-Clean Enter
Lock
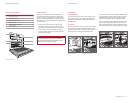
PRIOR TO USE
To ensure all residual oil from the manufacturing process
has been removed, each oven must go through the fol-
lowing procedure.
1 Clean oven thoroughly with hot water and a mild deter-
gent. Rinse and dry with a soft cloth.
2 Turn on ventilation. Some smoke and odor is normal.
3 Touch ( for lower oven) and set temperature to
290°C for one hour.
4 Touch and allow oven to cool with the door closed.
PREHEAT
During preheat, the oven is heated as quickly and evenly
as possible and is not ideal for cooking. Preheat should be
utilized for all cooking modes except broil and convection
broil. Once preheat is complete, an audible chime indicates
oven has reached set temperature.
CLOCK
The clock is visible on the control panel during all cooking
modes, except when the timer is in use. It is very important
the clock is set to the correct time if timed cook feature is
used. Clock must be reset after a power failure.
Setting clock:
1 Touch on the control panel.
2 Touch number pads to set time of day.
3 Touch , then touch 1 for AM or 2 for PM.
4 Touch .
Control panel (single oven shown).
09876
5
4
3
21
TIMER
The timer can be set for a maximum of 9 hours, 59 minutes.
Once a time is set, the countdown is illuminated on the con-
trol panel display. The last minute counts down in seconds.
When complete, the oven will chime and time will ash. The
timer will continue to chime every 10 seconds until
is
touched. The timer is independent from the oven. Setting
the timer does not affect cook time or stop time. For infor-
mation regarding auto program features, refer to page 6.
Setting timer:
1 Touch on the control panel.
2 Touch number pads to set time in hours and minutes.
3 Touch .
EXTENDED OPTIONS
The extended options feature allow the user to select prefer-
ences for language, temperature unit, temperature offset,
12/24 hour clock, backlight brightness, contrast adjustment,
standby on/off, and beeper (chime) tone.
Setting extended options:
1 To enter extended options mode, touch and hold for
5 seconds.
2 Touch to scroll through options, then follow instruc-
tions on the control panel display.
3 To exit, touch .