


- 6 -
No. 0168/0169
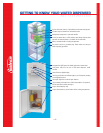
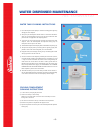
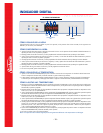
WATER DISPENSER MAINTENANCE
COOLING COMPA RTMENT
CLEANING INSTRUCTIONS
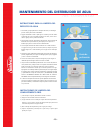
WATER TANK CLEANING INSTRUCTIONS
A
B
C
L i f t
Tw i s t
D ra i n
P i e rc i n g
P i n
1) Do not flick the power switch quickly on and off.The resulting power surges may
damage your water dispenser.
2) Always turn your water dispenser off when there is no water left in the bottle or
when you are changing bottles. Turn it back on after the new bottle has been
placed and the air is purged from the dispensing buttons.
3) To clean the unit, first unplug the power cord. Wipe the outside of the water
dispenser with a soft cloth dampened with liquid dish washing soap. Use
toothpaste to remove spots on the cabinet.
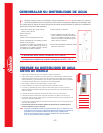
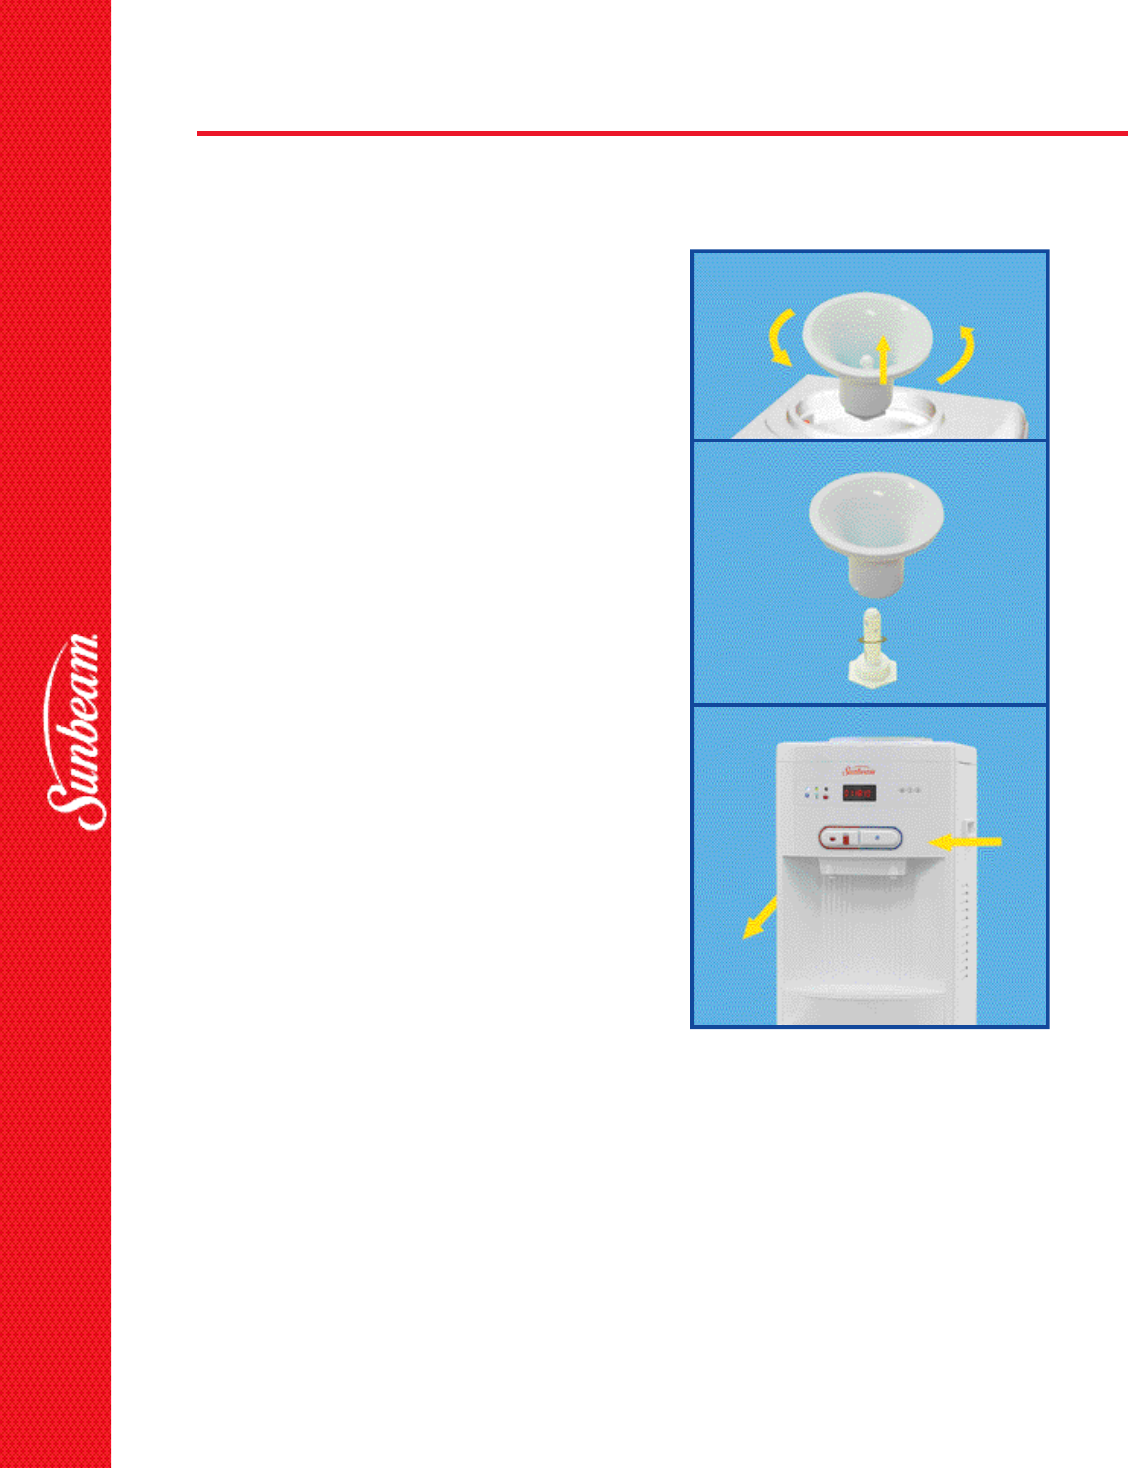
4) Twist the bottle receptacle of the No-Spill system counterclockwise and pull it up (A).
5) Ta k e apart the No-spill system by unscrewing the base (piercing pin) (B). Th e n
proceed to wash it with a dish wa s h i n g fluid, rinse it and reassemble.
6) Empty both tanks (hot and cold) by removing the cap and rubber gasket around
drain plug located on the side of the unit.
7) Clean the inside of the water dispenser periodically with CLR solution (Calcium,
Lime, Rust removal) available at most hardware stores. If not ava i l a b l e, you can use
v i n egar or a 2% citric acid solution.This removes mineral scaling caused by the
water. Rinse it well. Use the drain on the back in order to get the water out.
Replace the drain plug after you have completed the rinsing. Put all of the parts
back, securely fasten the drain plug (C). IT IS IMPORTANT TO LET THE WATER
DISPENSER DRY FOR TWO HOURS BEFORE PLUGGING IT BACK IN. Cover the
bottle receptacle to prevent it from contamination.
8) The harder the water you use, the more often you should clean the interior of
the unit. Recommended intervals are between one and three months depending
on the mineral content of the water and the frequency of bottle changes.
1) To clean the unit, first unplug the power cord.
2) Allow the ice build-up to melt naturally.
NOTE:Do not use sharp objects or knives to remove ice buildup. Do not use
boiling water to remove ice.
3) The water will accumulate in the tray at the bottom of the compartment.
4) Remove the tray from the compartment and empty the water.
5) Wipe the compartment and the tray with a soft cloth dampened with liquid dish
washing soap.