


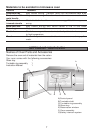
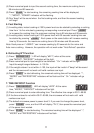
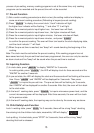

1. Power Level
Ten power levels are available, life cycle T=22 seeds
Level
Power
10
100%
9
90%
8
80%
7
70%
6
60%
5
50%
4
40%
3
30%
2
20%
1
10%
Remarks: When a power level between 10-8 is chosen, the high level
indicator lights up and will flash when in operation.
When a power level between 7- 1 is chosen, the low level
indicator lights up and will flash when in operation.
2. Clock Setting
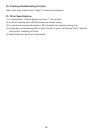
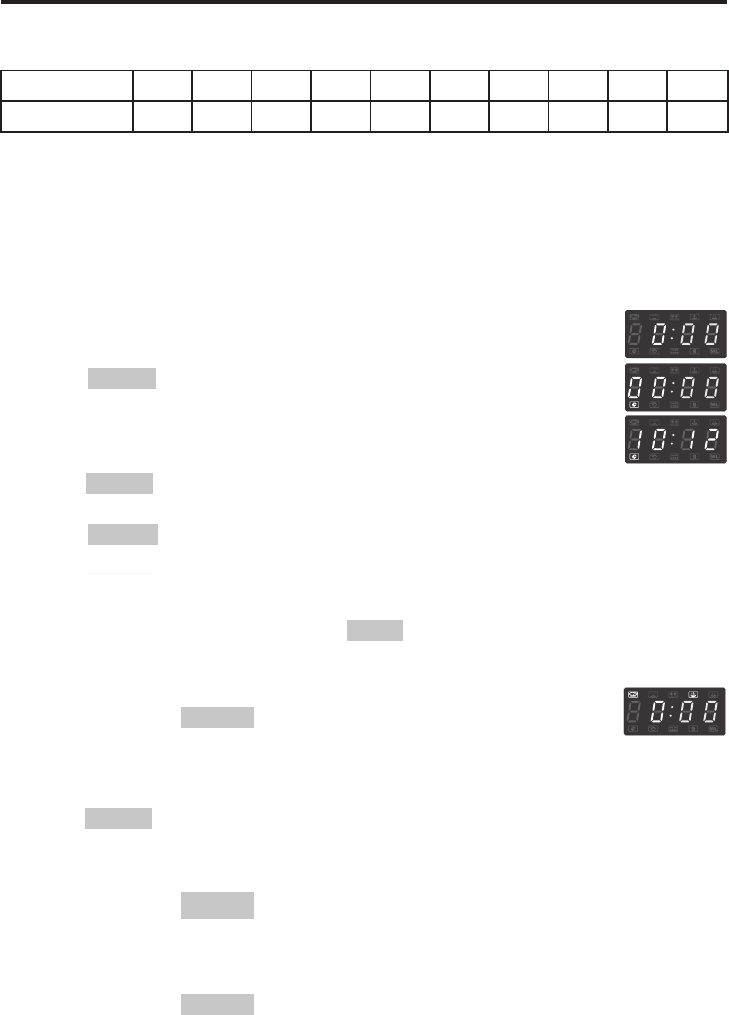
When the microwave oven is plugged into an outlet, the oven
will display " 0:00 "
(1) Press " CLOCK ", LED will display 00:00, clock indicator
will light. The hour figures will flash; ":" and "0" will be light.
(2) Press the number keys and enter the correct time. For example,
time is 10:12 now, please press "1,0,1,2" in turn.
(3) Press " AM/PM " to choose AM or PM. AM or PM will be selected in turn
by pressing the button " AM/PM " continuously.
(4) Press " CLOCK " to finish clock setting, the clock indicator will go out. ":"
will be flashing and the clock setting will be displayed.
(5) If the numbers entered are not within the range of 1:00--12:59, the setting will be invalid
until valid numbers are entered.
Note: In the process of clock setting, if the " STOP " button is pressed or if there is no
operation within 1 minute, the oven will go back to the former setting automatically.
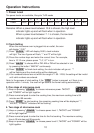
3. One stage of microwave cook
(1) Keep on pressing " POWER " to choose microwave power. "MICRO"
and "POWER" will be light together.
(2) Press numerical pads to enter the cooking time; the maximum cooking time is 99
minutes and 99 seconds.
(3) Press " START " to start cooking, the remaining cooking time will be displayed. ":",
"MICRO", "POWER" indicators will be flashing.
4. Two stage of microwave cook
(1) Keep on pressing " POWER " to choose power level 1, "MICRO" and "POWER"
will be light together.
(2) Press numerical pads to enter the time for the first cooking. The maximum cooking
time is 99 minutes and 99 seconds.
(3) Keep on pressing " POWER " to choose power level 2, "MICRO" and "POWER" will be
light together.
10
Operation Instructions