


III. Control Basics:
Customer Access
To adjust any of the control’s operating features, enter the customer access
code. Use the code 0, A, 1 combined with the following: Press the SET
button. The display will read CUS (Customer Access). Press the SET but-
ton. The display will show three zeros with the left zero flashing, Press the
SET button. The display will show three zeros with the center zero flashing.
Press the DOWN ARROW key to sequence through F, E, d, C, b, A, 9, 8,
7,…etc. When you reach A press SET. The display will show zero, A, zero
with the right zero flashing. Press the UP ARROW key to sequence through
1, 2, 3, 4, 5, 6, 7, 8, 9, A, b,…etc. When you reach 1 press SET. The
display will read SP (Thermostat Set Point). Press the SET button to view
and again to exit. You are now ready to adjust the control. Listed below
are the available parameters in the order they appear, using the down arrow
key on the controller, you can use either the up or down arrow keys to scroll
through the options.
Thermostat Set Point Defrost Lockout 3
Thermostat Set Point Differential
Defrost Lockout 4
Temperature Scale Dew Point Compensation Factor
Time (24-hour clock)
Room Temperature Offset
Date (month-day-year) Audible Alarm Style
Daylight Savings Cabinet Air Sensor Temp
Start Manual Defrost
Evaporator Coil Sensor
Defrost Lockout 1 Liquid Line Sensor
Defrost Lockout 2
Defrost Lockout Feature
Defrost lockouts will allow the you to prevent defrost cycles from occurring
for two hours during a designated time. Up to four can be set for any 24-
hour period. Each of the lockout parameters covers 6-hours of the 24-hour
clock. Note: The 24-hour clock must be set for this feature to operate at the
correct time of day.
DL1/OFF DL2/OFF DL3/OFF DL4/OFF
020 = 2:00 a.m. 080 = 8:00 a.m. 140 = 2:00 p.m. 200 = 8:00 p.m.
023 = 2:30 a.m. 083 = 8:30 a.m. 143 = 2:30 p.m. 203 = 8:30 p.m.
030 = 3:00 a.m. 090 = 9:00 a.m. 150 = 3:00 p.m. 210 = 9:00 p.m.
033 = 3:30 a.m. 093 = 9:30 a.m. 153 = 3:30 p.m. 213 = 9:30 p.m.
040 = 4:00 a.m. 100 = 10:00 a.m. 160 = 4:00 p.m. 220 = 10:00 p.m.
043 = 4:30 a.m. 103 = 10:30 a.m. 163 = 4:30 p.m. 223 = 10:30 p.m.
050 = 5:00 a.m. 110 = 11:00 a.m. 170 = 5:00 p.m. 230 = 11:00 p.m.
053 = 5:30 a.m. 113 = 11:30 a.m. 173 = 5:30 p.m. 233 = 11:30 p.m.
060 = 6:00 a.m. 120 = 12:00 p.m. 180 = 6:00 p.m. 240* = 12:00 a.m.
063 = 6:30 a.m. 123 = 12:30 p.m. 183 = 6:30 p.m. 243* = 12:30 a.m.
070 = 7:00 a.m. 130 = 1:00 p.m. 190 = 7:00 p.m. 010 = 1:00 a.m.
073 = 7:30 a.m. 133 = 1:30 p.m. 193 = 7:30 p.m. 013 = 1:30 a.m.
080 = 8:00 a.m. 140 = 2:00 p.m. 200 = 8:00 p.m. 020 = 2:00 a.m.
Defrost Lockout Feature (continued)
NOTE: First Enter Customer Access (see section III.)
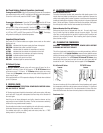
When the control displays
Thermostat Set Point, press the down
arrow key
until the control displays or
. Press the set button . The display will show off.
Press the arrow keys
to set the start time. When the correct time is
displayed, press the set button
SET
. You can press the up or down arrow
keys
to scroll to the next parameter or press the alarm cancel
button to exit or leave inactive for 30 seconds.
Setting The Clock
The internal time clock must be set in order for the data storage memory to
correctly log events and to allow any defrost lockout to occur at the correct
time of day. If the clock is not set, the control assumes the time is 12 a.m.
at the time power is supplied to the unit. The hours on a 24-hour time clock
read the following way:
H01 = 1:00 a.m. H07 = 7:00 a.m. H13 = 1:00 p.m. H19 = 7:00 p.m.
H02 = 2:00 a.m. H08 = 8:00 a.m. H14 = 2:00 p.m. H20 = 8:00 p.m.
H03 = 3:00 a.m. H09 = 9:00 a.m. H15 = 3:00 p.m. H21 = 9:00 p.m.
H04 = 4:00 a.m. H10 = 10:00 a.m. H16 = 4:00 p.m. H22 = 10:00 p.m.
H05 = 5:00 a.m. H11 = 11:00 a.m. H17 = 5:00 p.m. H23 = 11:00 p.m.
H06 = 6:00 a.m. H12 = 12:00 p.m. H18 = 6:00 p.m. H24 = 12:00 a.m.
NOTE: First Enter Customer Access (see section III.)
When the control displays
Thermostat Set Point, press the down
arrow key
until the control display reads clock. Press the
Set button
SET
. The display will show Hours. The right two
numbers will be flashing. Use the arrow keys to set the hour.
When the correct hour is displayed, press the Set button
SET
. The
display will show
minutes. The right two numbers will be flash-
ing. Use the arrow keys
to set the minutes. When the correct
hour is displayed, press the Set button
SET
. The display will then read
clock. You can use the up or down arrow keys
to the
next parameter or press the alarm cancel button
to exit or leave
inactive for 30 seconds.
Hot Food Holding Cabinet Operation
Hot Food Holding Cabinets differ from refrigerators and freezers in that they
do not typically operate 24/7, and that there is a much broader range of
safe storage temperatures to choose from (135-180°F). As a result these
are regularly turned ON and OFF. To facilitate this Traulsen includes an ON/
OFF button on their controls. This also includes a convenient Temperature
Recall Feature. Upon being turned on each day, this automatically returns
operation to the last previously set temperature.
-2-
SET