6
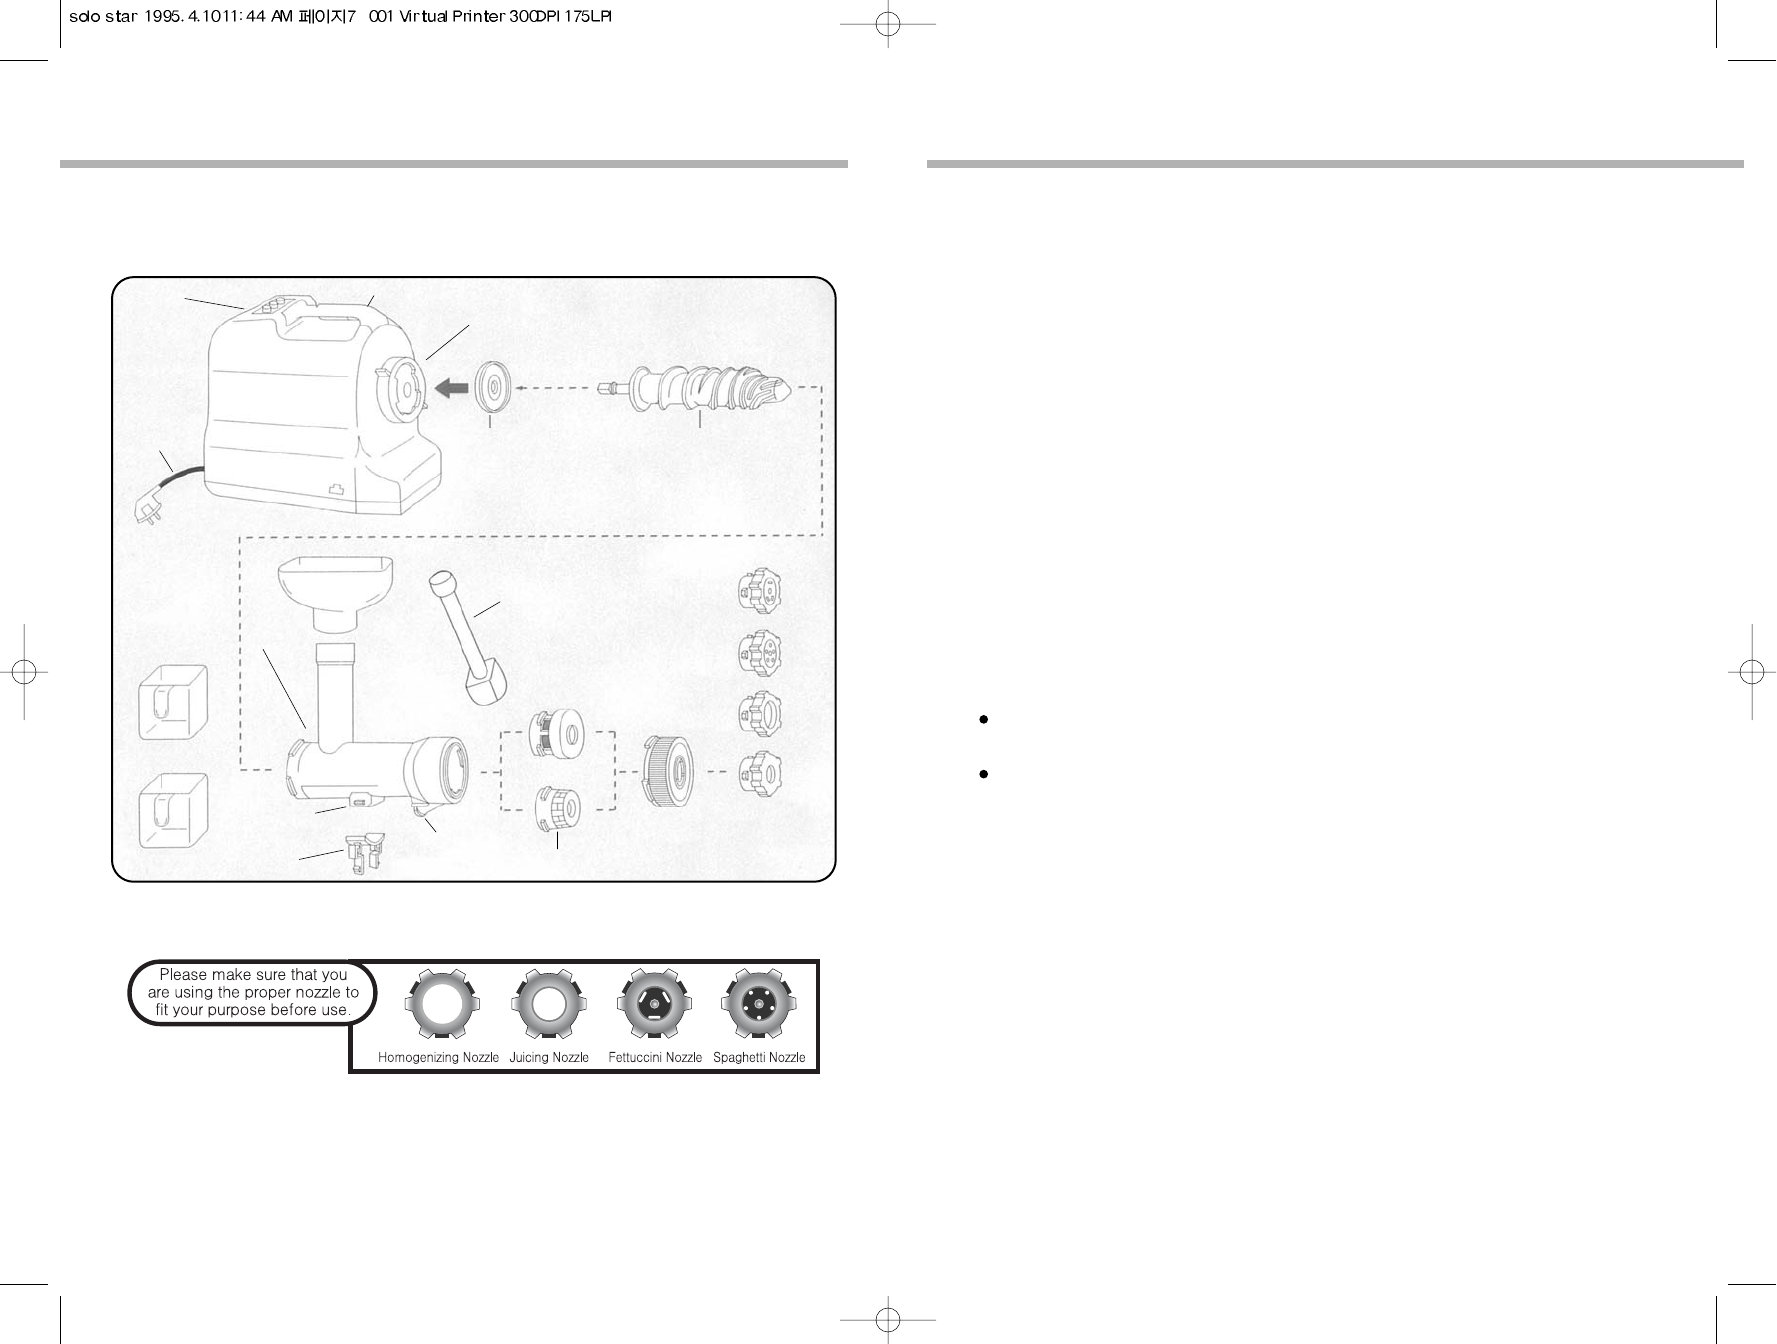
JUICER PART DESCRIPTION
ON/OFF/Reverse Switch
Juicer Part Description
MainBody
Auger Housing Retaining Ring
Auger Ring
Auger
Electric Cord
Fettuccini Nozzle
Spaghetti Nozzle
Homogenizing Nozzle
Juicing Nozzle
Plastic Plunger
Juicing Screen
Screen Locking Cap
Homogenizing Screen
First Juice Outlet
Second Juice Outlet
First Juice Outlet Plug
Juice Container
Plup Container
Processing Chamber
Auger Housing
Funnel
7
Attach the Auger Ring to the Auger (as seen in the picture) then place the hexagon shaft
of the Auger into the opening of the Auger Housing Retaining Ring.
Slide the Auger Housing over the Auger to the Auger Housing Retaining Ring. While
holding the housing stable, turn the Auger Housing Retaining Ring clockwise (right) to
lock the Auger Housing in place.
Pick the desired screen according to the foods being used and push in.
* Juicing Screen: for juicing leafy greens, vegetables, fruits and nuts.
Place the Juicing Screen into the front end of the Auger Housing. Put the Screen Locking
Cap over the screen and turn it counter-clockwise (while holding the housing stable) to
lock in position. Attach the Juicing Nozzle (the middle sized opening) to the Screen
Locking Cap by turning it counter-clockwise.
Place the First Juice Outlet Plug into the First Juice Outlet by following the
instruction and the drawing.
Attach the Homogenizing Screen into the Auger Housing. Fasten and turn the
Screen Locking Cap counter clockwise to lock in place (while holding the
housing stable).
Place the desired nozzle into the Screen Locking Cap and turn it counter-
clockwise.
a.
b.
c.
Do not use the First Juice Outlet Plug. Leave the First Juice Outlet open for
maximum juice yield.
Small amounts of pulp can be in juices depending on the produce used.
* Homogenizing Screen: for making Rice Cake/Breadstick, grinding (tomato, garlic,
coffee beans, etc.), Pasta noodles (Spaghetti or Fettuccini) or Tofu.
1.
2.
3.
SOLO STAR ASSEMBLY AND OPERATION


