THINGS TO NOTE
THE OVEN DOOR MUST BE LEFT OPEN DURING
GRILLING
The cooling fan for the controls will operate when
grilling.
The oven/grill indicator neon will illuminate.
THE GRILL PAN AND HANDLE
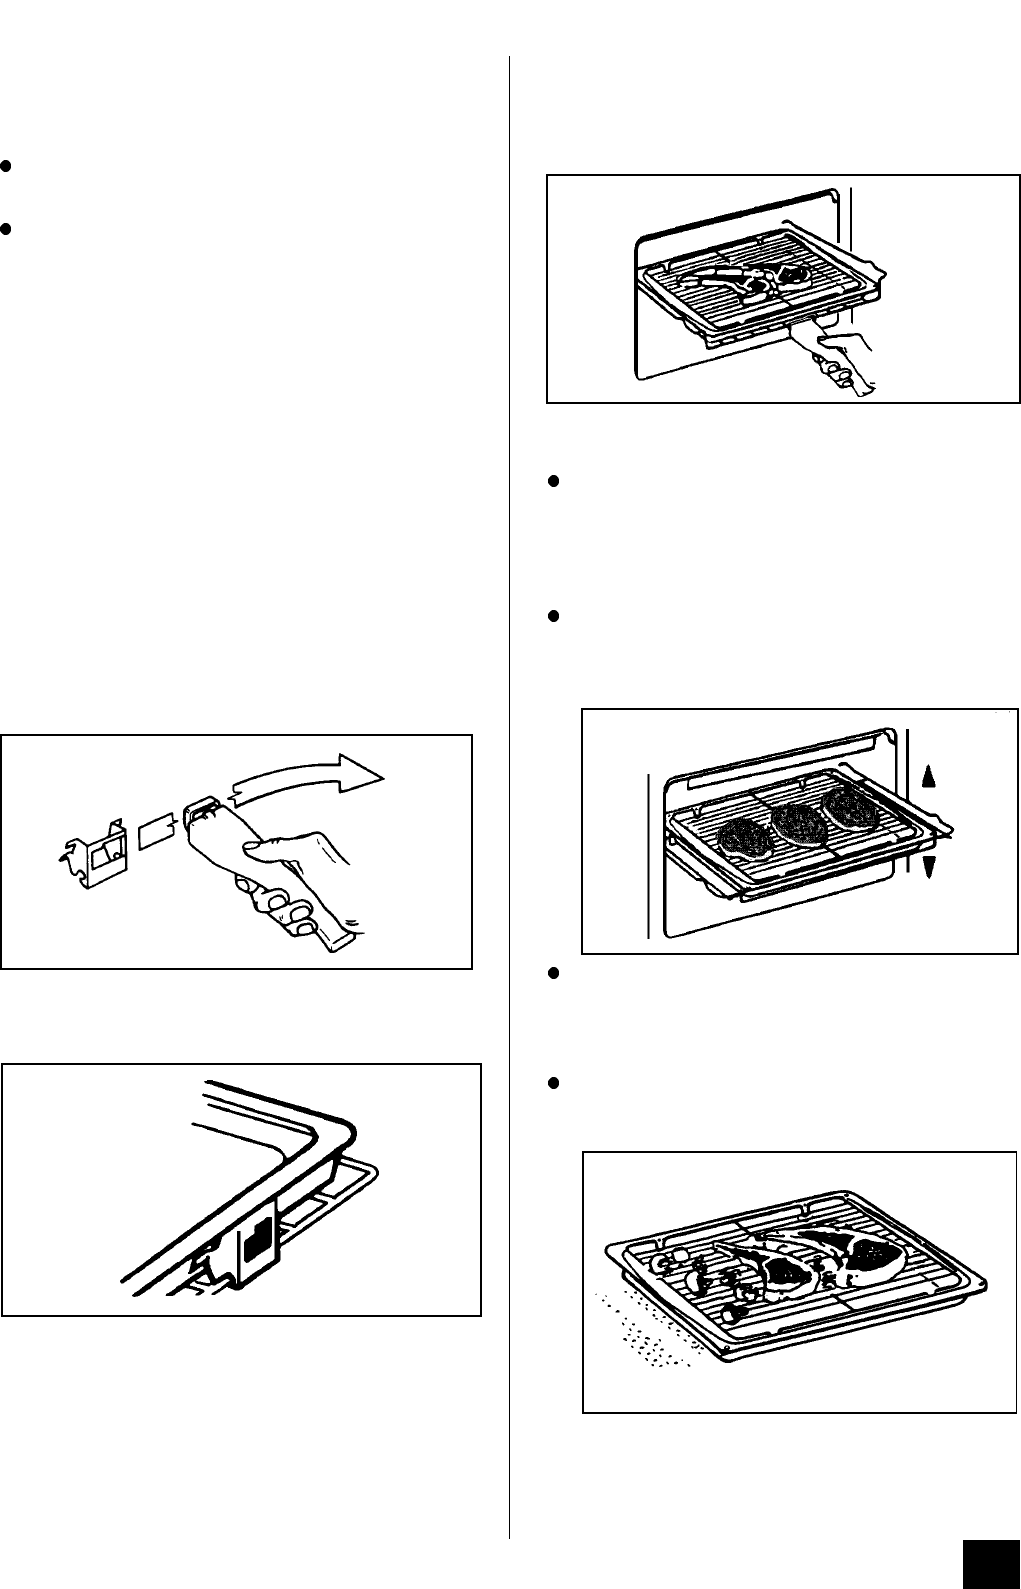
The grill pan is supplied with a removable handle.
To insert the handle, press the button on the handle
with the thumb and pivot the handle slightly upwards
inserting the lip into widest part of the bracket. Move
the handle towards the left, lower into position and
release the button.
Ensure the handle is positively located.
To remove the handle, press the button on the handle with
the thumb and pivot the handle slightly upwards and
towards the right to remove from the bracket.
Ensure your hand is protected when removing
the grill pan handle as the grill element can
become very hot.
ALWAYS REMOVE THE GRILL PAN HANDLE
DURING GRILLING.
To correctly locate the grill pan on the shelf, ensure
that the cut out on the underside of the handle
bracket locates over the front bar of the shelf.
To check the progress of the food being grilled, the
grill pan should be withdrawn on the shelf to attend to
food during cooking or the carrier shelf can be lifted
away from the cooker and rested on a heat resistant
work surface.
HINTS AND TIPS
Most foods should be placed on the grid in the
grill pan to allow maximum circulation of air to lift
the food out of the fats and juices. Food such as
fish, liver and kidneys may be placed directly on
the grill pan if preferred.
Adjust the grid and grill pan runner position to
allow for different thicknesses of food. Position
the food close to the element for faster cooking
and further away for more gentle cooking.
Food should be thoroughly dried before grilling to
minimise splashing. Brush lean meats and fish
lightly with a little oil or melted butter to keep
them moist during cooking.
Accompaniments such as tomatoes and
mushrooms may be placed underneath the
grid when grilling meats.
21


