


25
MAINTENANCE AND TROUBLESHOOTING
DAILY MAINTENANCE FOR THE TORNADO
When cleaning the oven, use only TurboChef
Oven Cleaner. Any other cleaning products can
damage critical parts, resulting in a non-warranty
service call.
Supplies and Equipment
TurboChef Oven Cleaner (P/N 103180 USA,
103380 Intl), Oven Guard (P/N 103181 USA,
103381 Intl), nylon scrub pad, cleaning towel
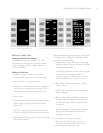
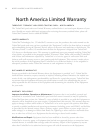
Step 1: Prepare the Oven
o
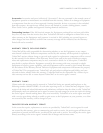
Turn oven off by pressing the key.
o
The oven will display / .
o
x
attempt to clean oven during the cool
down cycle. Cooling takes appx. 90 minutes.
: The oven operates at appx. 500
º
F
(260
º
C) and may cause injury if not allowed
time to cool properly.
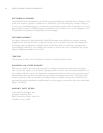
Step 2: Remove the Lower Access Panel
o
Wipe out any crumbs that have collected.
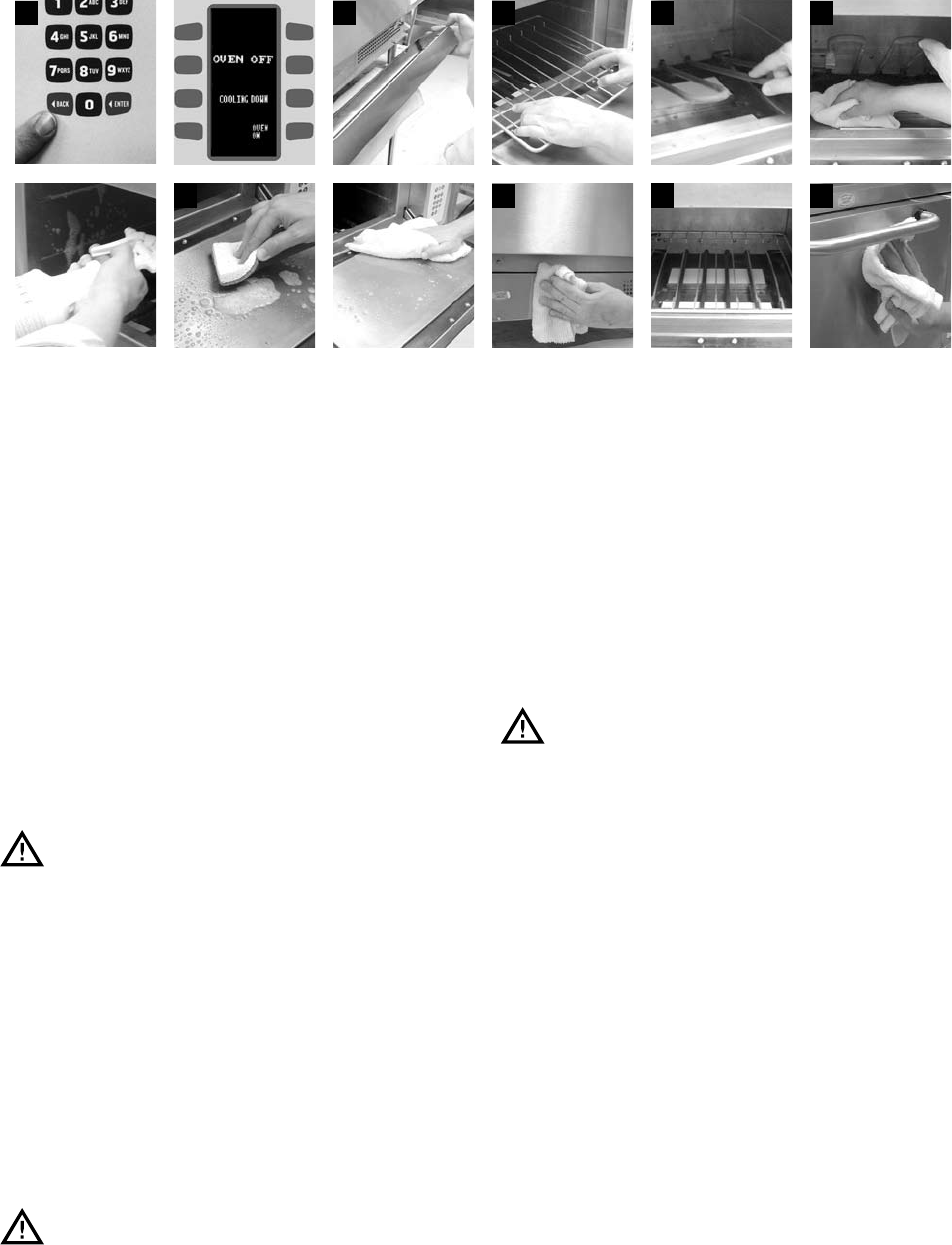
Step 3: Remove and Clean the Cooking Surface
o
If rack, wash, rinse, and sanitize.
o
If baking stone, gently dry-scrub. If the stone
gets wet, let it thoroughly air-dry.
Step 4: Lift Bottom Element
o
Be sure the bottom element is cool prior to lifting.
: The bottom element operates at
appx. 1000
º
F (537
º
C).
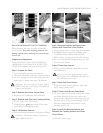
Step 5: Remove Particles and Spray Oven
Interior with TurboChef
®
Oven Cleaner
o
Using a damp towel, remove large food particles.
o
If stubborn stain is present, sparingly spray
TurboChef Oven Cleaner onto the stain.
o
Allow cleaner to penetrate for five (5) minutes.
o
x
saturate the bottom of the oven with
water or oven cleaner.
Step 6: Clean Oven Interior
o
Using a nylon scrub pad, clean the oven door
and cook cavity.
: apply pressure to the
wave guide covers. Breaking will result in a
non-warranty service call.
Step 7: Wipe Out Oven Interior
o
Wipe oven door, bottom element, and cook
cavity using a damp towel.
Step 8: Clean Lower Access Panel Area
o
x
spray any chemical in this area or into
any other openings in the oven, such as the
louvers in the side panels or the cooling fan on
the back cover. Doing so will damage critical
electrical components and result in a non-
warranty service call.
Step 9: Lower the Bottom Element and
Reinstall the Cooking Surface and Lower
Access Panel
Continued on next page.
10
9
876
1 2 3 4 5