


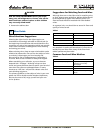

2115WC and 2115WCOL2, 2175WC and 2175WCOL2 15
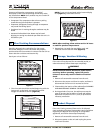
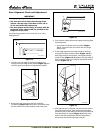
5. Remove the two door closer inserts
(Figure 21, 1)
from
the existing bottom hinge and install as shown on the
new bottom hinge
(Figure 20, 1)
.
6. Remove existing bottom hinge (three screws) and
remount on opposite side TOP. Remove hinge screw pin.
7. Remove the plastic hole plug from the top of the door
to allow the pivot pin to be inserted in the new
location. Install the plug into the vacated hole on the
opposite side.
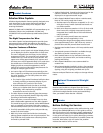
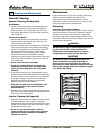
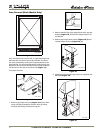
Figure 22
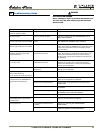
8. With bottom of door facing up, remove pivot plate
(two screws), flip over, and remount on opposite side of
door
(Figure 22)
.
Be sure slanted side of plate
faces center.
9. Holding door upright with top of door tilted forward,
place hole of door pivot plate on bottom hinge screw
pin/closer inserts
(Figure 20, 1)
.
10. Tilt top of door into position in top hinge and install top
hinge screw pin.
11. Install metal hinge screw plugs removed in Step 2 in old
hinge holes (three each, top and bottom).
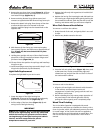
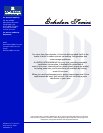
Light Bulb Replacement
To replace the light bulb in your U-Line unit:
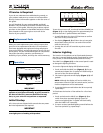
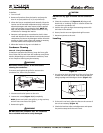
Figure 23
1. Grasp the edges of the light housing lens
(Figure 23, 1) opposite the exposed tab and gently
push the lens toward the tab (Figure 23, 2).
2. Pull the edge of the lens down
(Figure 23, 1)
and
swing it out of the light housing.
IMPORTANTIMPORTANT
ALWAYS use a genuine U-Line replacement bulb (P/N
31317) in the light housing. Use of any other bulb
within the housing will generate excessive heat,
causing damage to the light housing and cabinet
interior, and will compromise the precise
temperature control of your unit.
3. Replace the bulb only with a genuine U-Line P/N 31317
replacement.
4. Replace the lens by first inserting the tab side back into
the housing at a slight angle. While gently pushing the
lens towards the tab end, push the free end up into the
housing, and release when you will hear a snap/click.
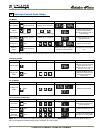
Wine Rack Removal/Installation
To remove a rack from the cabinet:
1. Grasp the end of the rack, and gently slide it out until
it stops.
2. Remove any bottles stored on the rack.
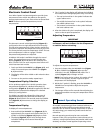
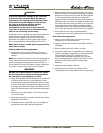
Figure 24
3. Press the left rack release lever
(Figure 24)
down, and
at the same time, lift the corresponding right rack
release lever up, and pull the rack out until it is free of
the tracks and the cabinet.
IMPORTANTIMPORTANT
Do not remove the track side rails from the cabinet.
To insert a rack in the cabinet:
1. Align the left and right rack channels with the tracks
in the cabinet, and ensuring an even track
engagement on both sides, gently push the rack into
the cabinet until it stops.
2. Before reloading the rack, ensure proper operation of
the travel stops in the left and right track rails by
pulling the rack out gently until it completely stops.
Wood Trim Finishing
The U-Line Wine Captain
®
is equipped with wood-
trimmed wine racks that are coated at the factory with a
clear vinyl sealer, which will adequately protect the wood
in normal usage. A final finish coat was not applied so
that the wood trim could be stained to match décor. The
trim on the racks may be coated with a final finish or
stained.
ULIN_0274_A
1
2
ULIN_0001_A
ULIN_0207_A