


2115WC and 2115WCOL2, 2175WC and 2175WCOL2 7
Electronic Control Panel
Your Wine Captain has been designed to provide three
temperature zones within the cabinet so the specific
storage requirements of your finest wines can be satisfied.
NOTE: These are product temperatures, not air
temperatures.
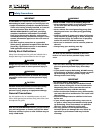
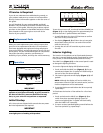
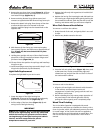
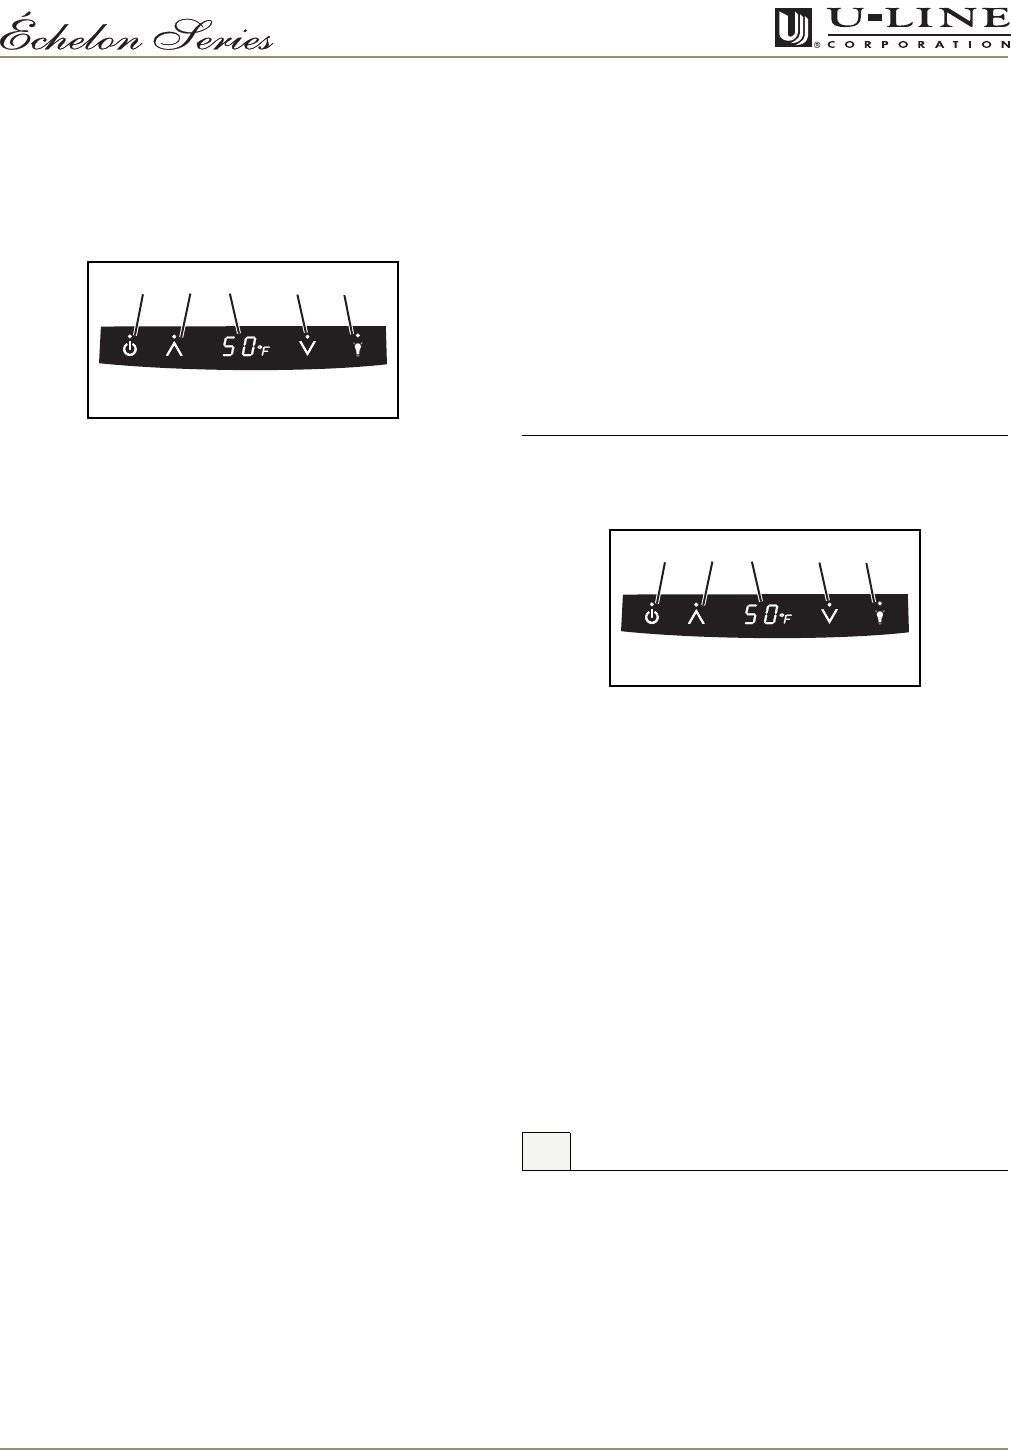
Figure 4
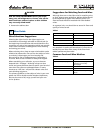
The electronic control with digital display (Figure 4) is
configured to show a single temperature continuously.
This set-point temperature is a base number used by the
controller to maintain the temperature zones in your unit.
The factory default set-point temperature is 50°F. This set-
point temperature is used as a gauge if further
temperature adjustments are required.
A DISPLAY OFF mode is available through the control
panel. This mode allows you to control whether the
display (Figure 4, 3) will be ON or OFF whenever the
door is closed. The icon touch sequence that follows will
switch between both modes:
1. Touch and hold the WARMER icon (Figure 4, 2), and
within five seconds press the POWER icon (Figure
4, 1) three times.
2. The display will be either visible or dark when the door
is closed.
3. To return to the previous mode, repeat Step 1.
Temperature Display Selection
U-Line products supplied for 110 VAC operation have
temperatures displayed in a default Fahrenheit (°F)
configuration (Figure 4, 3). Models supplied for 220 VAC
operation have temperatures displayed in a default
Celsius (°C) configuration.
The display can easily be adjusted for either type of
temperature display. Press and hold the LIGHT icon
(Figure 4, 5) and within five seconds press the COOLER
icon (Figure 4, 4) three times to change the display as
desired.
Temperature Display
To display all zone temperatures:
1. Press and hold the WARMER icon (Figure 4, 2) for
approximately five seconds and release when the °F
symbol in the display (Figure 4, 3) begins to flash.
2. The display
(Figure 4, 3)
will scroll through three
individual readings at two second intervals per
temperature.
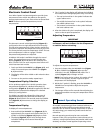
3. The °F symbol in the display will indicate the individual
zone temperature being displayed as they are scrolling.
• The top horizontal bar in the symbol indicates the
upper cabinet zone.
• The middle horizontal bar in the symbol indicates
the middle cabinet zone.
• The bottom horizontal bar in the symbol indicates
the lower cabinet zone.
4. After the third scroll cycle is completed, the display will
return to the set-point temperature.
Adjusting Temperature
IMPORTANTIMPORTANT
Adjust the set-point temperature in single
increments, and wait 24 hours for the temperature
to stabilize before rechecking.
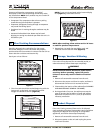
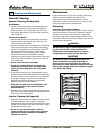
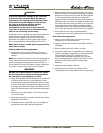
Figure 5
To adjust the set-point temperature:
1. Press and release either the WARMER icon (Figure
5, 2) or COOLER icon (Figure 5, 4) to put the
controller in the SET TEMPERATURE mode. The °F
symbol (Figure 5, 3) will begin to flash.
NOTE: If no further action is taken, this mode will self
cancel in five seconds, and the original set-point
temperature will be displayed.
2. While the °F symbol is flashing, press the WARMER or
COOLER icon as required to adjust the set-point
temperature.
3. The change will be set five seconds after adjusting the
temperature and the new set-point temperature will be
displayed.
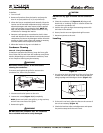
All models incorporate rigid foam insulated cabinets to
provide high thermal efficiency and maximum sound
reduction for its internal working components. In spite of
this technology, your model may make sounds that are
unfamiliar.
Normal operating sounds may be more noticeable
because of the unit’s environment. Hard surfaces such as
cabinets, wood/vinyl/tiled floors and paneled walls have a
tendency to reflect normal appliance operating noises.
123 54
ULIN_0184_A
7 Normal Operating Sound
123 54
ULIN_0184_A