


12 CO2175FF, 2175RF
Maintenance
Proper maintenance of your U-Line product will ensure
efficiency, top performance and long life. The
maintenance intervals listed are based on normal
conditions. You may want to shorten the intervals if you
have pets or other special considerations.
Defrosting
Frost-Free Models
Frost-free models do not produce frost in normal
operating conditions.
WARNING
DO NOT use any type of electrical heating device,
ice pick, knife or other sharp instrument to
defrost; this could damage the inner lining or
refrigeration system and void the warranty.
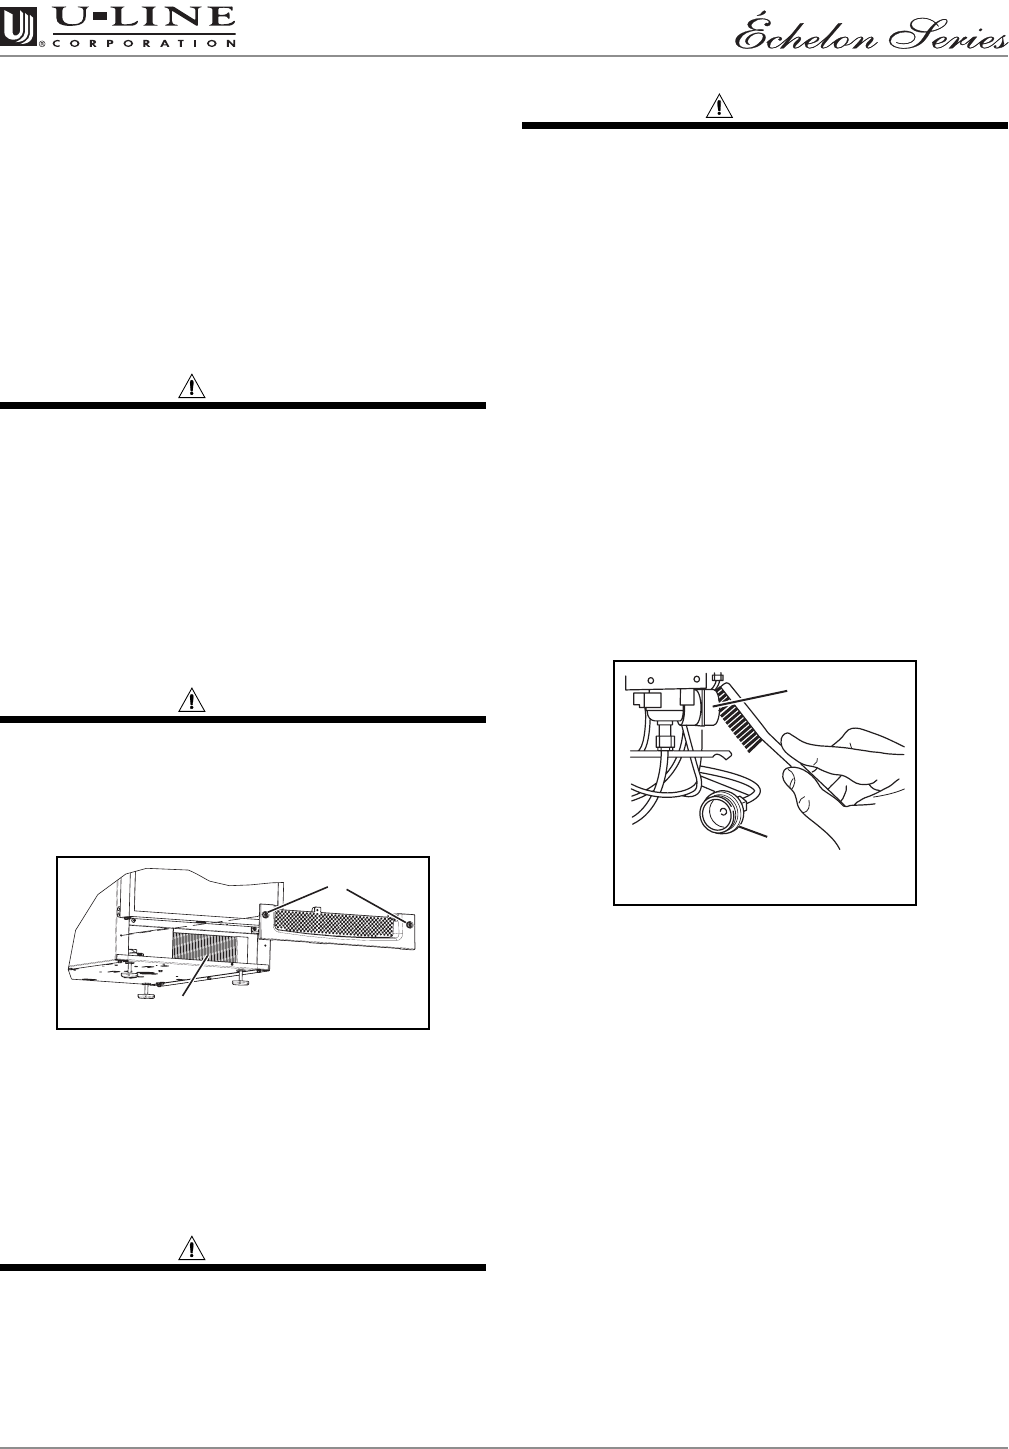
Condenser Cleaning
Interval - Every Three Months
To maintain operational efficiency, keep the front grille
free of dust and lint and clean the condenser every three
months. Depending on environmental conditions, more
or less frequent cleaning may be necessary.
WARNING
Disconnect electric power to the unit before
cleaning the condenser.
To remove and replace the grille for access to the
condenser fins, follow this procedure:
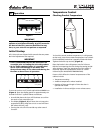
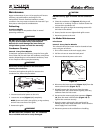
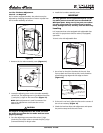
Figure 9
1. Disconnect electrical power to the unit.
2. Loosen two screws
(Figure 9, 1)
completely.
NOTE: Screws are held in the grille by o-ring retainers,
and will not come free of the grille.
3. Remove the grille.
WARNING
DO NOT touch the condenser fins. The condenser
fins are SHARP and can be easily damaged.
CAUTION
DO NOT use any type of cleaner on the condenser
unit.
4. Clean the condenser coil
(Figure 9, 2)
using a soft
brush with a “combing” action or vacuum cleaner. Do
not touch the condenser coil.
5. Position the grille to align the mounting screws with
the holes in the cabinet.
6. Secure, but do not over-tighten both grille screws.
7. Reconnect power to the unit.
Ice Maker Maintenance
Inlet Screen
Interval - Every Twelve Months
The solenoid valve inlet screen must be cleaned at least
once each year as follows:
1. Shut off the water at the main supply valve.
2. Pull the unit out to access the back panel.
3. Disconnect electrical power to the unit.
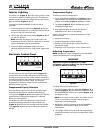
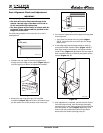
Figure 10
4. Disconnect the hose connector
(Figure 10, 1)
from the
water solenoid valve
(Figure 10, 2)
.
5. DO NOT remove the inlet screen from the water
solenoid valve. Use a tooth brush to gently clean any
sediment from the inlet screen.
6. Re-connect the water supply hose connector
(Figure
10, 1)
to the water solenoid valve
(Figure 10, 2)
.
Tighten the connector securely.
7. Open the water main supply valve and check for
leakage at the water hose connection. Ensure that the
water supply line is not kinked.
8. Reconnect power to the unit before re-installing.
ULIN_0203_A
2
1
2
1
ULIN_0054_A