


3-51
Section 3 - Service and Repair
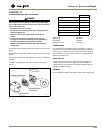
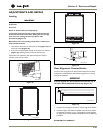
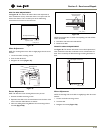
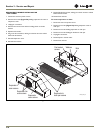
SIDE-TO-SIDE ADJUSTMENT
See Figure 46. The drawer will need a side-to-side adjustment if,
when viewed from the top, the drawer front is not square with the
sides of the cabinet. This is caused by one of the slides being
mounted too far forward on the unit’s liner.
Figure 46
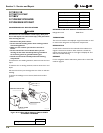
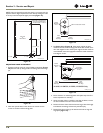
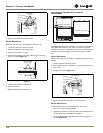
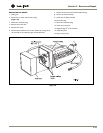
Minor Adjustment
NOTE: The mounting holes on the slide are slightly larger than the screws’
diameter.
1. Loosen the slide’s mounting screws.
2. Push the slide backward.
3. Retighten the screws
(Figure 47)
.
Figure 47
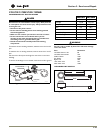
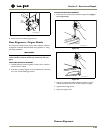
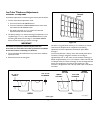
Severe Adjustment
NOTE: The slides have extra mounting holes that may be used.
1. Remove the slide’s mounting screws.
2. Reposition the slide so it is the same distance from the front of the
liner as the other slide. Measure to confirm.
3. Mark new drilling holes using different sets of mounting holes on
the slide
(Figure 48)
.
Figure 48
NOTE: Front location holes are shown. Corresponding rear holes will also
need to be marked.
4. Drill all the new holes with a #30 drill bit.
5. Remount the slide.
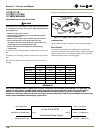
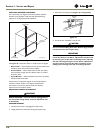
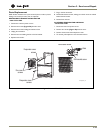
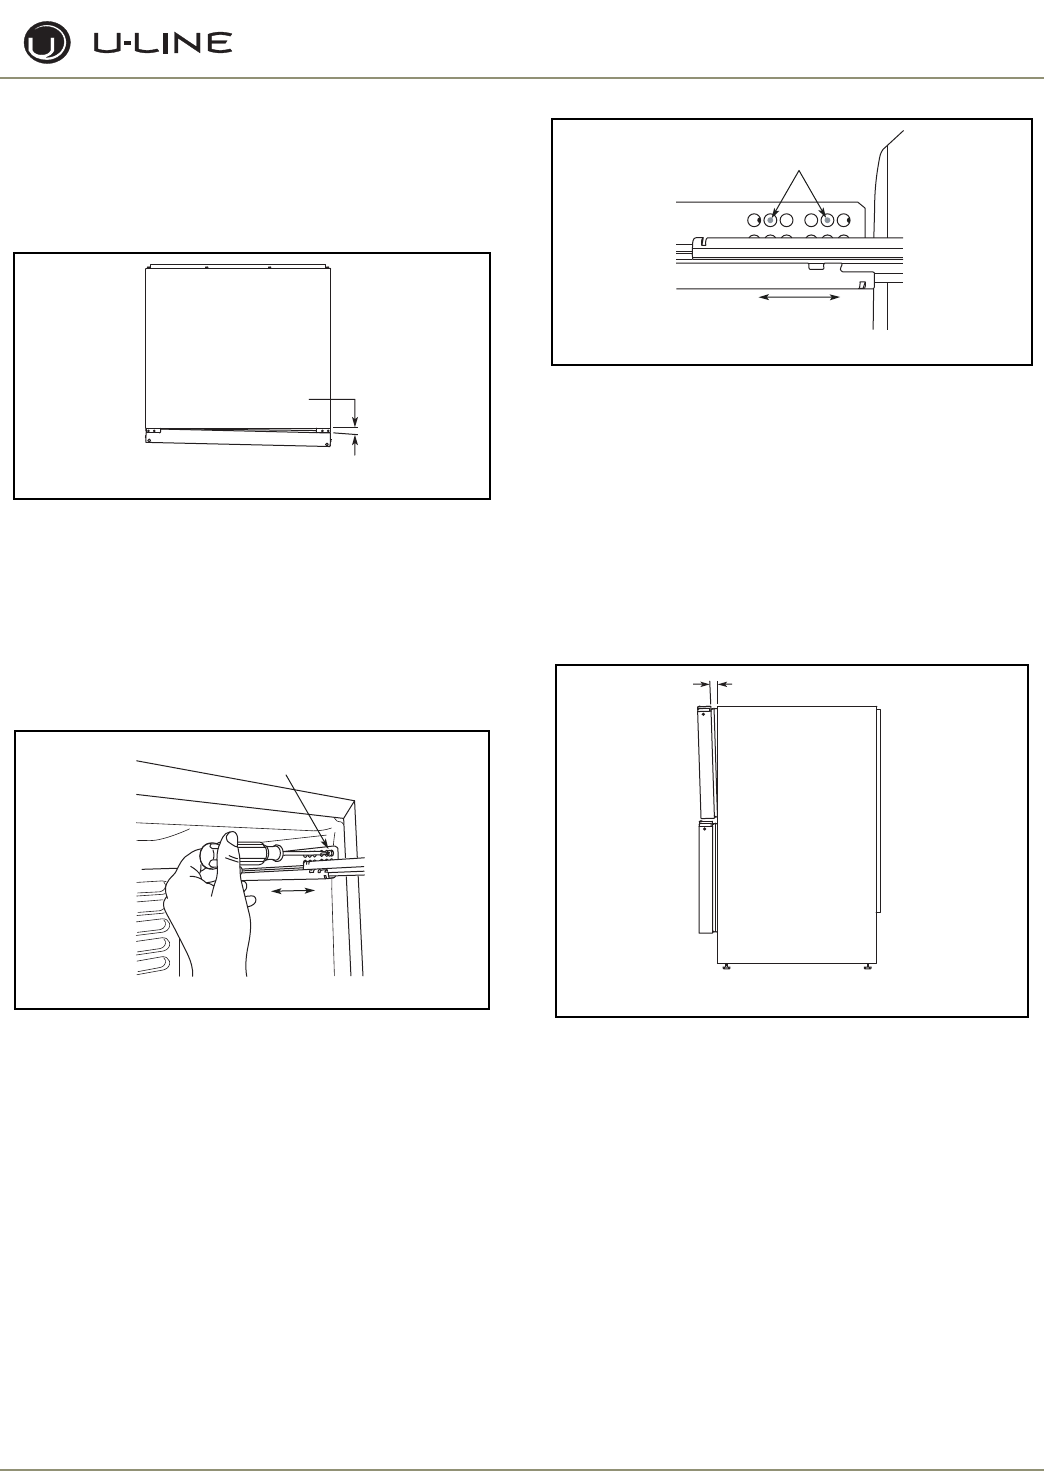
FRONT-TO-BACK ADJUSTMENT
See Figure 49. The drawer will need a front-to-back adjustment if,
when viewed from the side, the drawer front is cocked forward or
back. This is caused by the slide mountings not being level front to
back.
Figure 49
Minor Adjustment
NOTE: The mounting holes on the slide are slightly larger than the screws’
diameter.
1. Loosen one slide’s mounting screws.
2. Level the slide.
3. Retighten the screws
(Figure 50)
.
tinU fo weiV poT
ediS-ot-ediS dengilA toN
ULIN_0315_A
edilS hsuP
drawkcaB
nesooL
swercS gnitnuoM
ULIN_0316_A
weN llirD dna kraM
seloH gnitnuoM
edilS hsuP
drawkcaB
ULIN_0318_A
kcaB-ot-tnorF dengilA toN
tinU fo weiV ediS
ULIN_0319_A