


46 47
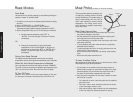
Cooking Tips
Cooking Tips
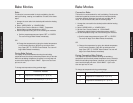
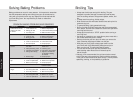
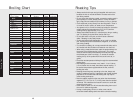
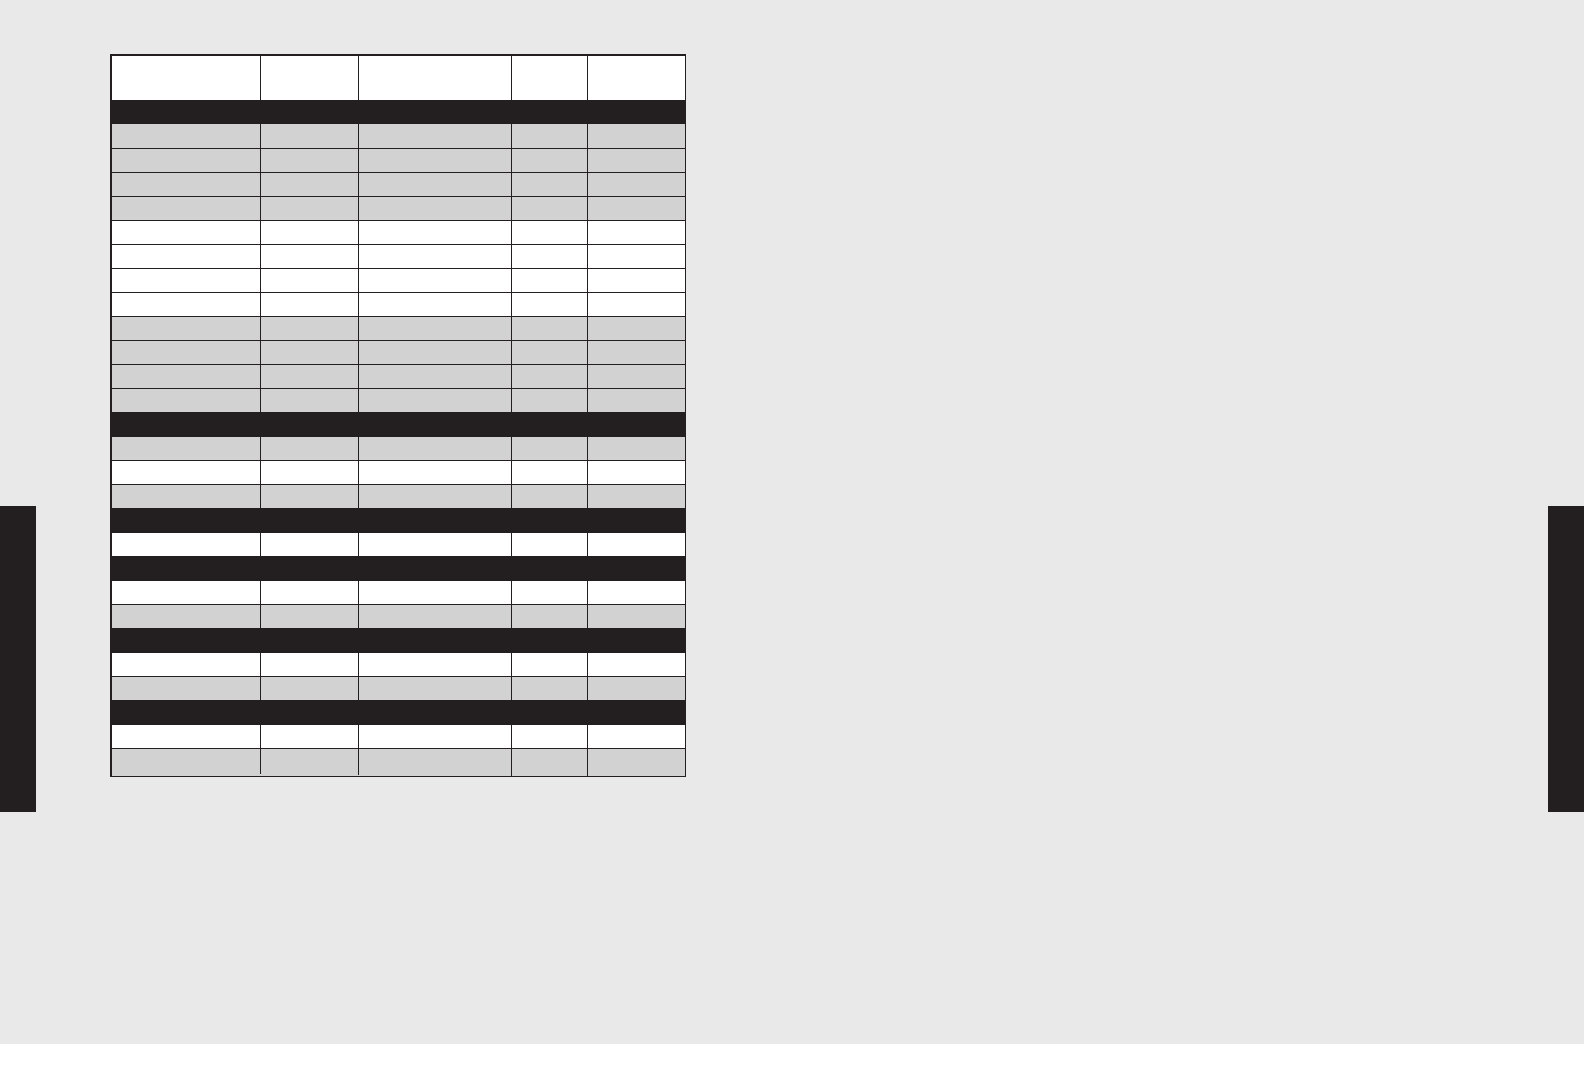
Broiling Chart
Type and Time
Cut of Meat Weight Setting Rack (minutes)
Te
BEEF
Sirloin, 1"
Rare 12 oz Conventional Broil 57
Medium 12 oz Conventional Broil 59
Well done 12 oz Conventional Broil 5 11
T-Bone, 3/4"
Rare 10 oz Conventional Broil 55
Medium 10 oz Conventional Broil 57
Well done 10 oz Conventional Broil 59
Hamburger, 1/2"
Rare 1/4 lb. Convection Broil 54
Medium 1/4 lb. Convection Broil 57
Well done 1/4 lb. Convection Broil 59
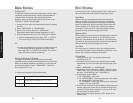
CHICKEN
Bnls Breast 1 lb. Convection Broil 4 18
Bone-in Breast 2 - 2 1/2 lb. Conventional Broil 4 20
Chicken pieces 2 -2 1/2 lb. Convection Broil 4 18 (min/lb)
HAM
Ham slice, 1" 1 lb. Conventional Broil 4 22
LAMB
Rib Chops, 1" 12 oz. Convection Broil 57
Shoulder 1 lb. Convection Broil 56
PORK
Loin Chops, 3/4" 1 lb. Convection Broil 4 14
Bacon Conventional Broil 4 6
FISH
Salmon Steak 1 lb. Convection Broil 57
Fillets 1 lb. Convection Broil 56
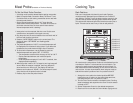
Roasting Tips
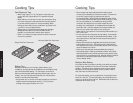
• Always use the broiler pan and grid supplied with each oven,
because the hot air must be allowed to circulate around the
item being roasted.
• Do not cover what is being roasted; convection roasting seals in
juices quickly for a moist, tender product. Poultry will have a
light, crispy skin and meats will be browned, not dry or burned.
• Cook meats and poultry directly from the refrigerator. There is
no need for meat or poultry to stand at room temperature.
• As a general rule, to convert conventional recipes to convection
recipes, reduce the temperature by 25° F (-3.9° C) and the
cooking time by approximately 10 to 15%.
• Always roast meats fat side up in a shallow pan, using a roasting
rack. No basting is required when the fat side is up.
• Do not add water to the pan, as this will cause a steamed
effect. Roasting is a dry-heat process.
• Poultry should be placed breast side up on a rack in a shallow
pan. Brush poultry with melted butter, margarine, or oil before
and during roasting.
• For convection roasting, do not use pans with tall sides, as this
will interfere with the circulation of heated air over the food.
• When using a meat thermometer, insert the probe halfway into
the center of the thickest portion of the meat. (For poultry,
insert the thermometer probe between the body and leg into
the thickest part of the inner thigh.) To ensure an accurate
reading, the tip of the probe should not touch bone, fat, or
gristle.
• Check the meattemperature halfway through the recommended
roasting time.
• After reading the thermometer once, insert it 1¼ to 2 inches
(1.3 cm) further into the meat, then take a second reading. If
the second temperature registers below the first, continue
cooking the meat.
• Roasting times always vary according to the size, shape, and
quality of meats and poultry. Less tender cuts of meat are best
prepared in the conventional bake setting and may require
moist cooking techniques.
• Remove roasted meats from the oven when the thermometer
registers 5° F (-15° C) to 10° F (-12.2°C) lower than the desired
doneness. This is because the meat will continue to cook after
removal from the oven.
• Allow roasts to stand 15 to 20 minutes after taking them out of
the oven to make carving easier.
• If using a cooking bag, foil tent, or other cover, use the
conventional bake setting rather than either convection setting.