


38
37
Product Care
Product Care
Cleaning and Maintenance
To stop the Self-Clean cycle:
To cancel or interrupt the self-cleaning cycle, turn both the
temperature control knob and the oven function selector knob to
OFF. When the oventemperature drops to a safe temperature, the
automatic door latch will release and the oven door can be
opened. When the oven has completely cooled, remove any ash
from the oven surfaces with a damp sponge or cloth.
Cleaning and Maintenance
To start the Self-Clean cycle:
1. Close the door completely.
2. Turn the oven selector knob clockwise to the self-clean mode.
3. Turn the temperature control knob past the clean setting until
the knob stops. At this time, the clean indicator light will come
on. Within 30 seconds the automatic door latch engages and
the oven indicator light comes on. The oven indicator light will
remain on until the oven reaches the self-clean temperature and
will then cycle on and off during the self-clean cycle. When the
oven reaches the elevated temperature needed for self-clean,
the door lock indicator light comes on.
4. The door lock indicator light will remain on until the self-clean is
completed or interrupted and the oven temperature drops to a
safe temperature. A complete cycle approximately 3 1/2 hours
with an additional 30 minutes needed for the oven to cool down
enough for the door latch to disengage. NOTE: A fan noise will
be heard during the self-clean cycle and will continue to run for
the 3 1/2 hour duration of the self-clean cycle.
5. When the cycle is completed, turn both the oven selector and
temperature control knob to the off position. When the oven
has completely cooled, open door and remove any ash from
the oven surfaces with a damp cloth.
Self-Clean Cycle
This oven features an automatic pyrolytic self-cleaning cycle.
During this cycle, the oven reaches elevated temperatures in order
to burn off soil and deposits. An integral smoke eliminator helps
reduce odors associated with the soil burn-off. A powder ash
residue isleft in the bottom of the ovenafter completion of the Self-
Clean cycle. The door latch is automatically activated after selecting
the Self-Clean setting. The latch ensures that the door cannot be
opened while the oven interior is at clean temperatures.
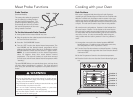
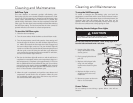
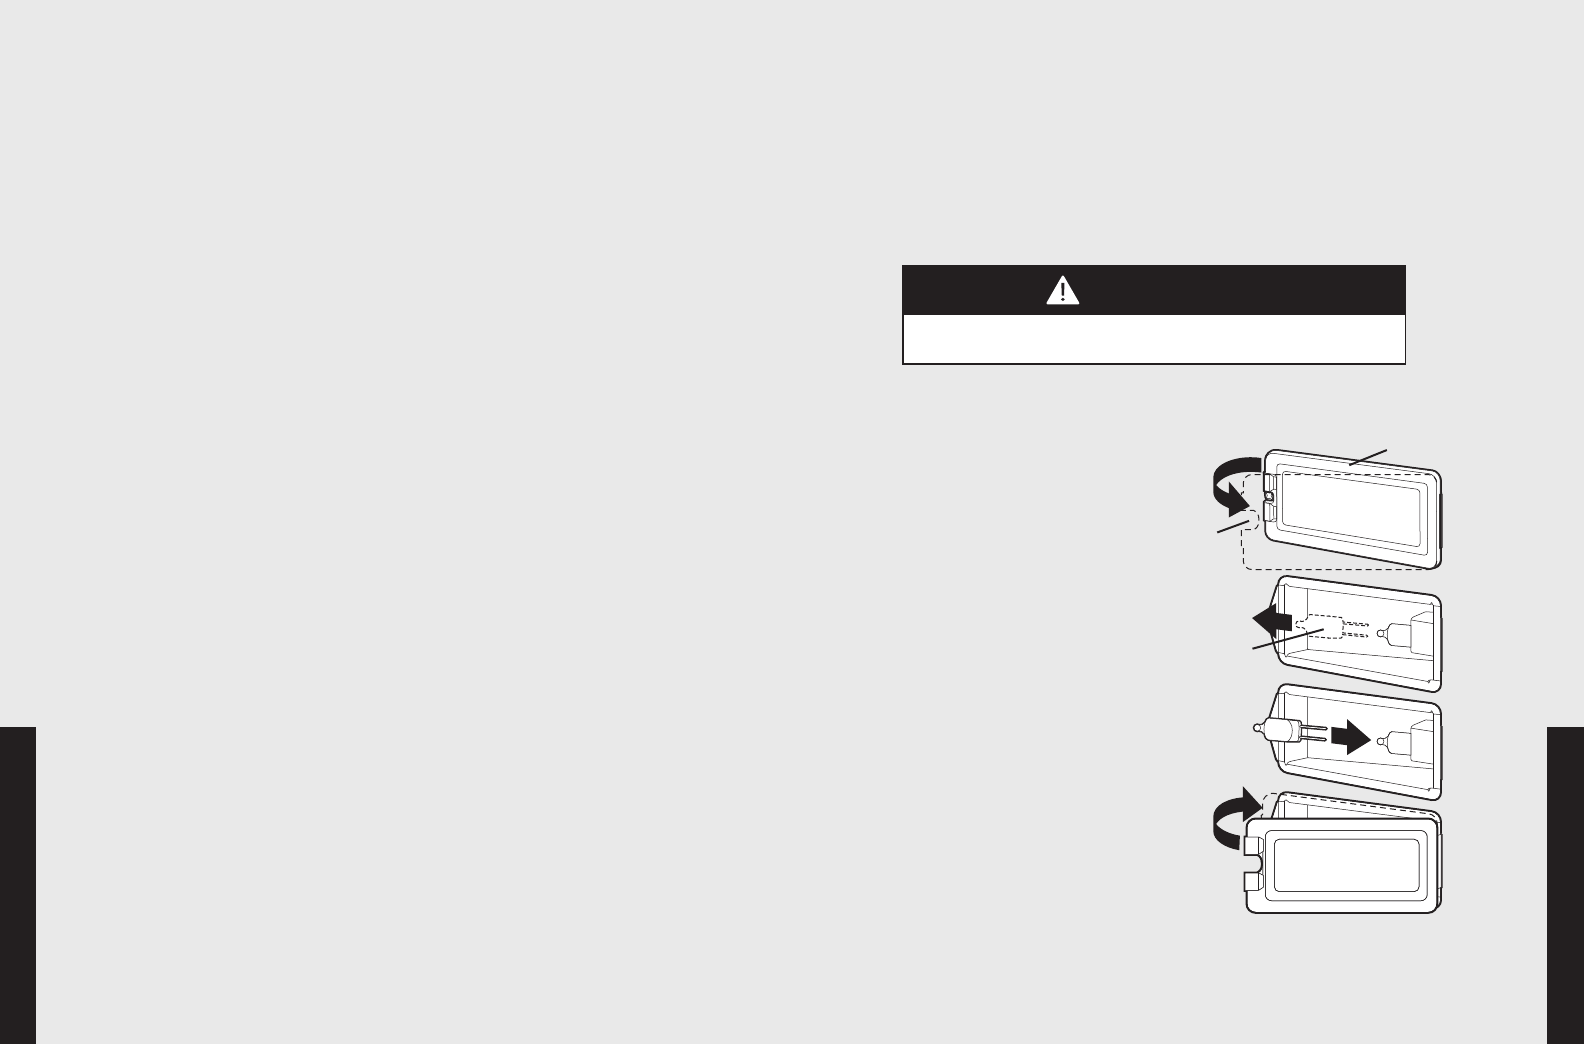
Replacing Interior Halogen Oven Lights
Do not touch bulb with bare hands. Clean off any signs of oil
from the bulb and handle with a soft cloth.
Power Failure
Do not attempt to use during a power failure. Unit will not
function.
CAUTION
DISCONNECT THE ELECTRIC POWER AT THE MAIN FUSE OR
CIRCUIT BREAKER BEFORE REPLACING BULB.
1. Unsnap glass light cover
using a screwdriver in the
access groove.
2. Firmly grasp light bulb and
pull out.
3. Replace with halogen bulb
using volt and wattage
requirements listed on glass
cover.
4. Replace the light cover by
snapping glass cover onto
metal box.
5. Reconnect power at the main
fuse or circuit breaker.
access
groove
light
bulb
glass light
cover