35
Before starting the Self-Clean cycle:
1. Remove the oven racks, rack supports, and any other items/utensils
from the oven. The high heat generated during the cleaning cycle
can discolor, warp, and damage these items. Do not use foil or
liners in the oven. During the Self-Clean cycle, foil can burn or melt
and damage the oven surface.
2. Wipe off any large spills from the oven bottom and sides. Never
use oven cleaners inside a self-cleaning oven or on raised portions
of the door.
3. Some areas of the oven must be cleaned by hand before the cycle
begins. Soil in these areas will be baked on and very difficult to
clean if not removed first. Clean the door up to the gasket, the
door frame, and up to two inches inside the frame with detergent
and hot water. Rinse thoroughly and dry.
To start the Self-Clean cycle:
1. Close the oven door completely.
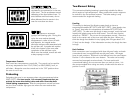
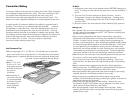
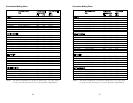
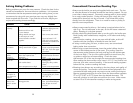
2. Turn the Oven Function selector knob clockwise to the self-clean
mode. At this time the clean indicator light will come on.
3. Turn the Temperature Control knob past the clean setting until the
knob stops. At this time, the temperature indicator light will come
on and within 30 seconds, the automatic door latch engages. The
temperature indicator light will remain on until the oven reaches the
self-clean temperature and will then cycle on and off during the
cycle.
4. The cleaning cycle will last approximately 3 1/2 hours with an
additional 30 minutes needed for the oven to cool down enough for
the door latch to disengage.
5. When the cycle is completed, turn both the Oven Function selector
and the Temperature Control knob to ”OFF” At this time the clean
indicator light will go off.
6. When the oven has completely cooled, open door and remove any
ash from the oven surfaces with a damp cloth.
To stop the Self-clean cycle:
To cancel or interrupt the self-cleaning cycle, turn both the
Temperature Control knob and Oven Function selector to “OFF”.
When the oven temperature drops to a safe temperature, the
automatic door latch will release and the oven door can be opened.
34
Self-Clean Cycle
CAUTION:
Do not touch the exterior portions of the oven after self-cleaning cycle
has begun, since some parts become extremely hot to the touch!
During the first few times the self-cleaning feature is used, there may
be some odor and smoking from the “curing” of the binder in the
high-density insulation used in the oven. When the insulation is
thoroughly cured, this odor will disappear. During subsequent self-
cleaning cycles, you may sense an odor characteristic of high
temperatures.
KEEP THE KITCHEN WELL-VENTED DURING THE SELF-CLEAN
CYCLE.
WARNING:
BURN OR ELECTRICAL SHOCK HAZARD
Make sure all controls are OFF and oven is COOL before cleaning.
Failure to do so can result in burns or electrical shock.
IMPORTANT
Do not clean, move, wet, or bend door gasket. Poor cleaning and
baking may result.
This range features an automatic pyrolytic self-cleaning cycle. During
this cycle, the oven reaches elevated temperatures in order to burn off
soil and deposits. An integral smoke eliminator helps reduce odors
associated with the soil burn-off. A powder ash residue is left in the
bottom of the oven after completion of the self-clean cycle. The door
latch is automatically activated after selecting the self-clean setting.
The latch ensures that the door cannot be opened while the oven
interior is at clean temperatures.
WARNING: Do not use commercial oven cleaners inside the oven.
Use of these cleaners can produce hazardous fumes or can damage the
porcelain finishes. Do not line the oven with aluminum foil or other
materials. These items can melt or burn during a self-clean cycle,
causing permanent damage to the oven.
Control Knobs
MAKE SURE THE CONTROL KNOBS POINT TO THE OFF POSITION
BEFORE REMOVING. Pull the knobs straight off. Wash in detergent
and warm water. Do not soak knobs. Dry completely and replace by
pushing firmly onto stem. DO NOT USE any cleaners containing
ammonia or abrasives. They could remove the graphics from the knob.


