31
GGrriiddddllee//SSiimmmmeerr PPllaattee
1. After using the griddle, always remove the drip pan located below it
by pulling the drip pan toward you. The drip pan needs to be
cleaned after each use of the griddle. Cooked-off grease will drain
from the griddle through the drain tube and accumulate in the drip
pan. Wash in hot soapy water or with an antibacterial cleaner. The
drip pan needs to be cleaned after each use. If grease is permitted
to accumulate, fire hazard could occur, since the griddle burners are
directly above the pan.
2. Rub the surface of a hot griddle with unsalted solid shortening,
vegetable oil or spray it with a non-stick cooking spray. Thoroughly
wipe it with a burlap or another rough cloth to remove food
particles and other residue.
3. Stubborn spots may be removed by rubbing the surface with a
rough grained nylon scrubbing pad with cooking oil. If necessary,
flush the surface of a warm griddle (200
o
F/93
o
C) with club soda and
wipe over entire surface with a paper towel. Coat lightly with
cooking oil.
4. Special griddle cleaners are commercially available which may be
used to remove heavy soil build-up. Follow manufacturer’s
directions exactly. Rinse the griddle with room temperature club
soda after using these cleaners. Dry and coat lightly with cooking
oil. Use griddle stones only when absolutely necessary and then
with extreme caution. Wipe away any griddle-stone dust and food
particles and coat lightly with cooking oil.
5. Using hot soapy water to clean the griddle will remove the cooked-
in seasoning and will require re-seasoning by coating lightly with
cooking oil.
6.
NNeevveerr fflloooodd aa hhoott ggrriiddddllee wwiitthh ccoolldd wwaatteerr!!
This promotes griddle
warping and can cause the griddle plate to crack if continued over a
period of time.
30
If ports on the burners are clogged, clean with a straight pin. Do not
enlarge or distort the ports. Do not use a toothpick to clean the ports.
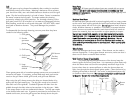
When replacing burner caps, carefully align the tabs underneath the
cap with the outside edge of burner. Make sure burner cap is level.
Occasionally check the burner for proper size and shape. If flames lift
off ports, are yellow, or are noisy when turned on, you may need to
clean the burners or call a qualified technician for adjustment.
SSeeaalleedd SSuurrffaaccee BBuurrnneerrss ((IIff aapppplliiccaabbllee))
Wipe up spill-overs as soon as possible after they occur and before
they get a chance to burn in and cook solid. In the event of a spill-
over, follow these steps:
1. Allow the burner and grate to cool to a safe temperature level.
2. Lift off the burner grates.
3. Remove the burner cap and clean per instructions below.
4. Wipe up any spills which remains on the sealed top surface.
5. Wash the grates and burner caps in hot, soapy water and rinse
clean.
6. Replace burner cap and grate after drying thoroughly.
If ports on the burners are clogged, clean with a straight pin. Do not
enlarge or disort the ports. Do not use a toothpick to clean the ports.
Make sure burner cap is level. Occasionally check the burner for
proper size and shape. If flames lift off ports, are yellow, or are noisy
when turned on, you may need to clean the burners or call a qualified
technician for adjustments.
BBuurrnneerr CCaappss
The surface burner caps should be routinely removed and cleaned.
Always clean the burner caps after a spill over. Keeping the burner
caps clean will prevent improper ignition and uneven flames. To clean,
pull burner cap straight up from the burner base. Wipe off surface
burner caps with warm, soapy water and a soft cloth after each use.
Use a a non-abrasive cleanser such as Bon Ami
TM
and a soft brush or
soft Scotch Brite
TM
pad for cooked-on foods. Dry thoroughly after
cleaning. For best cleaning and to avoid possible rusting, do not clean
in dishwasher or self-cleaning oven. When replacing burner caps,
carefully align the tabs underneath the cap with the outside edge of
burner. Make sure burner cap is level.
SSeeaalleedd BBuurrnneerr AAlluummiinnuumm BBaassee ((IIff aapppplliiccaabbllee))
The aluminum base should be wiped regularly with hot soapy water at
the end of each cooling period.
DDoo nnoott uussee
steel wool, abrasive cloths,
cleanser, or powders. To remove encrusted materials, soak the area
with at hot towel to loosen the material, then use a wooden or nylon
spatula.
DDoo nnoott uussee
a metal knife, spatula, or any other material tool to
scrape the aluminum base.
NNOOTTEE::
For stubborn stains, use non-
abrasive cleanser such as Bon Ami
TM
and a soft brush or soft Scoth
Brite
TM
pad.
CCoonnttrrooll PPaanneell
DO NOT USE any cleaners containing ammonia or abrasives. They
could remove the graphics from the control panel. Use hot, soapy
water and a soft clean cloth.
CCoonnttrrooll KKnnoobbss
MAKE SURE THE CONTROL KNOBS POINT TO THE OFF POSITION
BEFORE REMOVING. Pull the knobs straight off. Wash in detergent
and warm water. Do not soak knobs. Dry completely and replace by
pushing firmly onto stem. DO NOT USE any cleaners containing
ammonia or abrasives. They could remove the graphics from the knob.


