


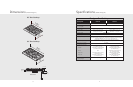

19
C
ooktop
Bracket
Screw
Countertop
1
C
ooktop
B
racket
Countertop
Eye Bolt
2
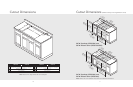
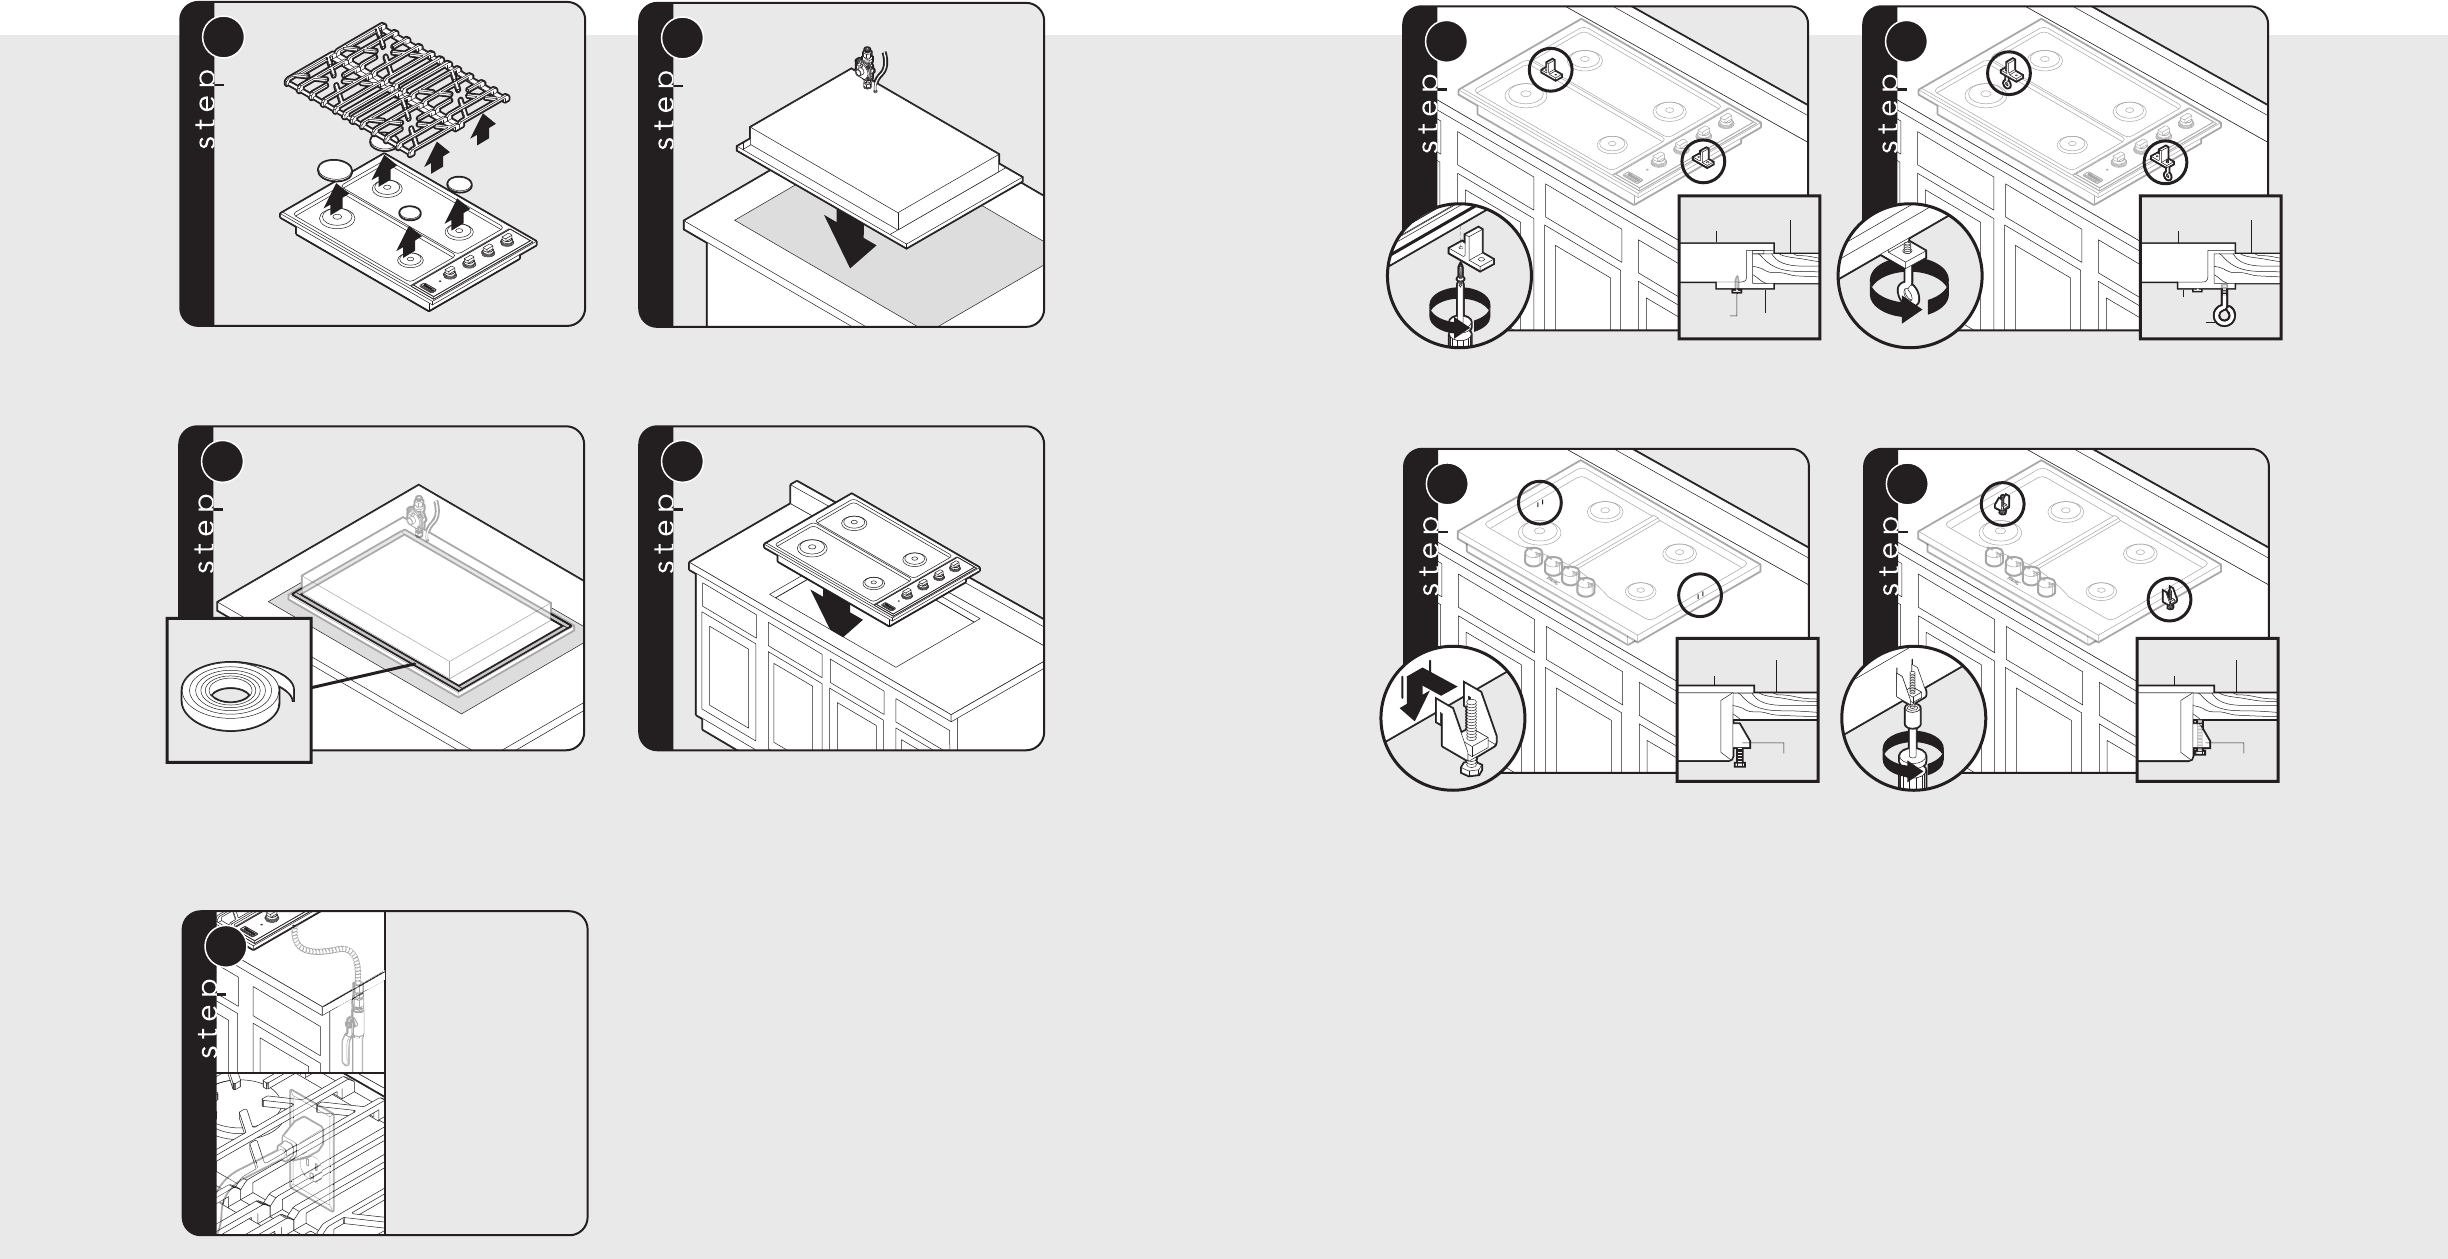
Screw hold down brackets using the #10 x 1/2” sheet
metal screw to the burner box.
Screw the eye bolt into the self-retaining nut and
tighten firmly against bottom of countertop.
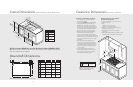
Cooktop
Bracket
Countertop
1
Cooktop
Bracket
Countertop
2
Place a bracket in the slots and lower
until the bracket catches.
Use the bolt to tighten the cooktop to the countertop.
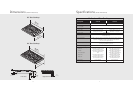
Note: There must be a 1” (2.5 cm) clearance under
counter on all four sides of cooktop.
DGSU Bracket Installation
VGSU Bracket Installation
18
2
2
2
2
1
1
1
2
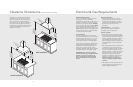
Optional Gasket
Remove the grates and burner caps.
Turn the cooktop upside down and place on a non-
scratch surface. Note: Make sure there are no loose
objects on the cooktop before turning upside down.
3
Optional Gasket
4
Note: Refer to
“Electrical & Gas
Requirements”
section for
proper
installation
information.
1
Installation
Peel away the plastic covering and place the gasket
material all the way around the burner flange.
IMPORTANT: Make sure the corners are covered
completely, leaving no air gaps.
Turn the cooktop over and place into countertop
opening.
Gas & Electrical Connection