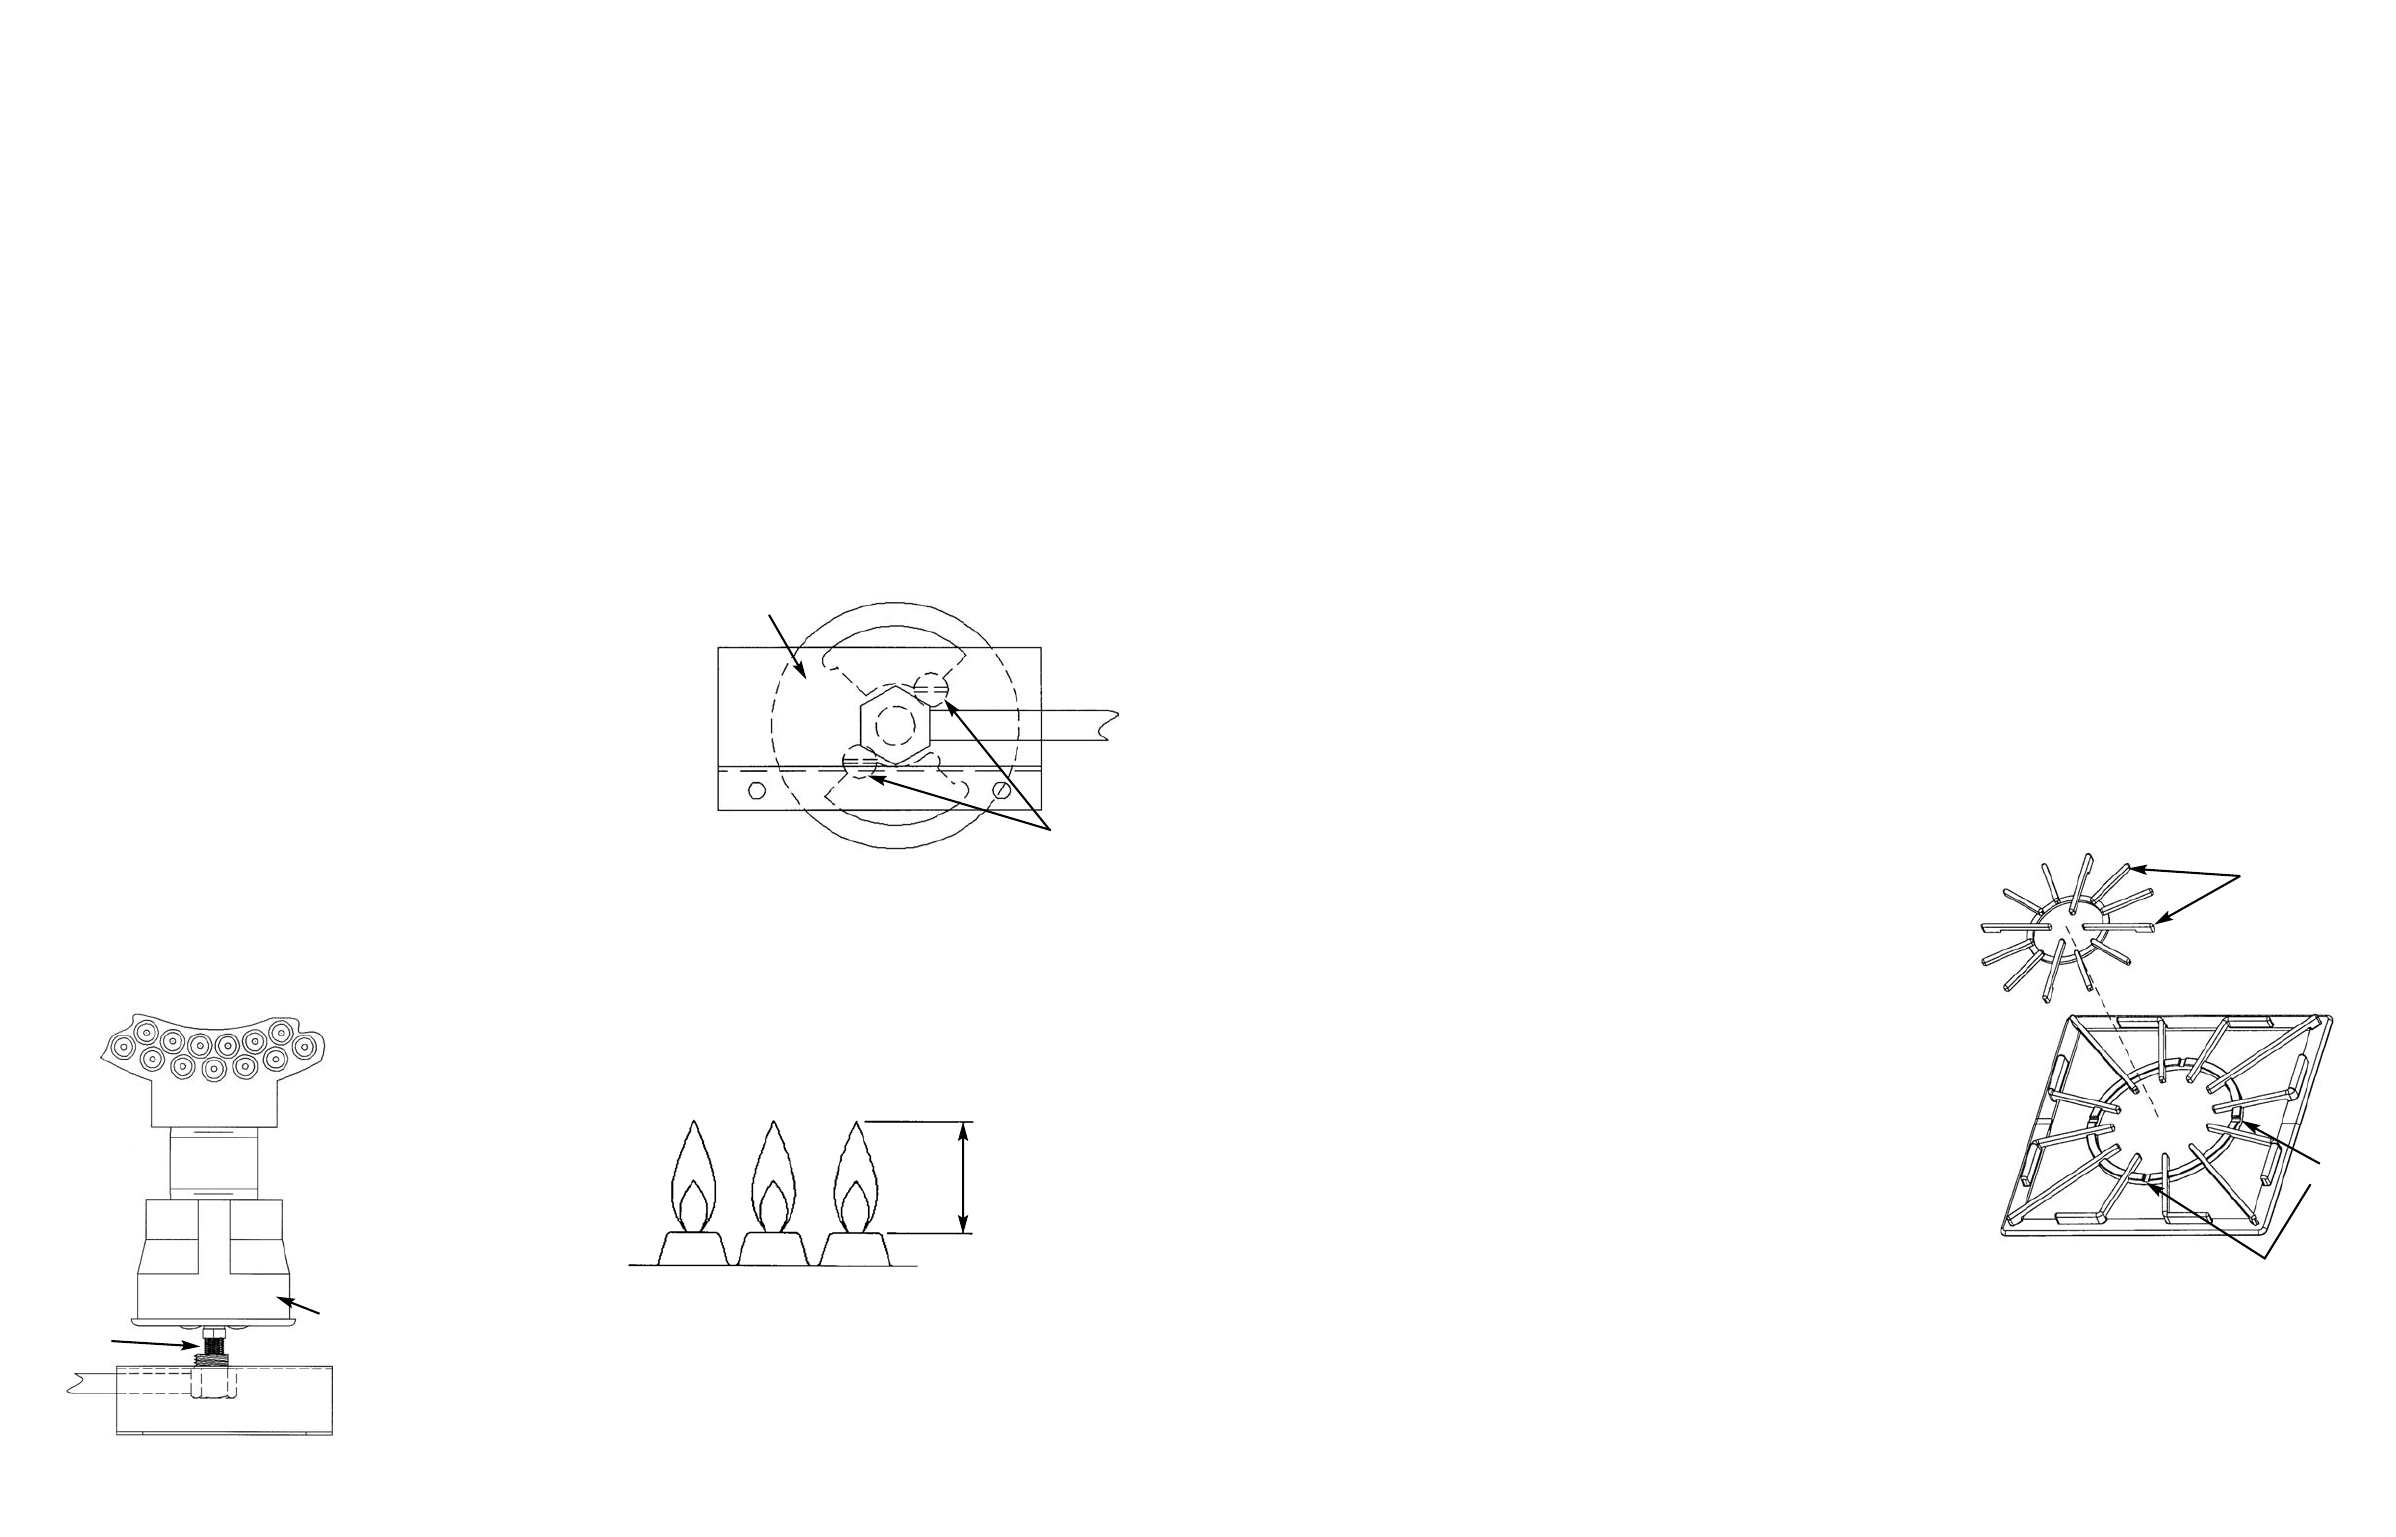
BURNER ADJUSTMENTS
To gain access to the burner for adjustments:
1. Remove the grate and grate support.
2. Locate the air shutter “A” and loosen the two screws “B” that holds
the air shutter in place.
3. Light the burner and turn the burner knob to the high position.
4. With a proper, high flame height, adjust the air shutter to obtain a blue
flame with no yellow tipping that sits on the burner at the burner ports.
(a) open the air shutter gap to add more air and to eliminate yellow
tipping.
(b) close the air shutter gap to reduce the air and to prevent a noisy
flame that lifts off the burner.
5. Turn the surface burners off.
6. Tighten the air shutter screws.
7. Replace the grate support and grate.
A
B
3
/4” (1.91 cm)
Air Shutter
Orifice
9
LP/PROPANE TANK REQUIREMENTS
A dented or rusty LP/Propane tank may be hazardous and should be checked by your LP/Propane supplier. Never use
a cylinder with a damaged valve. All tanks should be equipped with an OPD (overfilling protection device). This is a
DOT requirement for all tanks purchased after October 1, 1998, and will ensure that the tank is not overfilled. The
LP/Propane tank should be a standard 5-gal., 20 lb. gas cylinder tank approximately 12” (3.1 cm) in diameter and 18”
(45.7 cm) high which must be constructed and marked in accordance with the specifications for LP/Propane gas
cylinders of the U.S. Department of Transportation (DOT) and designed for use with a Type 1, QCC-1 system only. The
cylinder must be provided with a shut-off valve terminating in an LP/Propane gas supply cylinder valve outlet specified,
as applicable, for a Type 1, QCC-1 connection. The cylinder used must include a collar to protect the cylinder valve.
The cylinder supply system must be arranged for vapor withdrawal and provided with a listed overfilling prevention
device. If the appliance is stored indoors the cylinder must be disconnected and removed from the appliance.
Cylinders must be stored outdoors in a well-vented area out of the reach of children.
INITIAL IGNITION OF BURNERS
All appliances are tested before leaving the factory. Field adjustments may be necessary for proper mixture of gas and
air for proper operation. When the unit is connected to gas and electrical service, it should be adjusted by a qualified
technician. If it is not, contact your dealer for the name of their authorized service agency. If none are available,
contact Viking Range Corporation for the nearest authorized service agency in your area.
AIR SHUTTER
8
FLAME HEIGHT
OVERHEAD VIEW
BEFORE YOU USE YOUR NEW WOK/COOKER
All products are wiped clean with solvents at the factory to remove any visible signs of dirt, oil, and
grease which may have remained from the manufacturing process. Before starting to cook, clean
the wok thoroughly with hot, soapy water.
Wok Pan w/Lid
Remove all packaging materials and temporary labels from the wok. Clean thoroughly with hot
soapy water and dry thoroughly. Apply a light coat of vegetable oil (do not use corn oil) to the
entire inside surface with a paper towel. Heat the wok on medium setting until the cooking surface
turns golden brown. Repeat this procedure several times. This seasoning seals the pores of the
metal, keeps food from sticking, and prevents the wok from rusting. Wipe off excess oil before
using or storing.
USING YOUR WOK/COOKER
Lighting the Burners
To light the burners, turn the appropriate control knob counter clockwise to any position. This
control is both a gas valve and an electric switch. Burners will ignite at any “on” position with the
automatic reignition system. If the flame goes out for any reason, the burners will automatically
reignite if the gas is still flowing. When gas is permitted to flow to the burners, the electric igniters
start sparking. On all surface igniters you should hear a “clicking” sound. If you do not, turn off the
control and check that the unit is plugged in and that the fuse or circuit breaker is not blown or
tripped. Within a few moments, enough gas will have traveled to the burner to be able to light.
When the burner lights, turn the burner control to any position to adjust the flame size. Setting the
proper height for the desired cooking process and selected utensil will result in superior cooking
performance, while also saving time and energy.
Wok Operation
Using the Trivet Grate (Center Wok Grate) The trivet grate
converts the large burner grate to a grate suitable for use
with large stock pots. To use the trivet grate, place the small
grate in the center of the large grate. Turn the trivet grate
until the feet on the trivet grate rests inside the notches
located on the center ring of the large grate.
Trivet grate
feet
Notches


